


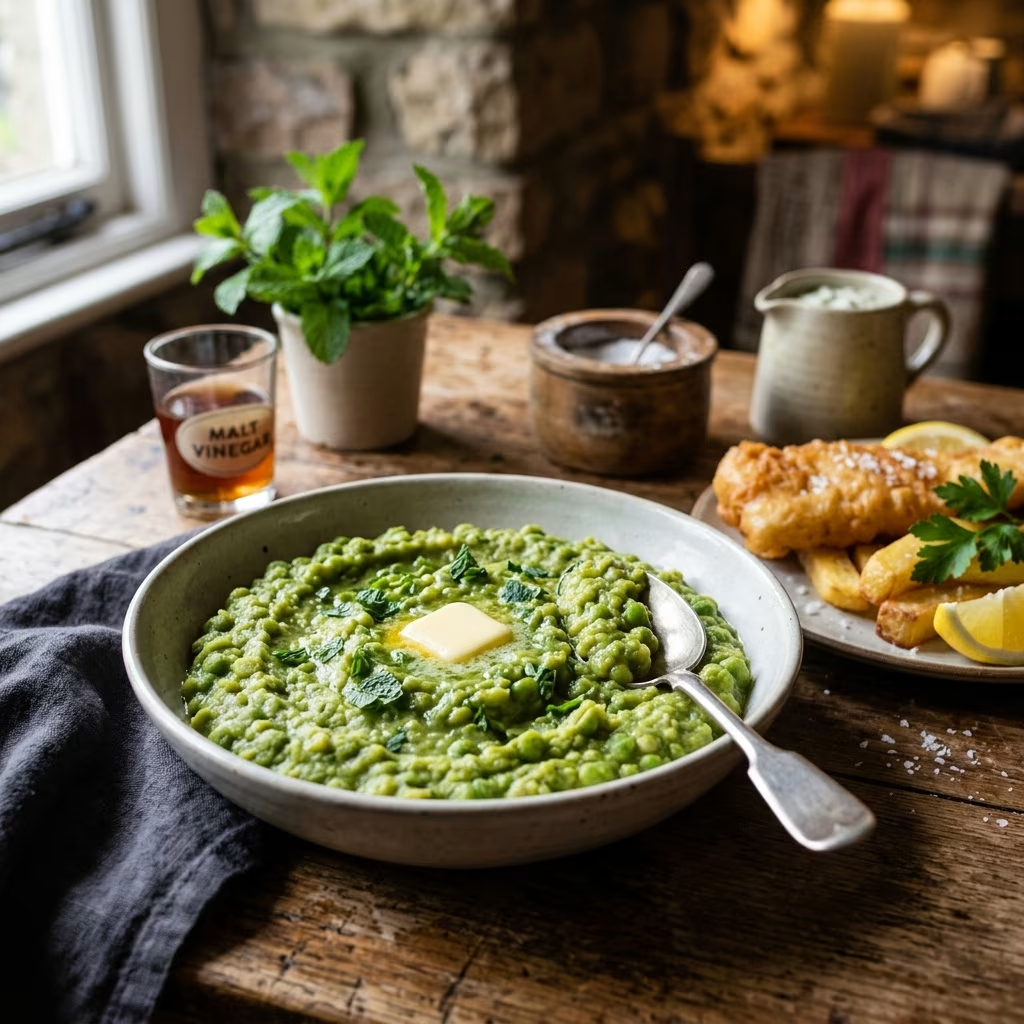
Classic Mushy Peas: The Quintessential British Side Dish Recipe
Mushy peas stand as a cornerstone of classic British cuisine, particularly as the vibrant, creamy-green partner to piping hot fish and chips. Far from being mere peas mashed to oblivion, the true art of mushy peas is in evoking the subtle nostalgia of chip shops, pub fare, and homey Sunday suppers. This guide unpacks their culinary roots, explores methods for preparing authentic mushy peas, and equips you with all you need for mastering this beloved comfort dish.
What Are Mushy Peas?
Mushy peas are a traditional British side dish, known for their soft, pudding-like texture and bright green hue. They are typically made from marrowfat peas—large, mature green peas that are dried and then rehydrated and slowly simmered until thick and almost creamy. This preparation sets mushy peas apart from standard green peas or pea purées, which have a brighter color, a firmer texture, and a sweeter flavor profile.
- Main ingredient: Marrowfat peas (sometimes garden peas as a substitute)
- Traditional pairing: Fried battered fish and golden chips (fries)
- Texture: Soft, slightly chunky, never fully puréed
- Flavors: Earthy, slightly nutty, often finished with salt, pepper, butter, or mint
History and Origins of Mushy Peas
The origins of mushy peas are intertwined with the working-class food traditions of Northern England. They rose to popularity in the 19th century alongside the emergence of fish and chip shops, offering a cheap and filling addition to the main meal. The reliance on hardy, dried marrowfat peas (which stored well in England’s damp climate) made them a culinary staple throughout the year, especially in areas where fresh produce was scarce in winter. Today, mushy peas can be found in pubs, chippies, and home kitchens throughout the UK and Ireland.
Ingredients for Authentic Mushy Peas
The core ingredient is marrowfat peas. If these are unavailable, some recipes substitute frozen garden peas, but this yields a sweeter, brighter green result and a distinct texture.
| Traditional Ingredients | Purpose in Dish |
|---|---|
| Marrowfat peas (dried) | Gives signature texture and flavor |
| Baking soda | Softens the peas, aids breakdown |
| Salt | Seasons the peas; added after cooking |
| Butter (optional) | Adds richness and gloss |
| Freshly ground white or black pepper | Balances sweetness; white preferred for appearance |
| Fresh mint (optional) | For a refreshing, herby twist |
Ingredient Notes
- Marrowfat peas: These are larger and starchier than regular green peas. Look for dried marrowfat peas in British specialty stores or online under brands like Batchelors or Bigga.
- Baking soda: Just a small amount is needed (typically 1/2 teaspoon per cup of dried peas) to help soften the peas during soaking and speed up cooking time. Be careful not to use too much, as it can impart a bitter, soapy flavor.
- Salt: Always season after cooking, as salt can toughen the peas’ skins during rehydration.
- Mint and lemon: For a lighter, more modern take, add fresh mint and a splash of lemon juice at the end of cooking.
- Butter and cream: For extra richness, stir in butter or cream just before serving. Omit for vegan preparations.
How to Make Mushy Peas (Step-by-Step)
The process of making mushy peas is straightforward, but attention to detail at each stage ensures the best flavor and texture. Here’s how to achieve authentic results:
- Soak the peas: Place dried marrowfat peas in a large bowl and cover with plenty of cold water. Stir in the baking soda. Allow to soak for at least 12 hours or overnight. The baking soda will fizz slightly as it activates, aiding in softening the peas’ tough outer skins.
- Drain and rinse: After soaking, drain the peas and rinse well under cold running water to remove any lingering baking soda.
- Simmer the peas: Transfer peas to a saucepan, cover with fresh cold water by about 1 inch, and bring to a boil. Skim off any foam that rises to the surface. Reduce heat and simmer gently, uncovered, stirring occasionally, until peas are very tender and falling apart (usually 30–45 minutes for soaked marrowfat peas).
- Mash to desired consistency: Once the peas are soft, drain off excess water if needed. Use a potato masher to break up the peas to a soft, lumpy consistency. Avoid using a food processor to prevent over-pureeing.
- Season and enrich: Stir in salt and white pepper to taste. For extra richness, mix in a knob of butter or a splash of cream. If desired, fold in fresh chopped mint and a squeeze of lemon juice.
Quick Tip: Using Frozen Green Peas
If you can’t find marrowfat peas, you can mimic the texture and color by steaming frozen English garden peas, then mashing them with butter and cream. This method yields a brighter green side with a fresher, slightly sweeter taste, although true purists may find the texture less authentic.
Tips for Perfect Mushy Peas
- Don’t rush the soak: Insufficient soaking can result in peas that remain tough, even after prolonged cooking. Soak overnight for best results.
- Go easy on the water: Add just enough to cover the peas. Any excess can be poured off before mashing, but too much water makes the mixture soupy.
- Stir occasionally: Prevent the peas from sticking and burning at the bottom by stirring gently during simmering.
- Use a potato masher: This gives a traditional, chunkier finish. Food processors are likely to over-purée, resulting in a smooth pea paste rather than a rustic mush.
- Adjust seasoning last: Salt and butter are added at the end to enhance the flavor without toughening the peas as they cook.
- For vegan peas: Omit butter and use a high-quality vegan margarine or a splash of olive oil.
Serving Suggestions for Mushy Peas
Mushy peas traditionally accompany the classic British fish and chips—the soft peas provide the perfect balance to crispy fish batter and starchy chips. However, their versatility means they complement many other dishes:
- As a side for roasted or grilled meats: Excellent with roast lamb, pork sausages, or roast chicken
- With pies: Perfect with classic meat pies, cottage pie, or shepherd’s pie
- As part of a full English breakfast: For a starchy, vibrant counterpoint to rich eggs and bacon
- With fried bread or potato cakes: Heap peas onto fresh bread for a simple, comforting snack
To serve, spoon mushy peas into a warm bowl or directly onto a plate beside your main dish. Add an extra pat of butter or a sprinkle of chopped mint for freshness just before serving.
Variations and Modern Twists
- Minty Mushy Peas: After mashing, stir in freshly chopped mint leaves and finish with a splash of lemon juice for a bright, herby result.
- Creamy Mushy Peas: Add a tablespoon or two of double cream or crème fraîche for a particularly rich and smooth finish.
- Vegan Mushy Peas: Use quality olive oil or vegan butter, and skip dairy ingredients entirely.
- Pea and Wasabi Mash: Add a touch of wasabi paste to give the peas a spicy, umami kick—a contemporary variation that pairs beautifully with tempura or grilled fish.
- Minted Pea Puree: If you do wish a smoother consistency, use a blender, pass through a sieve, and adjust seasoning to transform the dish into an elegant, velvety purée—a favorite in fine dining settings.
Nutritional Information
| Nutrient | Per Serving* |
|---|---|
| Calories | ~197 kcal |
| Fat | 15g |
| Sat. Fat | 9g |
| Carbohydrates | 13g |
| Fiber | 4g |
| Sugar | 5g |
| Protein | 5g |
| Sodium | 254mg |
| Vitamin C | 34mg |
| Iron | 1mg |
*Values are estimates and will vary depending on butter, cream, and portion size.
Troubleshooting Common Issues
- Peas too hard after simmering: The peas may not have soaked long enough, or the water was too hard. Use bottled or filtered water, and don’t skip the overnight soak with baking soda.
- Peas too watery: Simply drain off excess liquid before mashing. If still too thin, simmer uncovered to reduce further.
- Overly smooth texture: Mash gently by hand; avoid using blenders unless a smoother consistency is desired.
- Peas taste bland: Don’t be shy with salt and butter at the finish. A squeeze of lemon or a splash of vinegar can also lift the flavors.
Frequently Asked Questions (FAQs)
Q: Can I make mushy peas ahead of time?
A: Yes, mushy peas can be made in advance and stored in the refrigerator for up to three days. Reheat gently on the stove, stirring in a splash of water if needed to restore creaminess.
Q: Are mushy peas gluten-free?
A: Mushy peas are naturally gluten-free, provided that no wheat-based thickeners are added. Always check labels on commercial pea products.
Q: Can I freeze mushy peas?
A: Yes, mushy peas freeze well. Allow to cool completely, portion into freezer-safe containers, and freeze for up to three months. Thaw and reheat gently, adding water or butter to loosen texture as needed.
Q: Which peas are best: dried or fresh/frozen?
A: Dried marrowfat peas yield the most authentic flavor and texture. Fresh or frozen peas are a good substitute for convenience or a brighter color, but the result will be slightly different in taste and mouthfeel.
Q: What’s the difference between mushy peas and pea purée?
A: Mushy peas are chunkier and less refined, made by simply mashing cooked peas. Pea purée is a smooth, often sieved blend of peas, sometimes enriched with cream and typically used in fine dining.
Conclusion: Why Mushy Peas Endure
Mushy peas represent the best of British comfort food: affordable, hearty, and brimming with character. Whether part of a seaside fish supper, spooned alongside a roast, or used as a nostalgic taste of home, they remind us that even humble ingredients can become something special. Master the simple art of the perfect mushy pea, and you’ll gain a versatile, timeless side for countless meals.


