


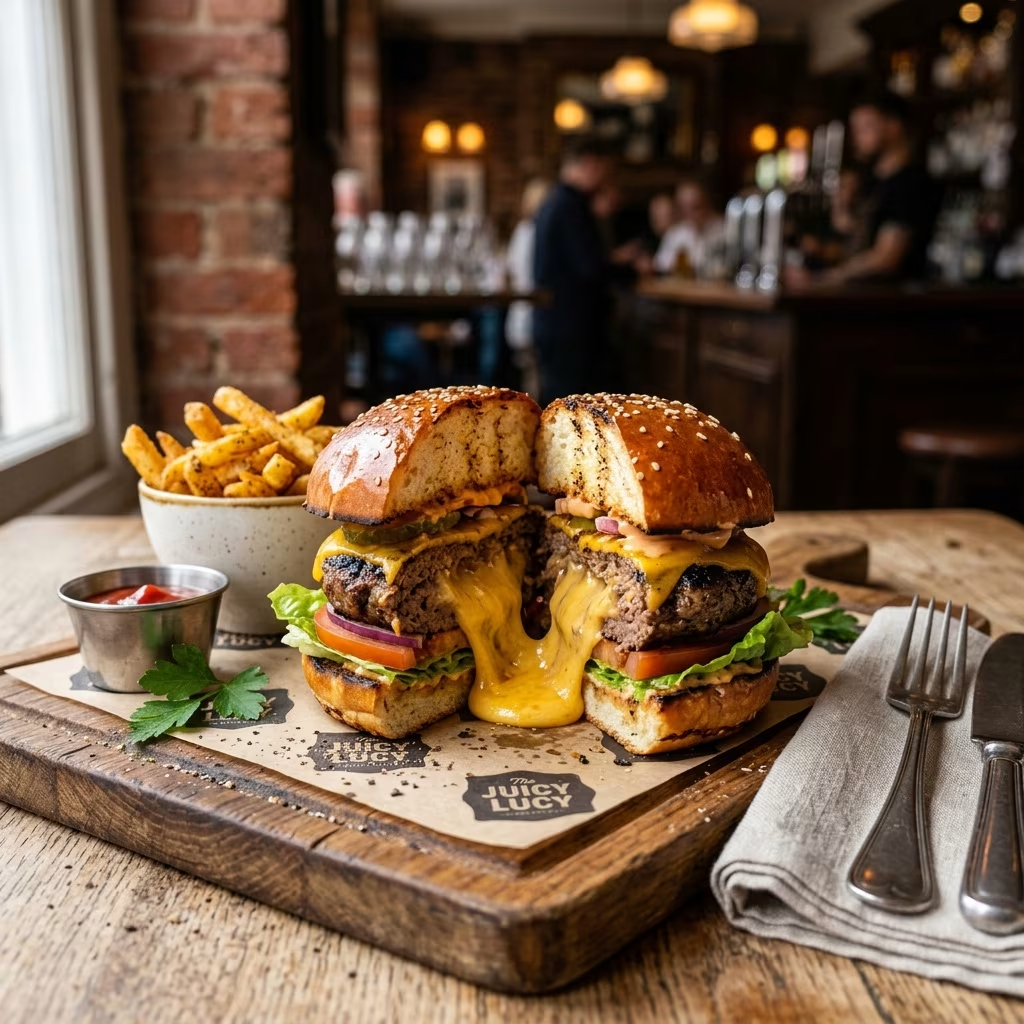
The Juicy Lucy stands as a testament to American burger ingenuity: two beef patties sealed around oozing molten cheese, delivering a unique gooey bite every time. This guide explores everything about the Juicy Lucy, from its origins and perfect cheese selection to a step-by-step recipe, expert techniques, and serving suggestions. Whether you’re a burger enthusiast or a kitchen novice, mastering the Juicy Lucy will transform your grilling repertoire.
What Is a Juicy Lucy?
The Juicy Lucy (sometimes Jucy Lucy) is a regional burger specialty from Minnesota, featuring cheese nestled inside rather than on top of the patty. When the burger is cooked, the cheese melts and creates a molten core, delivering a decadent experience unlike any regular cheeseburger.
- The burger originated in Minneapolis, with both Matt’s Bar and the 5-8 Club claiming to be its creators.
- The signature characteristic is molten cheese that bursts out upon biting. Handling with care (and patience) is recommended!
- Classic Juicy Lucy burgers typically use American or cheddar cheese, but modern spins may opt for pepper jack, blue cheese, or custom blends.
Why This Recipe Works
- Moisture Retention: The technique of sealing the patties tightly minimizes cheese leakage and keeps the burger juicy.
- Cheese Distribution: Using pre-formed squares or shreds ensures even melting and maximizes the molten center effect.
- Optimal Patty Thickness: Flattening the meat to 1/4 to 1/3 inch thick allows the burger to cook through without burning before the cheese melts.
This approach produces a perfectly balanced burger—crispy outside, juicy inside—with that dramatic cheesy burst characteristic of a true Juicy Lucy.
Choosing the Right Cheese
Cheese selection is crucial for the true Juicy Lucy experience.
- American Cheese: Classic—melts superbly, producing a viscous, oozy core.
- Cheddar: Popular alternative, with sharper flavor; use mild or medium cheddar for better melt.
- Other Options: Pepper jack, Swiss, or blue cheese for adventurous palates.
Tip: Avoid hard, aged cheeses as they don’t melt smoothly or may separate when heated inside the patty.
Essential Ingredients
- Ground Beef: 80/20 blend (80% lean, 20% fat) ensures maximum juiciness and flavor.
- Cheese: 2 ounces per burger, cut into squares or torn into strips for easy melting.
- Buns: Soft hamburger buns, lightly toasted for contrast in texture.
- Seasonings: Kosher salt and freshly ground black pepper; garlic powder optional.
Step-by-Step Guide: Crafting the Perfect Juicy Lucy
Follow these steps for guaranteed molten interiors and mouthwatering results:
- Divide and Shape the Meat:
Divide 1 pound of 80/20 ground beef into 8 golf-ball-sized portions. Press each portion into a thin patty, about 4 inches wide and 1/4 inch thick. Place half of the patties on a lined tray.
- Add the Cheese:
Place about 2 ounces of cheese, cut into small squares or torn into strips, in the center of each bottom patty. Leave at least 1/2 inch of border around the edge.
- Seal the Burger:
Place the top patties over each cheese-topped base. Press edges firmly to seal, then gently pinch and smooth the seams so no cheese can escape.
- Chill:
Place the assembled patties in the refrigerator for at least 10 minutes to help them retain shape and improve sealing.
- Season:
Sprinkle both sides of each patty liberally with salt and pepper.
- Cooking:
- Stovetop (preferred): In a heavy skillet over medium-high heat, cook the patties until well-seared (about 3-4 minutes per side). Flip only once to minimize cheese leaks.
- Grill: Prepare a medium-hot zone; grill burgers, covered, for 3-5 minutes per side. Monitor for cheese leakage and avoid pressing the burgers with a spatula.
- Rest:
Allow burgers to rest for at least 5 minutes before serving to prevent scalding and encourage cheese to thicken slightly.
Expert Techniques & Common Pitfalls
- Seal Well: Be thorough with sealing to avoid cheese blowouts. If cheese does leak, it will crisp and can be served alongside.
- No Over-Mixing: Mix seasonings in gently, just enough to distribute. Overworking leads to tough burgers.
- Don’t Press the Burger: Never smash the burger as it cooks; this squeezes out juices and molten cheese.
- Handling Cheese: Stack cheese for a thicker center or scatter shreds for a wider molten pocket.
- Resting Is Critical: Fresh off the heat, cheese will be lava-hot; a short rest is essential for safety and optimal ooze.
Advanced Tip: For stress-free prep, assemble patties and refrigerate up to 8 hours. For longer storage, wrap well and freeze for up to a month. Cook directly from frozen with slight adjustments in timing.
Recommended Toppings and Serving Suggestions
- Classic: Sliced pickles, lettuce, tomato, and minced raw onion.
- Condiments: Ketchup, yellow mustard, and mayonnaise.
- Bold Choices: Jalapeños, caramelized onions, bacon, or specialty aiolis.
- Bun Style: Soft white, potato, or brioche buns pair best with the Juicy Lucy’s gooey profile.
Pair burgers with fries, potato chips, or a crisp coleslaw for the ultimate American classic meal.
Making Ahead, Storage, and Leftovers
- Make Ahead: Form raw, stuffed patties and refrigerate for up to 8 hours before cooking. For extended storage, freeze assembled raw burgers for up to 1 month; cook straight from frozen, allowing 2-3 extra minutes per side.
- Storage: Leftover cooked Juicy Lucys can be refrigerated, tightly wrapped, for up to 3 days. Reheat gently in a 300°F oven until warmed through.
- Freezing Tip: To prevent freezer burn, wrap each raw burger individually in plastic wrap, then place in a freezer bag.
Table: Key Burger Tips at a Glance
| Tip | Description |
|---|---|
| Cheese Type | Use American or mild cheddar for best melt |
| Meat Blend | 80/20 beef ensures juiciness |
| Sealing | Pinch and smooth seams thoroughly to prevent leaks |
| Resting | Let rest 5 minutes before eating to avoid burns |
Recipe Variations
- Spicy Lucy: Add sliced jalapeños and pepper jack cheese for heat.
- Blue Cheese Lucy: Fill with blue cheese for a punchier flavor.
- Bacon Lucy: Layer in crisp bacon bits with the cheese core.
- Vegetarian Lucy: Use plant-based ground and vegan cheese alternatives; seal and cook as above.
Juicy Lucy vs. Regular Cheeseburger
| Juicy Lucy | Standard Cheeseburger |
|---|---|
| Cheese sealed inside the patty | Cheese laid on top of the patty |
| Burst of molten cheese on first bite | Melted cheese exterior, no molten core |
| Requires careful sealing and resting | Simple preparation |
Frequently Asked Questions (FAQ)
What is the origin of the Juicy Lucy?
The Juicy Lucy was invented in Minneapolis, Minnesota, with both Matt’s Bar and the 5-8 Club claiming the original creation. It has since become an iconic regional burger.
Which cheese is best for the cheese center?
Classic American cheese is favored for its smooth melting properties and rich, creamy texture, though mild cheddar, pepper jack, and Swiss also work well. Hard, aged cheeses are not recommended.
How do you prevent the cheese from leaking out?
Carefully pinch and seal the burger edges, then rest patties in the fridge before cooking. Grilling or flipping just once also reduces leakage.
Can Juicy Lucys be made ahead or frozen?
Yes. Stuffed raw patties can be refrigerated for 8 hours or frozen for up to one month. Cook from frozen with slightly longer time on each side.
Why rest the burgers after cooking?
Resting allows the cheese to thicken slightly and the juices to redistribute, reducing the risk of burns and ensuring the best gooey texture.
Is it possible to use other meats?
Absolutely. While beef is traditional, you can substitute ground turkey, chicken, or plant-based grounds. Adjust cooking times as needed to avoid drying out leaner meats.
Do I have to use a skillet or can I grill them outdoors?
Both methods work, though a heavy skillet gives a reliably even sear. For grilling, use a medium-hot, covered grill and flip once for best results.
Final Thoughts: The Joy of the Juicy Lucy
The Juicy Lucy is more than just a burger—it’s a culinary event and a true American original. With a few simple ingredients and careful attention to technique, you can craft a restaurant-worthy, cheese-filled burger experience at home. Remember the key rules: use melty cheese, seal thoroughly, cook gently, and always rest before serving. One bite of that oozy, molten center, and you’ll understand why the Juicy Lucy remains a beloved burger classic.


