Why Make Soap at Home?
Making soap at home has become increasingly popular as people seek natural, chemical-free alternatives to commercial products. Homemade soap allows you to control every ingredient that touches your skin, customize scents and properties, and create personalized gifts for loved ones. Additionally, it’s an economical way to maintain a steady supply of high-quality soap while expressing your creativity.
The benefits of homemade soap extend beyond cost savings. Commercial soaps often contain harsh detergents, synthetic fragrances, and preservatives that can irritate sensitive skin. When you make your own soap, you can choose nourishing ingredients like natural oils, butters, and essential oils that actually benefit your skin rather than strip it of its natural moisture.
Understanding Different Soap Making Methods
There are several methods for making soap at home, each with its own advantages and complexity levels. The two most popular methods for beginners are melt-and-pour and cold process soap making.
Melt-and-Pour Method
The melt-and-pour method is perfect for absolute beginners because it eliminates the need to handle lye directly. This method uses pre-made soap bases that you simply melt, customize with additives, and pour into molds. It’s safe, quick, and allows for immediate creativity without extensive safety precautions.
Melt-and-pour soap bases come in various types including glycerin, goat’s milk, shea butter, and hemp oil bases. Each base offers different skin benefits and creates unique textures in your finished soap. The process typically takes only a few hours from start to finish, making it ideal for last-minute gift-making or when you want instant gratification.
Cold Process Method
Cold process soap making involves combining oils with a lye solution to create soap through saponification. This method offers complete control over ingredients and creates harder, longer-lasting bars. However, it requires more safety precautions and has a longer curing time of 4-6 weeks.
The cold process method allows for unlimited creativity in terms of ingredients, colors, and designs. You can create swirls, layers, and embed objects within your soap. While more complex than melt-and-pour, cold process soap making is incredibly rewarding and produces professional-quality results.
Essential Equipment and Safety Gear
Before beginning any soap making project, it’s crucial to gather the proper equipment and safety gear. Safety should always be your top priority, especially when working with lye in cold process soap making.
Basic Equipment Needed
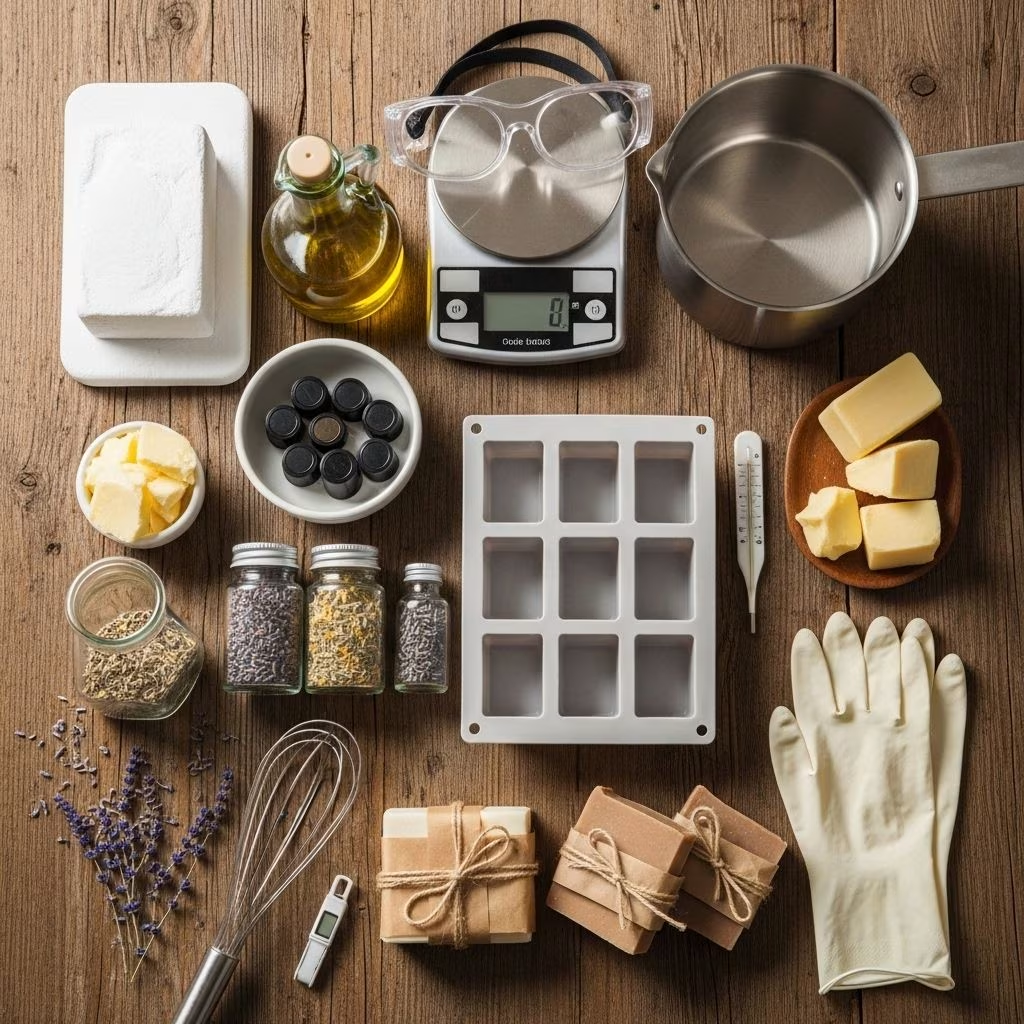
For melt-and-pour soap making, you’ll need microwave-safe bowls, a microwave or double boiler, soap molds, and stirring utensils. Silicone spatulas work well for scraping bowls clean, and alcohol in a spray bottle helps eliminate surface bubbles.
Cold process soap making requires additional equipment including a digital scale for precise measurements, an immersion blender for mixing, and heat-resistant containers for mixing lye solutions. You’ll also need thermometers to monitor temperatures and ensure optimal conditions for saponification.
Safety Equipment
When making cold process soap, always wear safety goggles to protect your eyes from lye splashes. Rubber gloves are essential to prevent skin contact with lye solution, and long sleeves provide additional protection. Work in a well-ventilated area and keep vinegar nearby to neutralize any lye spills.
Even with melt-and-pour soap making, basic safety precautions apply. Hot soap base can cause burns, so handle with care and keep first aid supplies accessible. Always supervise children closely and consider making soap making an adults-only activity.
Key Ingredients for Homemade Soap
Understanding soap ingredients is crucial for creating effective, skin-friendly products. Each ingredient serves a specific purpose and contributes to the soap’s final properties.
Base Oils and Fats
Oils and fats form the foundation of any soap recipe. Popular choices include olive oil for moisturizing properties, coconut oil for lather and hardness, and palm oil for stability. Specialty oils like sweet almond oil, jojoba oil, and castor oil add unique benefits and enhance the soap’s performance.
Each oil contributes different qualities to soap. Olive oil creates mild, moisturizing bars but produces less lather. Coconut oil generates abundant bubbles but can be drying in large quantities. Balancing different oils creates well-rounded soap with optimal cleansing and moisturizing properties.
Natural Additives
Natural additives enhance soap’s appearance, scent, and skin benefits. Honey acts as a natural humectant, drawing moisture to the skin while adding a subtle golden color. Oatmeal provides gentle exfoliation and soothes irritated skin. Herbs like lavender or calendula add color and therapeutic properties.
Essential oils offer natural fragrance and aromatherapy benefits. Tea tree oil provides antibacterial properties, while lavender oil promotes relaxation. Always research proper usage rates for essential oils, as some can cause skin irritation if used in excessive amounts.
Step-by-Step Melt-and-Pour Tutorial
Melt-and-pour soap making is the perfect starting point for beginners. This goat’s milk and honey recipe creates luxurious, skin-nourishing bars that rival expensive commercial soaps.
Ingredients for Goat’s Milk Honey Soap
You’ll need one pound of goat’s milk melt-and-pour soap base, two tablespoons of raw honey, one teaspoon of sweet almond oil, and half a teaspoon of vitamin E oil. Optional additions include a few drops of vanilla essential oil for fragrance.
Cut the soap base into evenly sized cubes to ensure uniform melting. Smaller pieces melt more quickly and evenly, preventing hot spots that could scorch the soap base.
Melting Process
Place the cubed soap base in a microwave-safe bowl and heat in 10-15 second intervals, stirring between each heating session. This gradual approach prevents overheating and maintains the soap base’s quality. The soap is ready when it reaches a smooth, liquid consistency without lumps.
Alternatively, use a double boiler method for more controlled heating. This gentler approach takes longer but reduces the risk of overheating and provides better temperature control.
Adding Ingredients
Once the soap base is completely melted, remove it from heat and let it cool slightly before adding other ingredients. Stir in the honey first, followed by the sweet almond oil and vitamin E oil. Mix gently but thoroughly to distribute ingredients evenly throughout the soap base.
If using essential oils, add them last when the mixture has cooled to prevent the volatile compounds from evaporating. Use a light hand with essential oils, as their concentrated nature means a little goes a long way.
Pouring and Setting
Pour the finished soap mixture into prepared molds, working quickly before it begins to set. Tap the molds gently to release air bubbles, or spray the surface with isopropyl alcohol to eliminate bubbles that rise to the top.
Allow the soap to cool and harden completely, which typically takes 1-2 hours depending on the mold size and room temperature. Once firm, carefully remove the soap from the molds and your handmade bars are ready to use immediately.
Cold Process Soap Making for Beginners
Cold process soap making involves more steps and safety considerations but offers unlimited creative possibilities and superior customization options.
Understanding Saponification
Saponification is the chemical reaction between fats and sodium hydroxide (lye) that creates soap. This process generates heat and transforms oils into soap and glycerin. Understanding this reaction helps you troubleshoot problems and create better soap recipes.
The saponification process continues for several weeks after the initial mixing, which is why cold process soaps require a curing period. During curing, excess water evaporates and the soap becomes milder and harder.
Basic Cold Process Recipe
A simple beginner recipe includes olive oil, coconut oil, and palm oil combined with a carefully calculated lye solution. Always use a soap calculator to determine the correct lye amount for your specific oil combination, as incorrect measurements can result in caustic or ineffective soap.
Measure ingredients by weight rather than volume for accuracy. Digital scales ensure precise measurements, which are crucial for successful soap making. Even small variations in lye amounts can significantly impact the final product.
The Cold Process Method
Begin by preparing your workspace and gathering all equipment. Mix the lye solution carefully, adding lye crystals to water (never the reverse) while stirring until dissolved. The solution will generate heat, so use heat-resistant containers and work in a ventilated area.
Heat oils to the appropriate temperature and allow both oil and lye solutions to cool to similar temperatures before combining. Pour the lye solution into the oils and blend with an immersion blender until the mixture reaches trace, a pudding-like consistency that indicates successful saponification has begun.
Troubleshooting Common Soap Making Issues
Even experienced soap makers encounter problems occasionally. Understanding common issues and their solutions helps ensure successful batches and reduces frustration.
Melt-and-Pour Problems
Overheating melt-and-pour base can cause it to become thick and difficult to pour. If this happens, allow the base to cool slightly and add a small amount of glycerin to restore workability. Prevention is key, so always use low heat and frequent stirring.
Soap that refuses to harden may indicate too much liquid additive or insufficient cooling time. Ensure molds are at room temperature and avoid adding excessive amounts of oils or liquids that can prevent proper setting.
Cold Process Challenges
Soap that traces too quickly may result from using the wrong temperature or adding fragrance oils that accelerate saponification. Work at lower temperatures and research fragrance oil behavior before use.
Conversely, soap that won’t trace may need more blending time or indicate measurement errors. Always double-check your recipe calculations and ensure your immersion blender is functioning properly.
Creative Soap Making Ideas
Once you’ve mastered basic techniques, explore creative possibilities to make your soap truly unique and personal.
Natural Colorants
Achieve beautiful colors using natural ingredients like spirulina powder for green, turmeric for yellow, and cocoa powder for brown. These natural colorants provide subtle, earthy tones while adding skin benefits.
Clays like French green clay or bentonite create lovely colors while providing detoxifying properties. Rose clay imparts a gentle pink color and is suitable for sensitive skin types.
Texture and Design Techniques
Create interesting textures by adding ingredients like poppy seeds for gentle exfoliation or coffee grounds for an energizing morning soap. Dried herbs and flower petals add visual appeal and natural fragrance.
Experiment with layering different colored soap bases for striking visual effects. Swirling techniques create marble-like patterns that make each bar unique and artistic.
Frequently Asked Questions
Q: How long does homemade soap last?
A: Properly stored homemade soap typically lasts 6-12 months. Store in a cool, dry place away from direct sunlight to maximize shelf life.
Q: Is it safe to use soap immediately after making it?
A: Melt-and-pour soap can be used immediately, while cold process soap requires a 4-6 week curing period for safety and quality.
Q: Can I make soap without lye?
A: All true soap contains lye, but melt-and-pour bases have already completed saponification, so you don’t handle lye directly.
Q: What’s the difference between soap and detergent?
A: Soap is made from natural fats and lye, while detergents are synthetic. Handmade soap is gentler and more moisturizing than commercial detergent bars.
Q: How much does it cost to make homemade soap?
A: Homemade soap typically costs $1-3 per bar to make, depending on ingredients used, compared to $5-15 for comparable artisan soaps.
References
- https://www.youtube.com/watch?v=sg6wEQjhe5Q
- https://www.youtube.com/watch?v=lBc-dWQmFIM
- https://cosmopolitancornbread.com/laundry-soap/
- https://www.wholesalesuppliesplus.com/handmade101/learn-to-make-articles/cold-process-oven-process-soap-tutorial.aspx
- https://cosmopolitancornbread.com/how-to-make-foaming-hand-soap/
- https://www.youtube.com/watch?v=qY4G1P2nits
- https://soapqueen.com/bath-and-body-tutorials/cold-process-soap-technique-roundup/
- https://www.cosmopolitan.com/style-beauty/beauty/a33322892/soap-brows-photos-tips/
- https://www.youtube.com/watch?v=6PmoiUL8rNI