How to Perform a Patch Test at Home for Allergens
Patch tests are invaluable tools in allergy management, especially for those experiencing skin reactions, sensitivities, or wanting to introduce new skincare, cosmetic, or household products into their routine. Knowing how to properly execute a patch test at home can help prevent uncomfortable allergic reactions and enable you to make well-informed choices about the products you use.
Introduction to Patch Testing
A patch test is a dermatological procedure used to confirm whether a particular substance will trigger an allergic reaction, irritation, or sensitivity when it comes into contact with your skin. Unlike food or environmental allergies, patch testing focuses on contact allergens—substances that cause symptoms like redness, itching, swelling, blisters, or rashes after delayed exposure to the skin.
Patch testing is especially useful for identifying triggers of contact dermatitis, eczema, and reactions to personal care products, topical medications, metals (such as nickel), fragrances, preservatives, latex, or plant extracts. While professional patch testing in a clinical setting provides a comprehensive analysis with dozens of allergens simultaneously, home patch testing helps detect if a specific product or ingredient is problematic for you before wider use.
Essentials of Patch Testing
- Purpose: To check your skin’s response to a substance before regular use.
- Type of reactions: Identifies delayed allergic reactions that develop over hours or days.
- Location: Usually performed on accessible skin areas like the inner forearm or upper back.
- Interpretation: Look for evidence of redness, swelling, blisters, or rashes after the test period.
Who Should Perform a Patch Test?
- Individuals with a history of skin rashes, itching, or contact dermatitis.
- People introducing new skincare, makeup, or household products.
- Anyone with known allergies seeking to screen for additional sensitivities.
- Children or adults with chronic eczema or suspicious reactions to soaps, lotions, jewelry, fragrances, or topical medications.
- Those advised by healthcare providers to rule out ingredient-specific allergies.
Materials Needed for Home Patch Testing
- Bandaids or adhesive patches: Use latex-free, hypoallergenic bandages to secure the test substance to the skin.
- Clear medical films (e.g., Tegaderm): Available at drugstores, these can be used to occlude and protect the test area.
- Cotton swabs: For applying a small amount of the test product.
- Mild soap and water: For cleaning the skin prior to application.
- Marker or pen: To outline the test spot and aid in monitoring changes.
- Test substance: The product or ingredient to be evaluated (e.g., cream, fragrance, detergent, metal jewelry).
Preparing for the Patch Test
Proper preparation is key for maximizing the accuracy and reliability of your patch test. Follow these steps:
- Choose an area on your body that is clean, dry, and free from rashes. The inner forearm is commonly used due to its accessibility and low interference with daily activities.
- Clean the test area thoroughly with mild soap and water. Avoid using lotions, creams, or topical medications on the area for at least 24 hours before testing. This prevents interference with the test substance.
- Avoid sun exposure to the test area for 1–2 weeks before the test. Sun damage can alter skin response.
- If you are testing for specific allergens (e.g., nickel, latex), ensure you have the pure substance or representative product.
- Review any medications you are currently taking. Most antihistamines do not interfere with patch tests, but always check with your healthcare provider.
Preparation Checklist
| Task | Details |
|---|---|
| Skin Cleaning | Wash only with mild soap and water; avoid lotions and creams on the test spot |
| Product Preparation | Use a small amount of the product or ingredient (dime-sized or less) |
| Patching Materials | Latex-free bandage or transparent medical film |
| Time Scheduling | Plan to keep the patch area dry and undisturbed for at least 48 hours |
Step-by-Step Guide: Performing a Patch Test at Home
Follow these steps to conduct a patch test safely and effectively:
- Selection of Site
The inner forearm is ideal, but you may also use the back or behind your ear. The skin should be healthy and free of irritation. - Skin Cleansing
Wash the area with mild soap. Dry thoroughly and do not apply lotion or ointment. - Application of Test Substance
Use a cotton swab or your clean fingertip to place a small, dime-sized amount of product onto the chosen site. - Occlusion
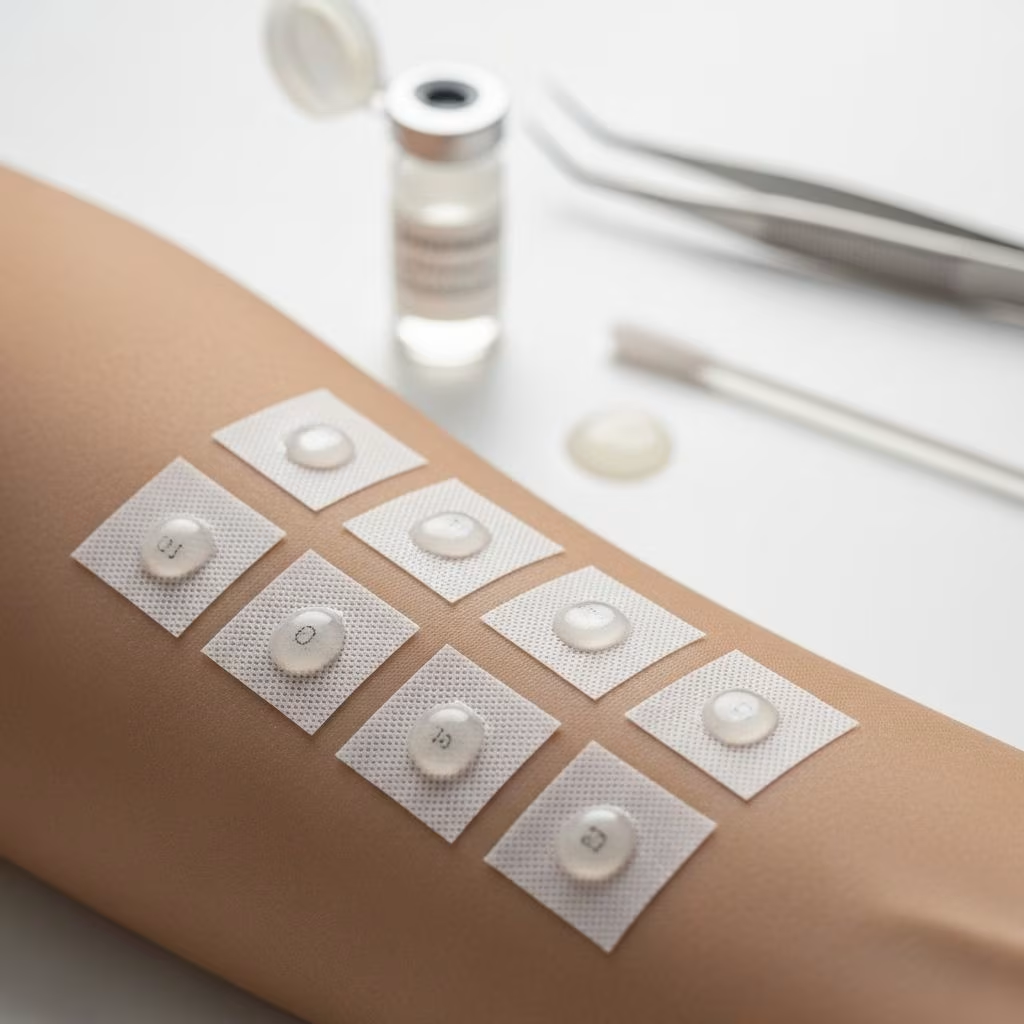
Cover the area with a latex-free adhesive bandage or transparent medical film (such as Tegaderm) to keep the product in place. Press gently to secure. - Mark the Test Area
Use a skin-safe marker or pen to outline the area around the patch. Take a photo if desired for reference. - Observation Period
Leave the patch on for 48 hours. Avoid washing, sweating, or vigorous activity; do not get the area wet. Skipping showers and activities that induce sweating is recommended during this period. - Patch Removal
After 48 hours, remove the patch and gently inspect the area. Avoid scrubbing or scratching. - Monitor for Reactions
Inspect the site immediately after removal, and again over the next 3–7 days. Take note of redness, swelling, itching, bumps, blisters, or oozing. Photograph if necessary for records. - Document Your Results
Record any response (none, mild, moderate, severe). Share results with your healthcare provider if indicated.
Sample Patch Test Timeline
| Time Point | Action/Observation |
|---|---|
| 0 hours | Apply product, occlude with bandage |
| 48 hours | Remove bandage, inspect for immediate reaction |
| 72-96 hours | Check for delayed reactions, take photographs |
| Up to 7 days | Continue to monitor for symptoms |
Interpreting Patch Test Results
A patch test is considered positive if the test area shows signs of:
- Redness (erythema)
- Swelling
- Bumps or small blisters
- Scaliness or itching
- Stinging, burning, or oozing
A negative test means there are no obvious skin changes at the test spot throughout the observation period. Some substances may cause a reaction within 48 hours, while others manifest over 3–7 days. Many reactions can be delayed, which is why extended monitoring is crucial.
The severity of reaction helps guide your next steps:
- Mild reaction: May indicate mild sensitivity; use with caution.
- Moderate to severe reaction: (persistent redness, swelling, blistering, or extensive rash)—avoid further use and consult a healthcare professional.
If multiple products or ingredients are being tested, separate test spots for each can be used and carefully labeled for accuracy.
Safety Considerations and When to Seek Help
- Test only one product or ingredient at a time on a single site. Leave other areas untouched to minimize risk.
- Do not test inside wounds, broken skin, or areas already experiencing a rash.
- If you develop severe itch, swelling, pain, or blisters, remove the patch immediately and wash with gentle soap and water.
- If you have known severe allergies, asthma, or have reacted strongly in the past, consult a healthcare provider before performing any test at home.
- Seek medical attention for significant reactions, widespread rashes, fever, or if symptoms do not resolve with simple care.
- After removal, avoid sun exposure or irritating products on the area until the skin has fully healed.
Advantages of Home Patch Testing
- Enables detection of individual product sensitivities before regular use
- Reduces risk of full-body allergic reactions
- Affordable and convenient—can be performed without specialized equipment
Limitations and When to See a Professional
- Home patch tests cannot identify the exact ingredient responsible for reactions in products containing multiple substances
- If your reaction is severe, persistent, or involves respiratory symptoms, always seek professional guidance
- Comprehensive patch testing at an allergy clinic can test up to 80–100 different allergens simultaneously and offer precise ingredient identification
Frequently Asked Questions (FAQs)
Q: How long does a home patch test take?
A: The initial wait is 48 hours, followed by continued observation for up to a week, since some reactions are delayed.
Q: Where should I apply the patch test?
A: The inner forearm is ideal for visual inspection, but the upper back is used in clinical settings. Avoid irritated or broken skin.
Q: What should I do if my skin reacts?
A: Remove the product and bandage immediately, cleanse the area gently, and apply a mild moisturizer. If the reaction worsens or spreads, contact a healthcare provider.
Q: Can I test more than one product at a time?
A: You can test multiple products at different spots, but always label and monitor each area separately. Do not overlap test sites.
Q: Is home patch testing safe for children?
A: Yes, with caution and under adult supervision. Avoid harsh chemicals and only test substances recommended by your pediatrician. If your child has severe allergies, consult their doctor first.
Q: What does a positive patch test look like?
A: Redness, swelling, bumps, blisters, itching, or oozing at the test site. Document and, if unsure, seek guidance from a dermatologist.
Q: Does a negative patch test guarantee safety?
A: No. Home patch tests reduce the risk, but do not eliminate it entirely—some reactions may develop with repeated exposure, higher concentrations, or continued use over time.
Conclusion
Patch testing at home is a safe, effective method for identifying skin sensitivities and contact allergens before introducing new products into your routine. It is especially crucial for those with existing eczema, contact dermatitis, or unknown ingredient sensitivities. By following the steps outlined in this guide—careful preparation, strategic site selection, strict observation, and conservative reaction management—you can reduce the risks of allergic skin reactions and make informed choices about the substances you apply to your skin.
If there is any uncertainty, severe reaction, or ongoing skin issues, professional patch testing under medical supervision is always advisable for more precise assessment and treatment. Remember, the power of knowledge about your skin’s unique sensitivities enables healthier, happier skin and more confidence with your skincare and personal care decisions.
References
- https://www.carolinaasthma.com/patch-testing/
- https://evme.com/blogs/learn/how-to-patch-test-at-home
- https://www.bassmedicalgroup.com/blog-post/how-to-prepare-for-allergy-patch-testing
- https://my.clevelandclinic.org/health/diagnostics/patch-test
- https://www.nationwidechildrens.org/family-resources-education/health-wellness-and-safety-resources/helping-hands/patch-testing-for-skin-allergies
- https://www.medicalnewstoday.com/articles/patch-test-skincare
- https://www.aad.org/public/everyday-care/skin-care-secrets/prevent-skin-problems/test-skin-care-products
- https://stanfordhealthcare.org/content/dam/SHC/clinics/menlo-medical-clinic/docs/Allergy/Patch%20Testing.pdf
- https://www.nationaljewish.org/conditions/tests-procedures/allergy-tests/metals-allergy-testing