


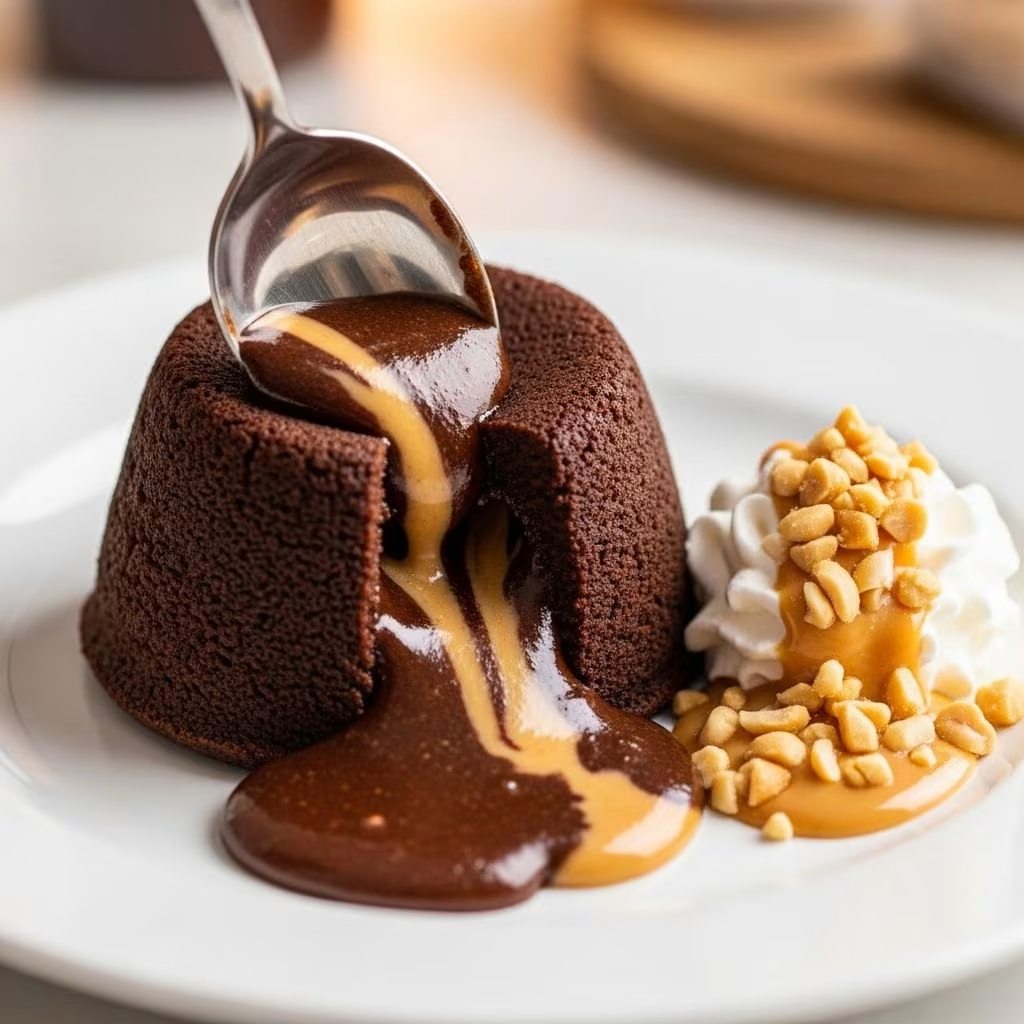
Chocolate Peanut Butter Lava Cakes: Your Guide to Molten Dessert Bliss
Chocolate Peanut Butter Lava Cakes combine two ultimate dessert favorites—rich, dark chocolate and creamy peanut butter—into a single, irresistible treat. With a molten peanut butter core enveloped in moist, chocolate cake, these cakes are easier to make than you think, yet decadent enough for any celebration or Valentine’s Day dinner at home.
Why You’ll Love Chocolate Peanut Butter Lava Cakes
These lava cakes are more than a chocolate fix—they’re warm, gooey, and rich with an explosion of peanut butter in every bite. Unlike typical cakes, the center stays molten and creamy for a dramatic, spoonable reveal. Best of all, you can make them at home, in your favorite PJs, no restaurant reservations required. Pair them with your loved one, your couch, or even a cozy movie night.
- Molten peanut butter center for a magical eating experience.
- Perfect for peanut butter and chocolate lovers—no need to choose just one!
- Simple steps—enjoy gourmet dessert without the hassle.
- Impressive and indulgent, perfect for special occasions or everyday treats.
What is a Lava Cake?
Lava cakes, also known as molten cakes, are personal-sized chocolate cakes typically distinguished by their warm, flowing center. The signature molten core is achieved either by baking the cake batter for less time so the center remains undercooked, or (as with this recipe) by including a filling that melts during baking. The result: a dramatic dessert that looks unassuming from the outside, but oozes liquid decadence as soon as you dig in.
- Lava cakes trace their origins to French chef Jean-Georges Vongerichten, who’s often credited for inventing the dessert in the 1980s.
- Popular in fine dining, yet easy enough for home kitchens.
- The most common fillings are chocolate ganache, but the peanut butter addition offers a sweet-salty twist.
Ingredients: The Building Blocks of Bliss
The beauty of this recipe lies in its use of accessible, kitchen-staple ingredients. Let’s break down what you’ll need for both the cake batter and the molten peanut butter center:
| Component | Ingredient | Notes |
|---|---|---|
| Peanut Butter Center | Peanut Butter | Use classic creamy peanut butter—not the ‘natural’ variety—for best texture. |
| Powdered Sugar | Adds sweetness and structure to the molten center. | |
| Butter | Brings richness and a smooth feel to the filling. | |
| Chocolate Cake | Bittersweet Chocolate | High-quality chocolate yields the best flavor and melt. |
| Butter | For melting with chocolate; gives a glossy texture. | |
| Flour | All-purpose; provides structure. | |
| Cocoa Powder | Boosts the chocolate flavor. | |
| Sugar | Sweetens the cake batter. | |
| Eggs | Provide lift and a tender crumb. | |
| Vanilla Extract | Enriches overall flavor. | |
| Instant Espresso Powder | Optional, but deepens the chocolate flavor without a coffee taste. | |
Optional toppings: Chocolate sauce, powdered sugar, or vanilla bean ice cream for serving.
Equipment You’ll Need
- 6-ounce ramekins – Any shape works (heart-shaped are optional but festive).
- Mixing bowls and spatulas
- Hand mixer or stand mixer
- Measuring cups and spoons
- Baking sheet (optional, for easier oven transfer)
Step-by-Step: How to Make Chocolate Peanut Butter Lava Cakes
1. Make the Peanut Butter Filling
- Stir peanut butter, powdered sugar, and butter together until smooth and creamy.
- Chill the mixture for about 30 minutes so it firms up and can be shaped easily.
- Once chilled, divide the filling into even portions (one for each lava cake).
2. Prepare the Ramekins
- Generously butter the ramekins to prevent sticking.
- Dust with a blend of flour and cocoa powder for extra insurance and cocoa flavor in every bite.
3. Make the Cake Batter
- Melt chocolate and butter together until glossy and smooth. Let it cool slightly.
- In a mixing bowl, whip eggs and sugar until thick, light, and frothy.
- Stir in the melted chocolate mixture, followed by vanilla and instant espresso powder if using.
- Fold in the flour and cocoa powder until just combined to avoid over-mixing.
4. Assemble the Lava Cakes
- Divide most of the chocolate batter between the prepared ramekins (reserve a little for the top).
- Place a mound of peanut butter filling in the center of each ramekin.
- Spoon the remaining chocolate batter over the top to completely cover the filling.
5. Bake
- Bake in a preheated 425ºF oven until the edges are set but centers are still soft—about 13-15 minutes.
- Rest for a few minutes; then invert onto plates for dramatic serving, or eat straight from the ramekin.
6. Serve
- Top with chocolate sauce and powdered sugar; for the ultimate indulgence, add a scoop of ice cream.
Tips & Tricks for Perfect Lava Cakes
- Use classic peanut butter: Natural or oily varieties can separate and affect the texture of the filling.
- Generous buttering and dusting of ramekins ensure cakes release easily and intact.
- Don’t overbake: The goal is a soft center! The cakes will continue to set slightly as they rest after baking.
- Experiment with shapes: Heart-shaped ramekins are perfect for Valentine’s Day, but round or square dishes work too.
- Try adding a pinch of salt to the peanut butter filling for enhanced contrast.
- For extra decadence, drizzle with homemade chocolate sauce or top with berries.
Serving Suggestions
Present your finished cakes like a pro with these delicious finishing touches:
- Classic: Drizzle warm chocolate sauce over the inverted cakes and dust with powdered sugar.
- Over-the-top: Add a scoop of vanilla bean ice cream for a hot-and-cold delight.
- Berries: Serve with a small handful of raspberries or sliced strawberries for color and tartness.
- Nuts: Sprinkle with chopped peanuts for crunch and extra flavor.
- Personalized: Individualize each cake with a piped swirl of whipped cream.
Make-Ahead and Reheating Instructions
- Make Ahead: Prepare the cakes and refrigerate, unbaked, in the ramekins for up to a day. Bring to room temperature before baking, or add a couple minutes to the baking time if baking directly from the refrigerator.
- Reheating: If baking ahead, cakes can be microwaved for 20-30 seconds to restore the molten center, but note: reheated cakes may not invert as cleanly. Serve straight from the ramekin and blanket with chocolate sauce and sugar to keep things beautiful.
Frequently Asked Questions (FAQs)
Q: Can I make these gluten-free?
A: Yes, substitute your favorite 1:1 gluten-free flour blend for the all-purpose flour. Double-check your cocoa powder for cross-contamination if needed.
Q: What chocolate should I use for the best result?
A: Choose high-quality bittersweet chocolate (60-70% cacao). Use bars rather than chips whenever possible for a silkier melt.
Q: Can I prepare the peanut butter filling in advance?
A: Absolutely! You can shape and refrigerate the filling up to two days in advance—just keep it covered so it doesn’t dry out.
Q: Why is espresso powder added?
A: Espresso powder enhances the chocolate’s depth of flavor without imparting a strong coffee taste. It’s optional, but highly recommended for best results.
Q: How do I know when the cakes are done?
A: The edges should look set and cake-like, while the centers will tremble slightly if the ramekin is jiggled. Resist overbaking for a perfect molten center!
Q: Can I freeze these lava cakes?
A: Unbaked filled cakes can be frozen (just add a few minutes to the baking time). Baked cakes aren’t as good from the freezer because the center won’t stay molten after reheating.
More Chocolate & Peanut Butter Desserts
If you love this combination, here are more treats you might enjoy:
- Chocolate Peanut Butter Pie: Silky, luscious, and great for holidays.
- No-Bake Peanut Butter Bars: Quick, beginner-friendly, and ideal for snacking.
- Chocolate Peanut Butter Ice Cream Sandwiches: Perfect for summer, with a playful twist on the classic PB&J.
- Peanut Butter Cheesecake: A showstopper with chocolate crust and creamy filling.
- Peanut Butter Cookies with a Chocolate Kiss: Ideal for any time of year.
Baking Made Joyful
Chocolate peanut butter lava cakes prove that gourmet desserts don’t require fancy equipment or special skills—just the right recipe and a love of chocolate. With these tips and techniques, you’re ready to create an unforgettable treat that will have everyone swooning for seconds.
References
- https://www.bakeat350.net/2019/02/chocolate-peanut-butter-lava-cakes.html
- https://www.thepioneerwoman.com/food-cooking/recipes/a100764/chocolate-peanut-butter-lava-cakes/
- https://www.thepioneerwoman.com/food-cooking/meals-menus/g65399864/chocolate-and-peanut-butter-desserts/
- https://www.thepioneerwoman.com/food-cooking/meals-menus/g43148763/peanut-butter-desserts/


