


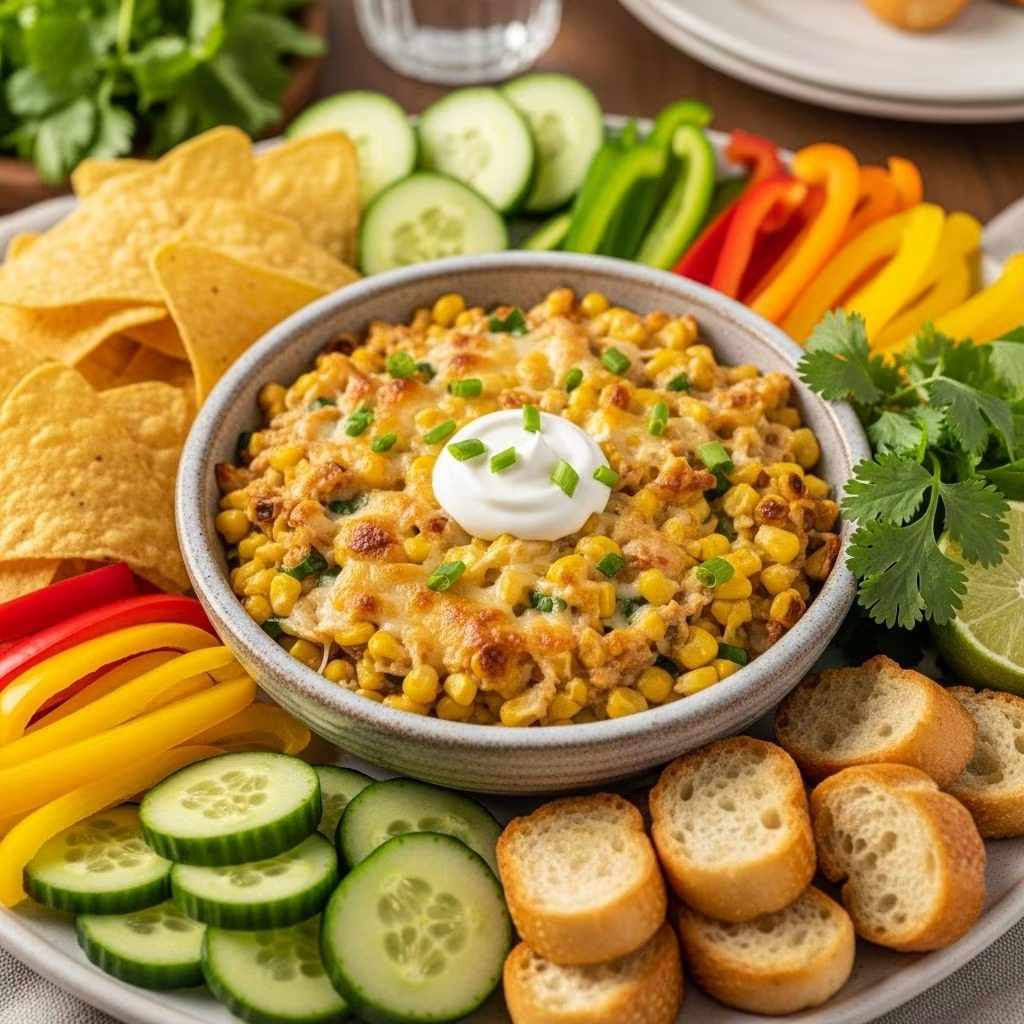
Ultimate Roasted Corn Dip
If you’re searching for a show-stopping party appetizer, look no further than this roasted corn dip. Combining the smoky, caramelized sweetness of grilled corn with creamy cheeses, spicy jalapeño, and colorful bell peppers, this dip delivers maximum flavor and texture with every bite. Whether it’s backyard BBQs, holiday gatherings, or casual get-togethers, roasted corn dip is always a crowd favorite.
Why You’ll Love This Roasted Corn Dip
- Perfect For Entertaining: Hot, cheesy, and deeply savory, it disappears fast at any party.
- Versatile: Easily adaptable to your spice preference and diet—swap ingredients as needed.
- Made Ahead: Prep it in advance and just bake when guests arrive!
- Easy to Scale: Make a single batch or double for larger crowds with minimal effort.
Essential Ingredients
This roasted corn dip shines thanks to fresh summer corn, but substitutions (like frozen corn) work too. Here’s what you’ll need:
- Fresh Corn: Ideally, 4-5 ears, grilled or roasted for charred flavor. (Frozen corn can be used in a pinch!)
- Butter: For sautéing veggies—adds richness.
- Garlic: Minced, for flavor depth.
- Jalapeño: Adds mild-to-moderate heat. Adjust to taste.
- Onion: Sweetness and body, often red or yellow.
- Green and Red Bell Peppers: For crunch and bright color.
- Canned Green Chiles: Mellow heat and tang.
- Cream Cheese: Makes the dip creamy and smooth.
- Mayonnaise & Sour Cream: Extra creaminess, slight tang.
- Pepper Jack Cheese: Melts beautifully, bringing a spicy, cheesy kick.
- Green Onions: For fresh, zippy flavor.
- Salt & Black Pepper: To balance and enhance all the flavors.
- Tortilla Chips or Pita Crisps: For serving.
How to Roast Corn for This Dip
- Preheat a grill or grill pan over medium to medium-high heat.
- Shuck 4-5 ears of corn, brush lightly with vegetable oil, and sprinkle with salt.
- Grill, turning every few minutes, until the kernels are charred and golden in places—this takes about 10 minutes total.
- Remove the corn, allow it to cool slightly, then slice off the kernels.
If using frozen corn, lightly sauté in a hot skillet until caramelized and golden for best flavor.
Step-By-Step Instructions
1. Roast the Corn
Follow the roasting instructions above to get those savory charred bits in your dip. Set kernels aside to cool.
2. Sauté the Veggies
- Melt butter in a large skillet over medium-high heat.
- Add garlic, jalapeño, onions, green bell pepper, and red bell pepper.
- Sauté for 4-5 minutes, until vegetables are soft and some edges start to brown.
- Stir in the canned green chiles and cook for another 30 seconds.
- Remove from heat and set aside to cool.
3. Make the Cheese Base
In a large mixing bowl, combine:
- 1 cup grated Pepper Jack cheese
- 8 oz cream cheese (softened)
- 1/2 cup mayonnaise
- 1/2 cup sour cream
- 3 sliced green onions
Stir until smooth and creamy.
4. Combine Everything and Bake
- Add the roasted corn and sautéed vegetables to the cheese mixture. Mix thoroughly.
- Pour into a small baking dish and smooth the top.
- Sprinkle the remaining 1/2 cup of Pepper Jack cheese over the top.
- Bake at 350°F (175°C) for 20–25 minutes, until bubbly and golden.
5. Serve
Serve hot with chips, pita crisps, or veggie sticks. Garnish with extra green onions if desired.
Tips & Tricks for Perfect Roasted Corn Dip
- Softening Cream Cheese: Let the cream cheese come to room temperature for smooth blending.
- Control the Heat: Remove seeds and membranes from jalapeños for less heat, or leave them for more kick.
- Meal Prep: The dip can be assembled ahead and refrigerated (unbaked) for up to 48 hours. Just sprinkle on cheese and bake before serving.
- No Grill? No Problem: Roast corn directly over your gas burner flame or broil on a sheet pan.
- Use Good Chips: Thick, sturdy tortilla chips or pita crisps work best for scooping this chunky dip.
Ingredient Substitutions
| Original Ingredient | Possible Substitutes | Effect on Final Dish |
|---|---|---|
| Fresh Corn | Frozen or canned corn | Less smoky flavor, but still sweet |
| Pepper Jack Cheese | Monterey Jack, cheddar, or queso fresco | Milder or different cheese notes |
| Mayonnaise | Greek yogurt | Brighter and less rich |
| Cream Cheese | Neufchâtel cheese | Lower fat, similar texture |
| Jalapeño | Serrano pepper, canned green chiles | Different heat levels |
Serving Suggestions
- Serve with sturdy tortilla chips, pita crisps, or toasted baguette slices.
- If feeling festive, offer fresh vegetable crudités (carrots, celery, mini peppers).
- This dip makes a great topping for steak, grilled chicken, or tacos.
- Try as a filling for quesadillas or grilled cheese sandwiches!
Storage & Make-Ahead Instructions
- Bake the dip up to 2 days ahead; reheat in a low oven until bubbly.
- Unbaked dip keeps in the fridge, covered, for up to 48 hours before baking.
- Leftovers? Store in an airtight container in the fridge for up to 3 days. Reheat in the oven or microwave in short bursts.
Customize Your Roasted Corn Dip
- Spicy Variation: Add extra jalapeño or a dash of hot sauce for more heat.
- Mexican-Inspired: Add ground cumin, paprika, or chipotle powder. Sprinkle cotija or queso fresco on top.
- Smoky Flavor: Use smoked paprika in the cheese base or smoke the corn over wood chips.
- Meaty Additions: Stir in cooked bacon, crumbled chorizo, or shredded rotisserie chicken for extra substance.
- Green Touch: Add chopped fresh cilantro or parsley before baking for an herbal finish.
Common Questions About Roasted Corn Dip
Can I use frozen corn instead of fresh corn?
Absolutely. Thaw and sauté frozen corn until golden in a skillet to develop flavor before adding to the dip.
How spicy is this dip?
It’s mildly spicy as written (with jalapeño and green chiles). Adjust to your heat preference by adding or reducing peppers.
Can I make roasted corn dip in advance?
Yes. Assemble all ingredients, cover, and refrigerate for up to 48 hours. Bake just before serving.
What else can I serve with this dip?
Try with sturdy chips, pita crisps, lettuce cups, or even as a taco or nacho topping.
Can it be made gluten-free?
Yes, the dip is naturally gluten-free. Just ensure your dippers (tortilla chips or veggies) are gluten-free.
Roasted Corn Dip Recipe Card
Ingredients
- 4–5 ears fresh corn, shucked (see notes for cold months)
- 1/2 stick unsalted butter (4 tbsp)
- 2 cloves garlic, minced
- 1 medium yellow (or red) onion, diced
- 1 green bell pepper, diced
- 1 red bell pepper, diced
- 1–2 jalapeños, seeded and diced finely
- 1 can (4 oz) diced green chiles
- 1 1/2 cups pepper jack cheese, grated and divided
- 8 oz cream cheese, softened
- 1/2 cup mayonnaise
- 1/2 cup sour cream
- 3 green onions, sliced thin
- Salt and black pepper, to taste
- Tortilla chips, pita crisps, or veggies for serving
Directions
- Preheat oven to 350°F (175°C). Grill corn as above, cool, and slice off the kernels.
- In a large skillet, melt butter over medium-high. Add garlic, onion, bell peppers, and jalapeño. Sauté about 5 minutes until just golden. Add green chiles; stir. Remove from heat to cool slightly.
- In a large bowl, combine 1 cup pepper jack, cream cheese, mayonnaise, sour cream, and green onions. Stir until smooth.
- Add roasted corn and sautéed veggie mixture. Stir until well-combined.
- Scrape into a baking dish, sprinkle remaining 1/2 cup cheese on top.
- Bake for 20–25 min, until golden and bubbly. Serve hot with chips or dippers of choice.
Recipe Notes:
- Short on time? Use frozen corn—just brown it in a skillet first.
- For a lighter version: Swap in light cream cheese, low-fat sour cream, or Greek yogurt.
- Storing: Keeps in fridge for 3 days; reheat in oven or microwave.
Nutrition Information (Approximate Per Serving)
- Calories: 270
- Protein: 6g
- Fat: 21g
- Carbs: 16g
- Sodium: 370mg
Values vary by ingredients and serving size; use as a guideline only.
Final Thoughts: Why Roasted Corn Dip Belongs at Your Next Party
Creamy and boldly flavored with layers of sweet, smoky, spicy, and tangy notes, roasted corn dip is destined to be the highlight of your snack table. Its tender corn, melting cheese, and colorful veggies make every scoop irresistible. Tweak the recipe to fit your tastes, prep in advance, and look forward to a dish your guests will request again and again!


