


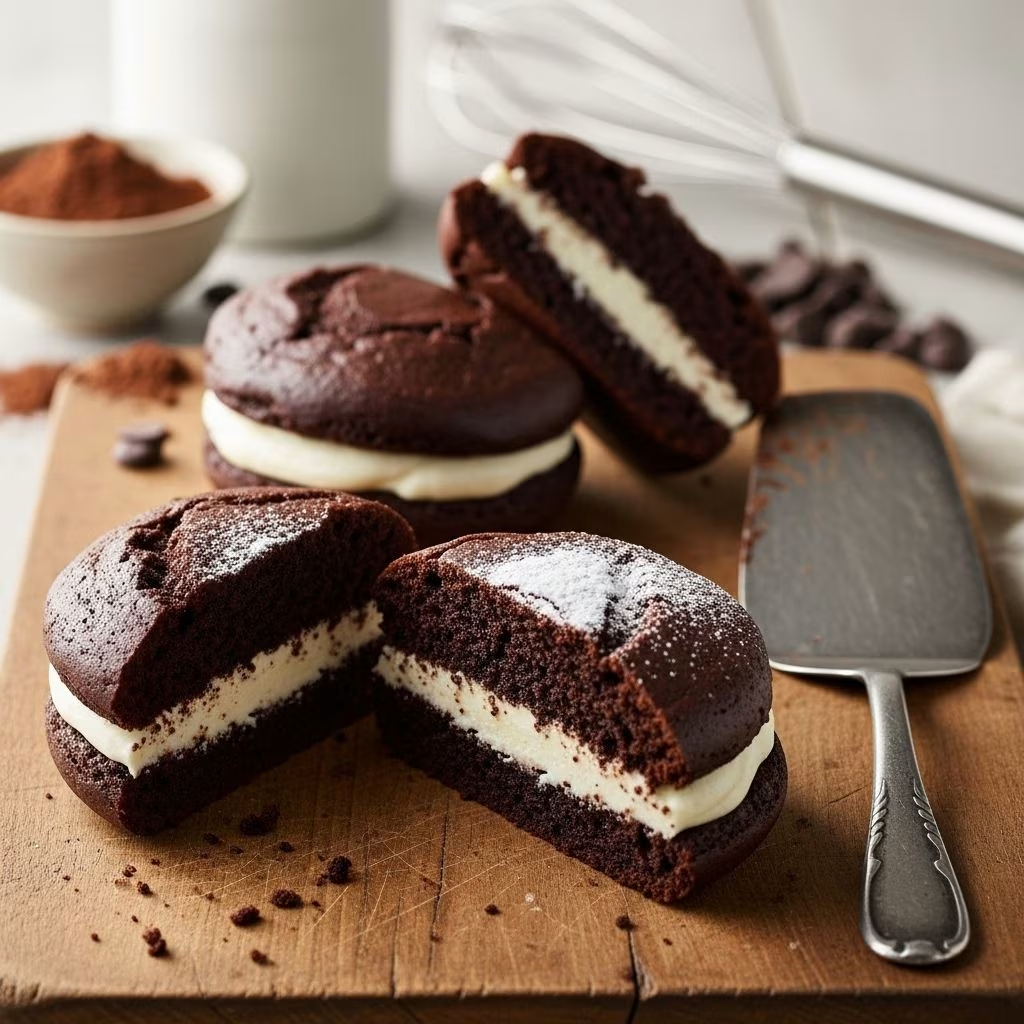
Devil Dogs: The Iconic Chocolate Cake Dessert
If you’ve ever longed for the nostalgic taste of devil dogs—chocolate cake sandwiches with a fluffy cream filling—then you’re in the right place. These treats, reminiscent of childhood lunchboxes and corner store indulgences, combine two soft chocolate cakes with a dreamy whipped filling. Unlike their store-bought counterparts, homemade devil dogs are incredibly fresh, rich, and customizable. This detailed guide walks you through every part of the process, from cake to filling, with all the tricks and tips you need to make them perfectly at home.
What Are Devil Dogs?
Ask someone about devil dogs and you may find the answer changes depending on who you ask. For some, the name conjures an ultra-chocolaty cake with a whipped filling, while others might think of a mischievous college mascot—or even a loaded hot dog. But in the classic American baking lexicon, devil dogs are soft, oblong pieces of chocolate cake sandwiched together with a light, creamy center. They’re part of the same family as Suzy Q’s or homemade Ding Dongs, but without the chocolate coating. Simply put, they’re a celebration of chocolate and cream in hand-held form.
- Devil dogs combine chocolate cake and whipped filling.
- Similar in spirit to treats like Ding Dongs and Suzy Q’s (but with unique shape and style).
- Perfect for sharing, parties, lunchboxes, and dessert tables.
Understanding the Devil Dog Debate
The term “devil dog” means different things to different people—some recall it as a chocolate dessert, others as something entirely unrelated. Still, the version covered here follows the tradition of a cocoa-rich cake with cream filling. It’s an American classic that bridges nostalgia and simple homemade comfort.
Ingredients You’ll Need
The beauty of this recipe is its reliance on pantry staples. Both the chocolate cake and the signature frosting are made from ingredients you probably already have:
- For the chocolate cake:
- All-purpose flour
- Granulated sugar
- Salt
- Unsweetened cocoa powder (use heaping spoonfuls for deep flavor)
- Butter
- Boiling water
- Buttermilk
- Eggs
- Baking soda
- Vanilla extract
- For the filling (the famous ‘Best Frosting I’ve Ever Had’):
- All-purpose flour
- Milk (or half-and-half for extra richness)
- Unsalted butter
- Granulated sugar (not powdered sugar)
- Vanilla extract
How to Make Devil Dogs: Step-by-Step
1. Bake the Chocolate Sheet Cake
This recipe starts with a moist, rich chocolate sheet cake. The process is straightforward—mix dry and wet ingredients separately, combine, then bake the batter in a large, greased pan to produce an even layer that’s easy to cut later.
- Preheat your oven and thoroughly spray a rectangular sheet pan with nonstick baking spray.
- Whisk together flour, sugar, salt, and cocoa in a large mixing bowl.
- In a saucepan, melt butter, add water and bring to a boil, then pour it over the dry mixture and stir lightly.
- In another bowl, whisk together buttermilk, eggs, baking soda, and vanilla. Combine with the chocolate mixture.
- Pour batter into the pan and bake until set and springy to the touch.
- Let the cake cool completely in the pan—this is essential for easy cutting and proper filling assembly.
2. Prepare the Whipped Cream Filling
Traditional devil dogs are filled with a luscious, extra-fluffy vanilla cream. The unique technique uses a cooked flour and milk base—different from classic buttercream—which produces a whipped texture that stays stable between the cake layers.
- Whisk flour into milk (or half-and-half) and cook over low heat, stirring, until the mixture thickens dramatically (like brownie batter).
- Remove from heat and let cool to room temperature—quick tip: set the pan over a bowl of ice to speed things up.
- Beat butter and sugar on high until extremely light and fluffy. Don’t stop beating until the sugar is fully dissolved—graininess is your enemy here.
- Add the cooled flour-milk mixture and vanilla, then beat again until the icing transforms into a pale, whipped cream-like texture.
3. Assembly: Cutting, Filling, and Sandwiching
Once both components are cooled and ready, it’s assembly time! These step-by-step tips ensure neat, uniform devil dogs with exactly the right filling-to-cake ratio:
- Turn the sheet cake out of the pan gently onto a flat surface.
- Use rectangular cutters or a sharp knife to cut even, clean rectangles. (Nesting cutters work well, but careful hand-cutting does the trick, too.)
- Arrange rectangles bottom side up on a baking sheet. Chill them briefly in the refrigerator; this keeps the filling firm when assembling.
- Load the whipped frosting into a piping bag fitted with a plain or open star tip. Pipe a generous layer onto half the cake rectangles.
- Top each filled rectangle with a second piece of cake, pressing gently so the filling spreads evenly to the edges.
- Optional but recommended: pipe a small dollop of filling on top and finish with a maraschino cherry for vintage charm.
Tips for Success
- Be patient as you cool both cake and frosting base; warmth leads to melting or slippery filling.
- If you’re in a hurry, chill the flour-milk frosting base with an ice bath.
- For the neatest sandwiches, trim cake edges before cutting rectangles.
- Use any whipped-type filling you love: classic, Cool Whip (in a pinch), or your favorite stabilized whipped cream.
- Chill assembled devil dogs until serving. The cold will keep the filling firm and help meld all the flavors together.
Alternative Fillings and Flavor Variations
The classic filling is heavenly, but you have plenty of room for creativity:
- Swap vanilla for almond, coffee, or hazelnut extracts in the frosting base.
- Add a cocoa powder touch to the filling for double-chocolate.
- Use a marshmallow fluff based spread for an extra nostalgic twist.
- Mix in finely crushed cookies, freeze-dried fruit powder, or citrus zest.
Recipe: Homemade Devil Dogs
Chocolate Sheet Cake
| Ingredient | Amount |
|---|---|
| All-purpose flour | 2 cups |
| Granulated sugar | 2 cups |
| Salt | 1/4 teaspoon |
| Unsweetened cocoa powder | 4 tablespoons (heaping) |
| Butter | 2 sticks (1 cup) |
| Boiling water | 1 cup |
| Buttermilk | 1/2 cup |
| Eggs | 2 large, beaten |
| Baking soda | 1 teaspoon |
| Vanilla extract | 1 teaspoon |
Creamy Whipped Filling
| Ingredient | Amount |
|---|---|
| All-purpose flour | 5 tablespoons |
| Milk or half-and-half | 1 cup |
| Butter | 1 cup (2 sticks), room temp |
| Granulated sugar | 1 cup |
| Vanilla extract | 1 teaspoon |
Assembly Extras
- Maraschino cherries, for topping (optional)
- Piping bag and tip
Serving Suggestions
Homemade devil dogs are best served slightly chilled. Their sturdy yet tender cake and airy filling make them ideal for birthday parties, family holidays, or simply as a nostalgic weekend treat. They keep well for a day or two in the refrigerator—if you can resist eating them all immediately!
Storage Tips
- Refrigeration: Store in an airtight container. The whipped filling holds up best when cold.
- Freezing: If planning ahead, freeze the assembled cakes (without the cherry) and let thaw in the fridge before serving.
Frequently Asked Questions (FAQs)
Q: Are devil dogs the same as Ding Dongs?
A: Though closely related, devil dogs are typically chocolate cake rectangles with whipped filling, while Ding Dongs are round, chocolate-coated, and also filled with cream. The filling types may differ, but the spirit is the same.
Q: Can I use boxed cake mix for devil dogs?
A: Yes, you can use a high-quality boxed mix for convenience; just make sure it bakes up sturdy enough to cut and handle. Homemade versions yield better flavor and texture control.
Q: Why is the filling cooked with flour and milk?
A: Cooking the flour and milk creates structure and helps stabilize the frosting, allowing it to hold its shape and remain fluffy between the layers.
Q: Can I customize the size and shape?
A: Absolutely! Use cookie cutters for rounds, hearts, or any other shape you desire. Adjust the size for mini devil dogs or giant ones for sharing.
Q: What can I do with cake scraps?
A: Save cake scraps for trifles, cake pops, or to snack on while you assemble the devil dogs!
Pro Tips for the Perfect Devil Dogs
- Grease your baking pan thoroughly to ensure easy removal of the cake.
- Let all components cool before combining—warm cake will melt the filling.
- Be generous but not excessive with the filling; overfilling may cause spillage.
- Chilling helps the cakes set up for slicing and serving cleanly.
- Consider making a double batch—the first batch disappears fast!
Share the Love
Devil dogs are a labor of love that always deliver smiles. Bake a platter for your next gathering, package single servings as sweet gifts, or bake with kids for an afternoon activity. With rich chocolate cake and clouds of whipped cream, these homemade treats are destined to become a household favorite.


