


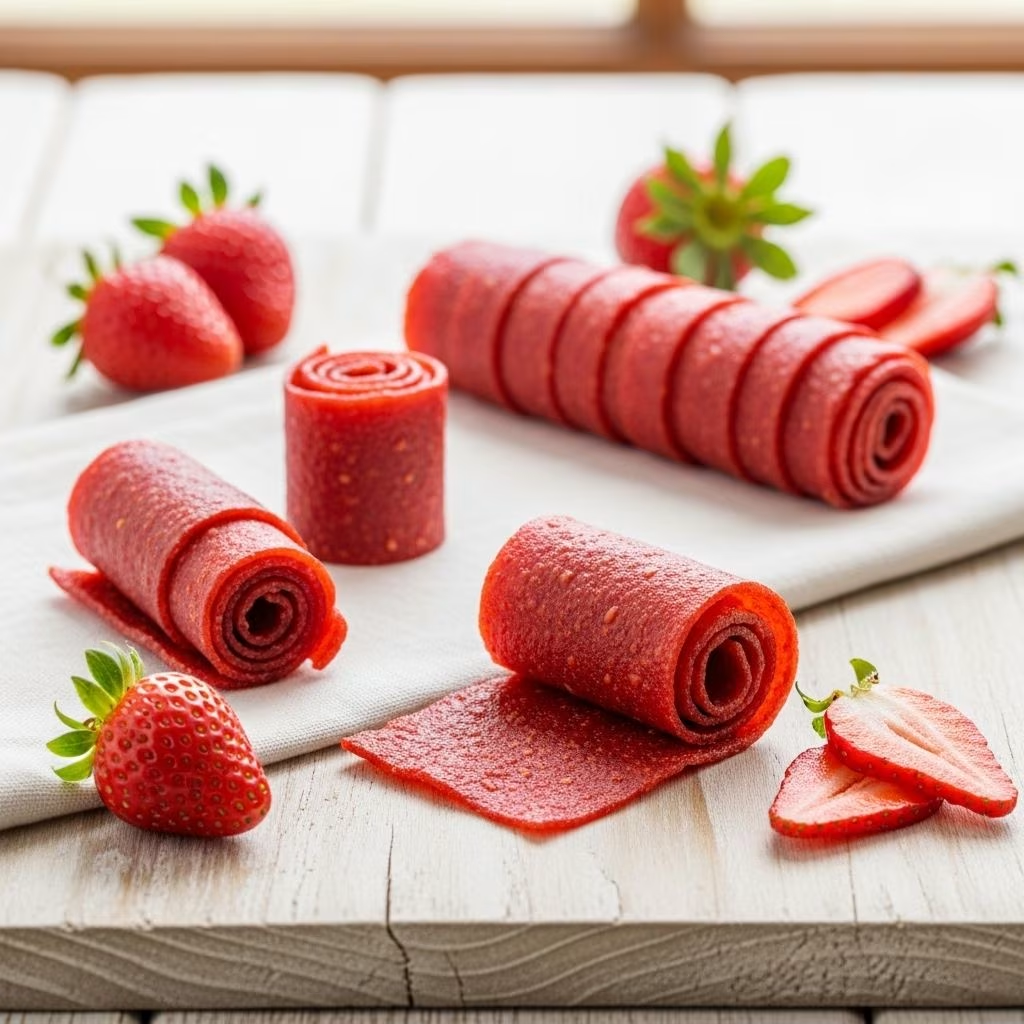
Homemade Strawberry Fruit Roll-Ups
Skip the processed snacks and enjoy the pure taste of strawberries with homemade fruit roll-ups. Using just a handful of ingredients, you can easily create chewy, vibrant strawberry leather that’s naturally sweet, packed with flavor, and much healthier than store-bought alternatives. This guide covers everything from ingredient selection to troubleshooting, so you can master this classic snack at home.
Why Make Your Own Fruit Roll-Ups?
- Healthier and customizable: Control the sweetness, freshness, and fruit combination.
- Minimal ingredients: Just strawberries, sugar (optional), and lemon juice.
- No specialty equipment needed: The process works with a basic oven and common kitchen tools.
- Perfect for all ages: Fun treat for kids and nostalgic snack for adults.
Essential Ingredients & Equipment
- Strawberries: Choose ripe, flavorful berries for the best-tasting roll-ups. About 4 cups chopped (approximately 1½ lbs whole).
- Sugar (optional): Use ½ cup granulated sugar if desired. Adjust or eliminate based on berry ripeness and sweetness preference.
- Lemon juice: 2 tablespoons provide brightness and natural preservation.
- Sheet pan and parchment paper
- Blender or food processor
You can also substitute with other fruits or blend with strawberries for unique flavors. Frozen fruit works as well—just thaw and drain first.
Step-by-Step Instructions
- Prepare fruit: Wash, hull, and chop strawberries. For extra-smooth fruit leather, optionally strain out seeds with a fine mesh sieve.
- Cook fruit mixture: Combine strawberries, sugar, and lemon juice in a saucepan. Simmer on medium to medium-low heat, stirring frequently, until the mixture thickens to a jam-like consistency (about 20–25 minutes). Allow to cool for 10 minutes.
- Puree: Blend the cooked fruit mixture until completely smooth with no visible chunks.
- Spread on baking sheet: Line a rimmed sheet pan with parchment paper. Pour and spread the puree thinly and evenly—about 1/16–1/8 inch thickness. Use an offset spatula for a uniform layer.
- Dry in oven: Set your oven to its lowest setting (typically 150–180°F / 66–82°C). Bake for 4–8 hours, checking after 4 hours and then approximately every 30 minutes. The fruit leather is ready when dry, no longer sticky, and peels cleanly.
- Cool and cut: Allow to cool fully before cutting into strips using scissors or a pizza cutter.
- Roll and store: Roll fruit strips in parchment or wax paper for easy storage and snacking.
Quick Tips for Success
- Even thickness: Ensure the puree is spread evenly for consistent drying and texture.
- Check doneness: Fruit leather should be dry, glossy, and pliable, but not brittle.
- Seedless option: Strain the mixture after blending if you prefer a smoother result.
- Cool before cutting: Prevents tearing and sticking.
- Flavor variations: Combine with raspberries, mangoes, or even add a dash of vanilla for unique twists.
Storing & Packing Tips
- Room temperature: Store in an airtight container at room temperature for up to two weeks. Lemon juice helps extend shelf life by acting as a natural preservative.
- Refrigerator: For longer storage, refrigerate; use wax paper or parchment to separate layers.
- On-the-go: Wrap individual strips in parchment for easy lunchbox or snack packing.
Nutritional Highlights
| Nutrient | Per Serving (approx.) |
|---|---|
| Calories | ~13–20 |
| Fat | 0g |
| Carbohydrates | ~3–5g |
| Sugars | Varies (depending on sugar addition & fruit) |
| Vitamin C | High (from strawberries & lemon juice) |
*Homemade fruit roll-ups are naturally fat-free, low-calorie, and offer fiber and antioxidants from whole fruit.*
Expert Tips for Best Results
- Fruit selection: Ripe, in-season strawberries provide the best flavor and color.
- Sweetness adjustment: Taste the puree before adding sugar; some berries are sweet enough without it.
- Puree texture: If puree is too watery, prolong the stovetop simmer; if too thick, add a splash of water or lemon juice.
- Oven temperature: If your oven won’t go below 170°F/77°C, prop the door open with a heat-safe utensil for air circulation and lower temps. Avoid over-drying.
- Uniform drying: Rotate sheet pans if your oven has hot spots.
- Frozen fruit: Thaw and drain well to avoid excess moisture that slows drying.
Troubleshooting & FAQs
Why is my fruit roll-up sticky or not drying?
Sticky results often mean the puree layer was too thick or the oven temperature too low. Check doneness frequently after 4 hours and use even, thin layers.
Can I make these without added sugar?
Yes. If your strawberries are very ripe and sweet, you can omit sugar. Taste the puree before baking.
How can I avoid seeds?
After blending, press the puree through a fine mesh strainer to remove seeds for a smoother fruit roll-up.
Can I use a food dehydrator?
Absolutely. Spread the puree on nonstick dehydrator trays and follow the dehydrator’s fruit leather settings (usually 135–140°F).
How do I know when the fruit leather is done?
The leather should be shiny, dry to the touch, and peel away from the paper without sticking or ripping.
How long do homemade fruit roll-ups last?
With lemon juice and proper storage, they keep at room temperature up to 2 weeks or refrigerated for up to a month.
Fun Flavor Variations
- Strawberry-Raspberry: Tangy and vibrant, use equal parts of each fruit.
- Strawberry-Mango: Adds sweetness and tropical notes.
- Strawberry-Rhubarb: Tart, old-fashioned flavor—add sugar to balance tartness.
- Spiced Roll-Ups: Add a pinch of cinnamon or ginger for extra depth.
- Mixed Berry: Use a combination of strawberries, blueberries, blackberries, and raspberries.
DIY Fruit Roll-Up Tips for Families
- Kid-friendly: Let kids help roll up the cut strips for snack-time fun.
- Allergy friendly: Naturally gluten-free, dairy-free, nut-free, and vegan.
- Lunchbox ready: Rolls travel well and don’t require refrigeration for short periods.
Frequently Asked Questions (FAQs)
Q: Can I make fruit roll-ups with frozen strawberries?
A: Yes, thaw and drain the fruit first to avoid excess liquid, then proceed as with fresh berries.
Q: How do I prevent roll-ups from sticking together when storing?
A: Use parchment or wax paper to separate layers, or roll each strip in paper before storing.
Q: Is there a way to make these without an oven?
A: You can use a food dehydrator following the same method, or try air-drying in very dry climates, though results are less consistent.
Q: Are homemade roll-ups as chewy as store-bought?
A: The texture is very similar, with a satisfyingly chewy consistency—plus more real fruit flavor and less processed sugar!
Q: Can I use honey or maple syrup instead of sugar?
A: Yes, but add sparingly. Liquid sweeteners can affect drying time and texture.
Final Thoughts
Homemade strawberry fruit roll-ups are simple to make, customizable, and a fantastic way to enjoy real fruit in snack form. Whether you eat them straight from the jar or tuck them into lunches, these treats are sure to please everyone. Try new combinations, get creative with flavors, and enjoy the wholesome taste and colors of homemade fruit leather—all made right in your own kitchen.


