


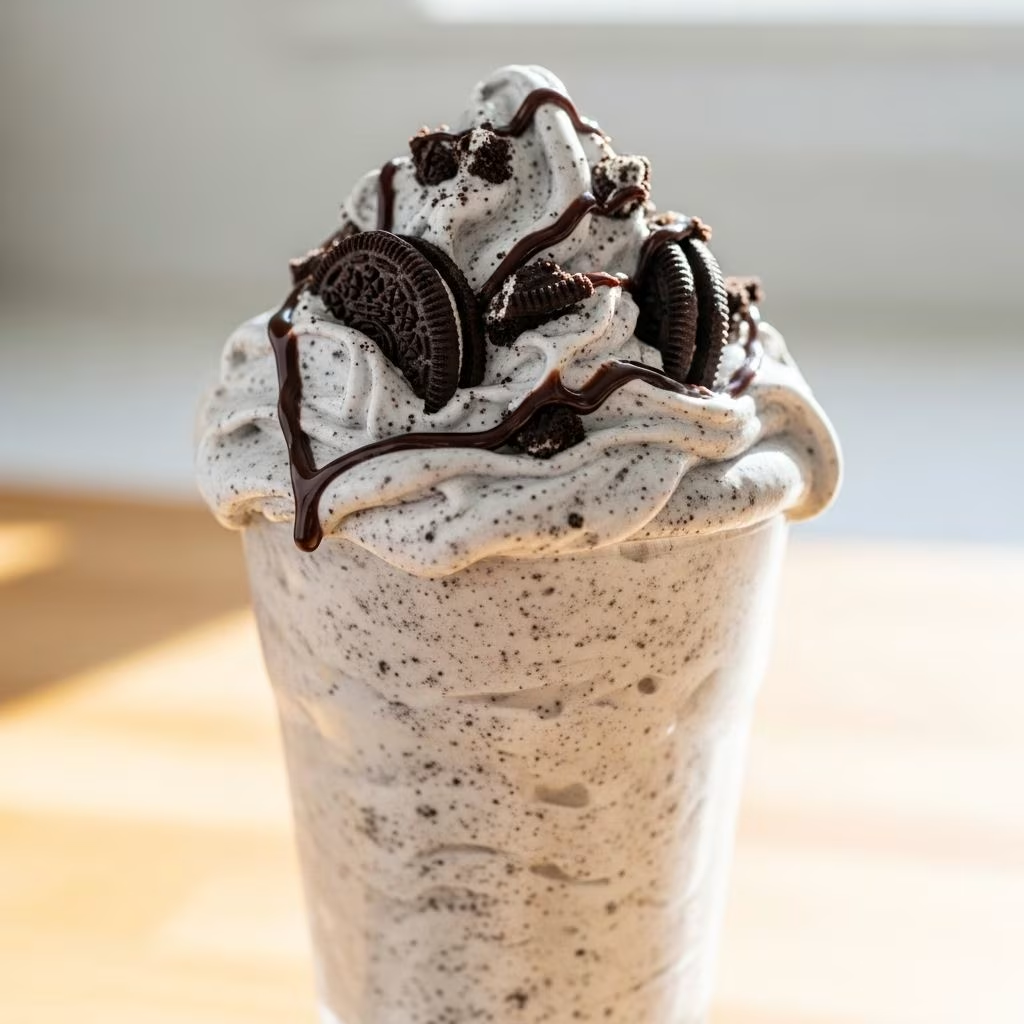
Craving the creamy, decadent Oreo Blizzard from Dairy Queen but don’t want to make a trip or wait in line? With the right ingredients and a few sneaky technique tips, you can replicate this iconic frozen treat right in your own kitchen. This guide walks you through choosing the best base, achieving that signature Blizzard texture (that passes the upside-down test), and inventing your own custom mix-ins for a truly satisfying at-home dessert experience.
Why Make Your Own Blizzard?
Homemade Blizzards unlock a world of creative flavors and let you customize texture, sweetness, and portion size. Skip the drive-thru and enjoy your twist on a beloved treat, tailored to your preferences, right at home.
- Customizable: Control your mix-ins, ingredient quality, and sweetness level.
- Cost-Effective: Enjoy big servings for a fraction of the drive-thru price.
- Fun for All Ages: Making Blizzards is an interactive project for families, parties, or solo dessert lovers.
- Year-Round Enjoyment: Perfect for hot summers or cozy winter days when cravings strike.
The Science of Blizzard Texture
A true Dairy Queen Blizzard has a unique consistency: thick, smooth, and creamy—dense enough to hold in the cup even if turned upside down (the famous “upside-down test”). Achieving that texture at home requires paying close attention to both ingredient temperature and mixing technique.
- Soft, Not Runny: The ice cream must be soft enough to mix but not so melted that it loses its thickness.
- No Blender Needed: While tempting, using a blender or traditional milkshake tools will over-aerate and melt the ice cream, making it runny like a milkshake instead of dense like a Blizzard.
- Stand Mixer Magic: A stand mixer (like KitchenAid) or a powerful hand mixer with a paddle attachment creates just the right blend of creaminess and density.
Essential Blizzard Equipment
- Stand Mixer with paddle attachment (preferred for best texture)
- Hand Mixer (alternative; use low to medium speed)
- Chilled Stainless Steel Bowl (helps maintain cold temperature)
- Flexible Spatula (for folding in mix-ins and scooping out every bit)
- Serving Cups (chilled for best results)
Key Ingredients
For the classic Oreo Blizzard, simplicity rules. Just two ingredients form the backbone of this treat, but ingredient choice matters:
- Vanilla Ice Cream: Opt for a high-quality, creamy brand for best results. Whole milk or premium varieties like Tillamook or Häagen-Dazs have ultra-smooth textures, but any rich vanilla ice cream will do.
- Oreo Cookies: The classic choice! Use regular Oreos—leave them in chunky pieces for texture, or try different Oreo varieties for fun flavor twists (Mint, Golden, Peanut Butter, etc.).
Tip: Let your ice cream sit out for about 10 minutes before mixing to reach the ideal scooping texture.
The Method: Making an Oreo Blizzard at Home
Step-by-Step Instructions
- Chill Your Mixing Bowl
At least 10 minutes before making your Blizzard, place your metal mixing bowl in the freezer. This helps the ice cream stay cold and thick while mixing. - Prep the Oreos
While your bowl chills, coarsely crush 6–8 Oreo cookies. Aim for uneven, chunky bits rather than dust; these give that signature Blizzard texture with a satisfying bite. - Soften the Ice Cream
Remove 2 cups of vanilla ice cream from the freezer. Let it sit at room temperature for 10 minutes, until slightly soft at the edges but still firm in the center (think consistency of soft-serve). - Mix the Ice Cream
Transfer ice cream to the chilled mixing bowl. Using a stand mixer with a paddle attachment (or a hand mixer on low), beat the ice cream just until smooth, about 30 seconds. Avoid overmixing, which can make the ice cream melty. - Fold in the Oreos
Add the crushed cookies to the bowl and gently mix with the paddle (or a spatula), until evenly distributed—some larger Oreo chunks should remain for texture. - Serve Immediately
Spoon the mixture into chilled serving cups. If you want to mimic the DQ experience, see if your Blizzard passes the upside-down test! Enjoy right away for best texture.
Sample Ingredient Table
| Ingredient | Amount (for 2 servings) | Notes |
|---|---|---|
| Vanilla Ice Cream | 2 cups | High-quality, creamy is best |
| Oreo Cookies | 6–8 | Chunky pieces; try flavor variations! |
Technical Tips: Getting the Blizzard Texture Right
- Mix, Don’t Blend: Using a blender or food processor will create a milkshake, not a Blizzard. Stick to a stand or hand mixer for that signature thickness.
- Work Quickly: The colder your bowl and tools, the creamier your ice cream stays. Don’t allow ingredients to sit out too long before mixing.
- Chunky Mix-ins: Don’t pulverize your Oreos—bigger pieces add crunch and visual appeal!
- Chill Serving Cups: Serving in a pre-chilled cup helps prevent the Blizzard from melting too fast, just like the pros.
Blizzard Customizations: Flavors, Mix-Ins, and Variations
Once you master the base Blizzard, the possibilities for customization are endless. Here are some popular and creative twists:
- Peanut Butter Oreo Blizzard: Add a heaping spoonful of peanut butter to the ice cream just before mixing in the Oreos. Use Peanut Butter Oreos for double flavor.
- Mint Oreo Blizzard: Swap in Mint Oreos and add a drop of peppermint extract.
- Chocolate Overload: Use chocolate or cookies-&-cream ice cream as the base; fold in chocolate chips or a drizzle of fudge sauce.
- S’mores Blizzard: Substitute crushed graham crackers and mini marshmallows for the Oreos, plus chocolate chips or fudge.
- Candy Mix-In: Try chopped peanut butter cups, M&M’s, toffee, or your favorite candy bars.
- Fruit Swirl: Fold in fresh strawberries, cherries, or raspberry preserves for a fruity, creamy treat.
See the recipe as a template: You’re only limited by your sweet tooth and imagination!
Frequently Asked Questions (FAQs)
Q: What makes a Blizzard different from a milkshake?
A: Blizzards are thicker and denser than milkshakes, with the consistency of soft serve ice cream that holds mix-ins suspended without sinking. Milkshakes are blended (often with milk) until pourable, whereas Blizzards are just softly mixed ice cream and add-ins.
Q: Can I make a Blizzard without a stand mixer?
A: Yes, you can use a hand mixer, or even a sturdy spatula if the ice cream is softened enough—but a stand mixer with a paddle attachment gives the best texture and makes mixing easier.
Q: Which brand of ice cream works best?
A: Premium brands with high fat and low air content (overrun) are ideal, as they result in a creamier, denser Blizzard. Any good-quality vanilla ice cream works, but brands like Tillamook, Häagen-Dazs, or local boutique brands shine in homemade treats.
Q: Why can’t I use a blender?
A: A blender introduces too much air and generates heat, which melts the ice cream and breaks up the cookies too finely, resulting in a runny milkshake—not a Blizzard. The key is gentle folding for dense, spoonable texture.
Q: How do I store leftovers?
A: Homemade Blizzards are best eaten fresh. If you need to store leftovers, transfer to a freezer-safe container and freeze. Let sit at room temperature for a few minutes before eating to return to ideal scooping consistency.
Dietary Modifications and Allergy Advice
- Dairy-Free Blizzard: Use rich non-dairy ice creams (such as coconut milk or oat milk base) and check for dairy-free sandwich cookies.
- Gluten-Free Blizzard: Choose gluten-free sandwich cookies and pair them with gluten-free vanilla ice cream.
- Reduced Sugar: Use lower-sugar ice creams and cookies. Mixing in fresh fruit can also add sweetness with less processed sugar.
Approximate Nutrition Information (Per Serving)
| Calories | Total Fat (g) | Sugar (g) | Protein (g) |
|---|---|---|---|
| ~450 | 22 | 36 | 5 |
These numbers are approximate and depend on your choice of ice cream and cookie.
Troubleshooting Common Issues
- Runny Blizzard? Start with colder ice cream and a chilled bowl. Work fast and avoid overmixing. Never use a blender.
- Too Stiff to Stir? Let the ice cream soften for a few minutes, or briefly microwave for 5 seconds before mixing.
- Cookies Too Soggy? Add cookie chunks right before serving and avoid overmixing for best crunch.
Serving & Presentation Ideas
- Spoon your Blizzard into a tall, chilled glass or classic soda fountain cup.
- Top with whipped cream, extra crushed Oreo crumbs, or a drizzle of fudge.
- Serve with a long spoon for maximum mix-in retrieval!
Blizzard Inspiration: Popular Flavor Ideas
| Flavor Name | Base Ice Cream | Main Mix-In |
|---|---|---|
| Classic Oreo | Vanilla | Oreo Cookies |
| Peanut Butter Lover’s | Vanilla / Peanut Butter | Peanut Butter Oreos & swirled PB |
| Choco-Mint Crunch | Mint Chocolate Chip | Mint Oreos |
| S’mores | Vanilla | Graham Crackers, Marshmallows & Chocolate Chunks |
| Reese’s Pieces | Vanilla | Chopped Reese’s & PB Cups |
Pro Tips for Better Homemade Blizzards
- Use heavy cream or milk to slightly loosen extra-firm ice cream if needed, but only a tablespoon at a time.
- For the classic DQ magical swirl look, use a large piping bag to fill your cup.
- The thicker the starting ice cream, the closer the final texture will be to authentic Blizzard consistency.
More Ways to Satisfy Your Blizzard Craving
- Pair your Blizzard with homemade brownies, cookies, or cake for added decadence.
- Try freezing bite-sized portions for a frozen party treat pop.
- Host a Blizzard bar with a variety of ice creams and toppings for friends or family to mix their own creations!
Conclusion
With a handful of ingredients and a bit of technique, you can transform your kitchen into the ultimate Blizzard stop—no car keys required. Whether you stick to the classic Oreo or invent your own signature creation, the homemade Blizzard is bound to become a go-to dessert for celebrations, family fun, or solo indulgence. Get mixing, get creative, and don’t forget the upside-down test!


