


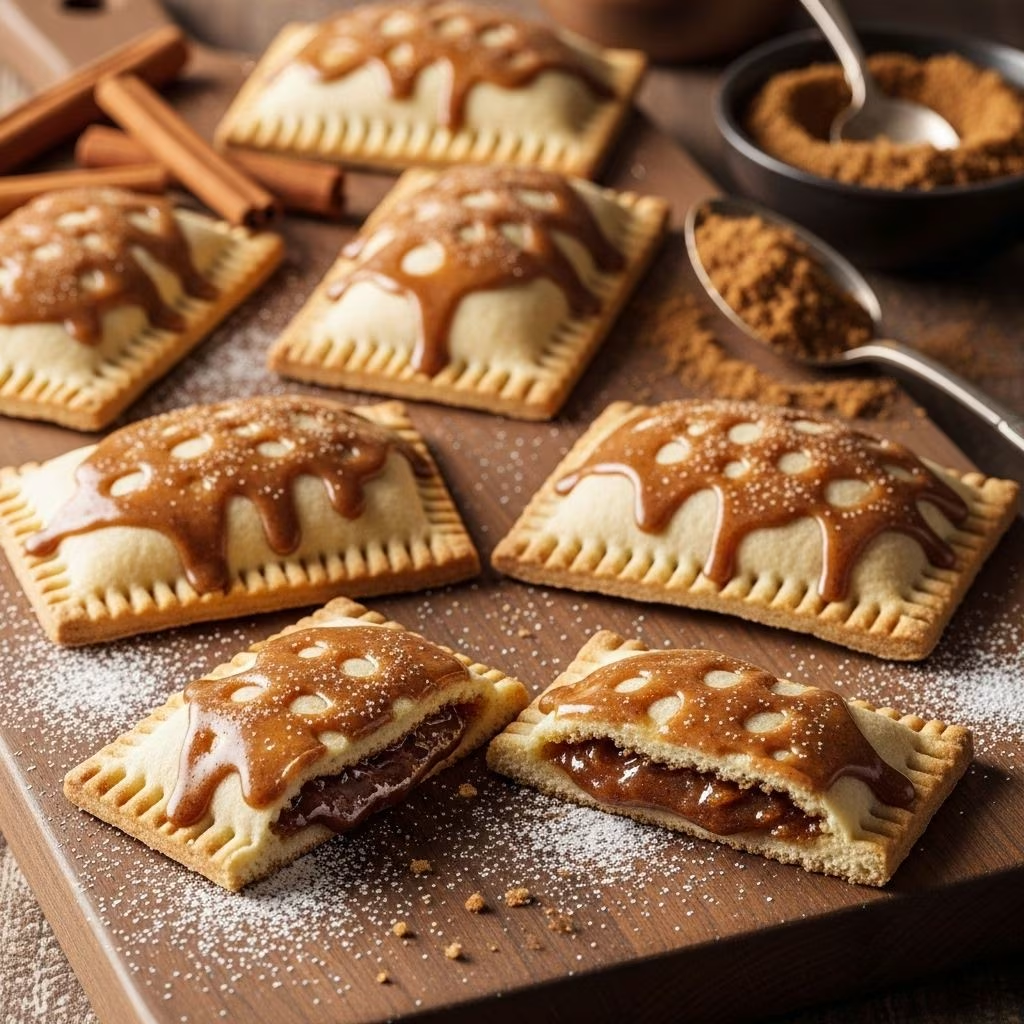
How to Make Brown Sugar Cinnamon Pop-Tarts at Home
Few breakfast treats stir up nostalgia like Brown Sugar Cinnamon Pop-Tarts. Their flaky pastry, cinnamon-kissed brown sugar filling, and sweet icing have delighted generations. Luckily, you can recreate this iconic treat at home, producing pastries that not only taste but feel like the real thing—only better. This detailed guide walks you through the ingredients, method, and secrets that ensure your homemade Pop-Tarts both look authentic and pack maximum flavor.
Why Homemade Pop-Tarts?
Store-bought Pop-Tarts are convenient and fun, but homemade varieties let you control the quality of each element—from the dough’s texture to the depth of the filling. Homemade Pop-Tarts feature:
- Buttery, flaky pastry that outshines commercial versions.
- Deeply spiced brown sugar-cinnamon filling with real ingredients.
- Smooth, glossy icing that hardens with that signature crackle.
- No artificial flavors or preservatives, just pure comfort.
The Anatomy of the Perfect Pop-Tart
Before diving into the recipe, let’s break down what makes a Brown Sugar Cinnamon Pop-Tart truly authentic. Each element contributes to the signature taste and texture:
- Pastry Shell: Not puff pastry, but a crisp, short dough—delicate yet sturdy enough to contain its filling without shattering.
- Brown Sugar Cinnamon Filling: A deeply flavored mixture of brown sugar, cinnamon, and a bit of flour to hold it together, offering both sweetness and warmth.
- Signature Icing: A thin, pale glaze, not too thick, applied in a rectangle to mimic the commercial look and crackle like the real thing.
Ingredients Overview & Special Considerations
Let’s examine what you’ll need for each component:
For the Dough
- Flour: All-purpose for classic texture. A gluten-free blend may be substituted, with minor adjustments.
- Cold Butter: Yields superior flakiness and flavor.
- Kosher Salt: Essential for balance.
- Corn Syrup: Promotes moisture retention and a tender crumb—crucial for authentic texture.
For the Filling
- Light Brown Sugar: Delivers the authentic flavor base.
- Ground Cinnamon: Provides a warming, aromatic depth.
- All-purpose Flour: Helps thicken the filling and prevents leakage.
- Kosher Salt: Enhances flavor and balance.
For the Icing
- Powdered Sugar: For a classic, crackly glaze.
- Corn Syrup: Adds shine and helps set the icing firmly.
- Milk: Shapes icing consistency.
- Ground Cinnamon (optional): For extra spice in the glaze.
Step-by-Step Guide: Making Authentic Pop-Tart Pastry
1. Mixing the Dough
The authentic Pop-Tart dough is simple—more tender than a pie crust, less flaky than puff pastry. The process:
- In a large bowl, whisk together the flour and salt.
- Add cold, cubed butter and cut it in until the mixture forms coarse crumbs with pea-sized bits.
- Drizzle over corn syrup and mix until the dough comes together. Avoid overmixing; a homogenous but supple dough is perfect.
Tip: Chill the dough well before rolling. This ensures easy handling and the signature Pop-Tart texture.
2. Rolling & Cutting
- Divide the chilled dough and roll it to about 1/8-inch thickness. Authenticity comes from precision—use a ruler for neat rectangles.
- Cut rectangles approximately 3.25 x 4.25 inches. Keep dough scraps cold for easy re-rolling.
Pro tip: Stack dough rectangles between parchment sheets and chill until ready to fill.
Mixing the Brown Sugar Cinnamon Filling
This classic filling is more than just brown sugar and cinnamon—it’s perfectly balanced and purposefully textured.
- Stir together brown sugar, cinnamon, flour, and salt until evenly combined.
- Use enough flour to give the filling structure, helping it stay put during baking and mimic the fuss-free bite of the original.
Shaping, Filling, and Assembling Pop-Tarts
3. Filling the Dough
- Lay out half of your pastry rectangles on parchment.
- Spoon 1–2 tablespoons of filling in the center, leaving a small margin all around. Spread evenly for a flat, commercial look.
Important: The filling should stop short of the edges to avoid leaking in the oven.
4. Sealing the Edges
- Top with remaining dough rectangles, smoothing gently and encasing the filling with no air pockets.
- Press edges to seal—no crimping! True Pop-Tarts don’t have forked or crimped edges; a smooth seam is authentic.
Tip: Use a bench scraper or the blunt edge of a utensil to seal. Press gently rather than forcefully so as not to distort the shape.
5. Docking & Chilling
- Use a fork to dock (prick) the top of each Pop-Tart eight times (two rows of four). This allows steam to escape and prevents puffing.
- Chill assembled Pop-Tarts well before baking to maintain shape.
Baking Your Pop-Tarts: Achieving the Real Look
Pop-Tarts aren’t deep golden; they’re barely browned for a characteristic look.
- Preheat oven to 350°F (180°C). Place Pop-Tarts on a parchment-lined sheet.
- Bake for 18–22 minutes, until the surface is dry with only a hint of color, not golden brown.
Patience pays off—let them cool completely before icing.
Making the Iconic Pop-Tart Icing
The distinctive brown sugar cinnamon icing is glossy, fragile, and cracks perfectly when bitten.
- Whisk powdered sugar with corn syrup, a splash of milk, and cinnamon (if desired) until shiny and pourable.
- Spread a rectangle of icing on each cooled Pop-Tart, mimicking the neat, boxed look.
- Let the icing set fully until dry and crisp to the touch.
For extra authenticity, keep the icing within the scored border, just like store-bought treats.
Expert Tips for Pop-Tart Success
- Use Cold Ingredients: Cold butter and dough result in tender pastry and minimal spreading.
- Mind the Edges: Don’t crimp—just seal; this ensures a true Pop-Tart shape with a smooth seam.
- Filling Consistency: Don’t overfill—this avoids leaks and overly thick centers.
- Dough Handling: Keep scraps cold, and reroll carefully to avoid toughening.
Custom Variations and Flavor Ideas
While brown sugar cinnamon is classic, expand your repertoire with easy variations:
- Substitute fruit fillings: apple or prune with spices for a festive twist.
- Try jam-based fillings (ensure they’re thick or add a bit of flour to stabilize).
- Add rainbow sprinkles or chocolate drizzle for kid-friendly flair.
- Mix spices into the dough for extra warmth and complexity.
- Use a gluten-free flour blend to accommodate dietary needs (increase binder if needed).
Comparing Homemade vs. Store-Bought Pop-Tarts
| Aspect | Homemade | Store-Bought |
|---|---|---|
| Pastry Texture | Buttery, crisp, and flaky | Tender but often dry and crumbly |
| Filling | Rich flavor, real brown sugar & spices | Sweeter, sometimes artificial flavor |
| Icing | Crackly, shiny glaze, real taste | Often thicker, very sweet |
| Customization | Endless combinations | Limited to available flavors |
| Preservatives | None; fresh ingredients | Contains stabilizers |
Serving, Storage, and Reheating Tips
- Enjoy Fresh: Homemade Pop-Tarts are best eaten the day they’re made, when the icing is crisp and the pastry fresh.
- Storage: They keep well in an airtight container at room temperature for up to three days.
- Reheating: Warm in a 300°F (150°C) oven for a few minutes; avoid toasting to prevent icing from melting.
- Freezing: Freeze un-iced Pop-Tarts, thaw, then ice and serve for optimal texture.
Frequently Asked Questions (FAQs)
Q: Can I substitute honey or maple syrup for corn syrup?
A: While you can use honey or maple syrup, the dough’s texture and tenderness may change. Corn syrup is key to replicating that signature commercial Pop-Tart bite.
Q: My filling is leaking. What am I doing wrong?
A: Ensure there is a margin around the filling, and seal edges thoroughly. Also, avoid overfilling and chill the tarts before baking to help maintain their structure.
Q: The icing isn’t setting. Any tips?
A: Use corn syrup in the icing and let it air dry completely. If your kitchen is humid, it may take longer for the icing to set and become crispy.
Q: Can I freeze baked and iced Pop-Tarts?
A: Freeze them un-iced for best results. Thaw at room temperature, then glaze once fully defrosted to prevent moisture from ruining the icing’s texture.
Q: Are gluten-free Pop-Tarts possible?
A: Yes. Use a reliable gluten-free flour blend and consider adding a gum-free binder to help dough structure. The result can be just as delicious as the original.
Final Thoughts: Why These Pop-Tarts Truly Satisfy
Homemade brown sugar cinnamon Pop-Tarts blend nostalgia, craft, and unbeatable flavor. They’re the ultimate kitchen project for breakfast treat lovers and are sure to outshine the boxed version. Whether you’re baking for family, friends, or reliving childhood memories, these Pop-Tarts will have you reaching for seconds—if there are any left.


