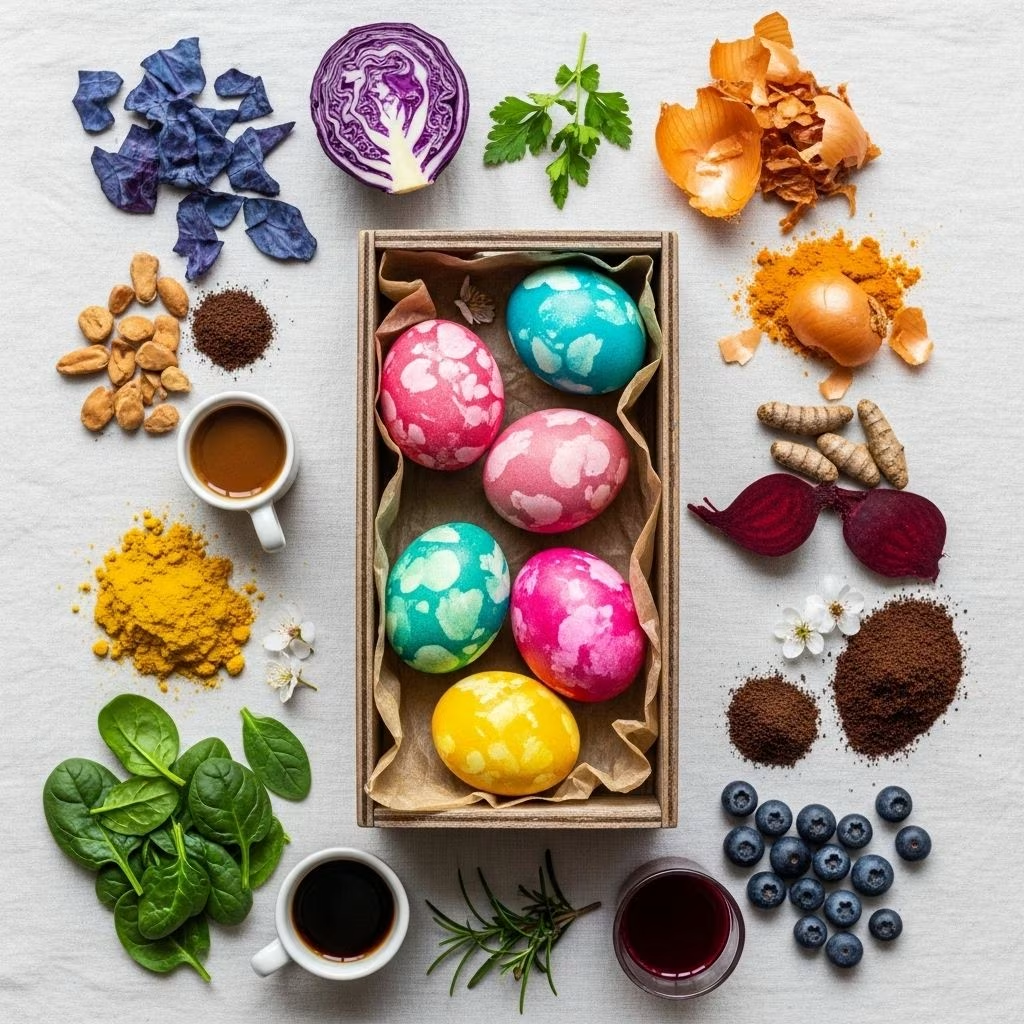
Bring a splash of creativity and eco-friendly spirit to your Easter celebration by dyeing eggs with natural dyes made from fruits, vegetables, spices, and teas. This method gives you the freedom to experiment with colors, minimizes exposure to artificial additives, and yields beautifully unique results that are safe to eat. Whether you’re looking for a fun family tradition or a sustainable craft, this guide covers everything you need for naturally-dyed Easter eggs.
Why Dye Easter Eggs Naturally?
Opting for natural dyes offers several benefits:
- Eco-friendly: Minimizes chemical waste and synthetic dye use, making it better for the environment.
- Safe and Edible: Uses food-grade ingredients so the eggs are safe to eat after dyeing.
- Unique Beauty: Natural dyes produce intricate patterns and subtle shades that can’t be replicated with synthetic colors.
- Creative Discovery: Experimenting with different ingredients and soaking times reveals unexpected color variations.
Natural dyed eggs are more than decoration—they’re edible art with a story, perfect for enjoying and displaying alike.
Essential Tools and Ingredients
To get started, gather the following supplies:
- Eggs: White and brown eggs both work—white for vibrant colors, brown for earthy hues.
- Naturally Coloring Ingredients: Fruits, vegetables, spices, and teas (see detailed list below).
- White Distilled Vinegar: Essential for setting the dye on the eggshell.
- Mason Jars or Bowls: One per dye bath.
- Paper Towels: For drying and handling eggs.
- Tongs or Spoons: For placing and removing eggs from hot dye baths.
- Gloves: (Optional) Prevents hands from staining.
- Strainer or Cheesecloth: For filtering solids out of the dye.
The Natural Dye Color Guide
Mix and match these ingredients to produce gorgeous rainbow shades. Here’s a handy color chart with the best sources for each natural hue:
| Hue | Source Ingredient | Notes/Tips |
|---|---|---|
| Blue | Red cabbage, diluted grape juice | Red cabbage magically turns blue; grape juice offers a soft tint. |
| Purple / Lavender | Blueberries, undiluted purple grape juice | Blueberries yield deep purples; longer soak time deepens shade. |
| Pink | Beets, hibiscus tea | More time = deeper pink; hibiscus adds speckled texture. |
| Yellow | Turmeric, chamomile tea | Turmeric produces bold yellow; chamomile for gentle gold. |
| Green | Spinach, green tea, matcha | Fresh, light greens; soak time deepens tone. |
| Orange | Paprika, yellow onion skins | Onion skins result in rustic orange; paprika can intensify shade. |
| Brown | Strong coffee, black tea | Rich, warm browns; also adds subtle flavor. |
Mixing bath strength and soaking time gives you a surprising variety of colors and effects. Feel free to combine sources for new shades!
Step-by-Step: How to Dye Easter Eggs Naturally
1. Prepare the Dye
- Fruits & Vegetables: Chop and measure a 1:1 ratio—one cup chopped produce to one cup water.
- Spices: Use one tablespoon per cup of water.
2. Make the Dye Bath
- Combine your chosen ingredient and water in a saucepan.
- Bring to a gentle boil, then simmer for 15–20 minutes, until the color is vivid.
3. Strain and Cool
- Strain out any solids using a mesh strainer or cheesecloth.
- Pour the colored liquid into a jar or bowl—one dye per container.
4. Add Vinegar
- Stir in two tablespoons of white vinegar per cup of dye liquid. Vinegar is key to setting the dye on the shell.
5. Dye the Eggs
- Gently submerge hard-boiled eggs in the cool dye baths.
- The longer the soak, the more vibrant and deep the final color will be. For gentle pastels, a few minutes suffice; for rich saturation, leave them for several hours or overnight in the fridge.
- Handle eggs with tongs or a spoon to prevent fingerprints and mix colors by dyeing in two separate baths sequentially.
6. Remove and Dry the Eggs
- Set dyed eggs on a wire rack or paper towel to dry. Letting the dye water dry on the shell gives a textured finish; rinsing results in a smoother look.
- For an extra shine, gently buff once dry with a paper towel lightly dabbed in a natural oil (such as olive or canola).
Pro Tips for the Best Results
- Staining: Both eggs and fingers can pick up stains from natural dyes. Wear gloves and line your workspace with paper towels.
- Egg Selection: White eggs display brighter colors, while brown eggs result in earthier, subtler tones perfect for a rustic aesthetic.
- Patterns & Designs: Use rubber bands, leaf cutouts, or wax crayons to create fun patterns—these areas resist dye and add a decorative touch.
- Fridge Time: Overnight soaking in the refrigerator ensures the richest color saturation and minimizes spoilage risk.
- Flavor: Some dyes (like coffee or onion skins) can impart a faint flavor to the eggs. These are best enjoyed as snacks or in recipes where the flavor suits, such as salads.
Creative Variations and Customization Ideas
- Layered Colors: Double-dip eggs in two or more dye baths for a marbled or ombre effect.
- Botanical Art: Wrap eggs with fresh leaves (like parsley or cilantro) and secure with nylon stockings before dyeing for elegant silhouettes.
- Naturally Speckled: Skip the rinse and let the egg dry in the dye bath liquid for more organic, speckled textures.
Sample Natural Dye Recipes
Blue Dye with Red Cabbage
- Chop up half a small head of red cabbage and simmer with 4 cups water for 20 minutes.
- Cool, strain, and add vinegar as described above.
- Soak hard-boiled eggs for at least 1 hour (up to overnight for rich blues).
Yellow with Turmeric
- Stir 2 tablespoons ground turmeric into 2 cups of boiling water.
- Simmer for 10 minutes, strain, and add vinegar.
Pink with Beets
- Peel and chop 2 medium beets; boil with 2 cups water.
- Simmer for 20 minutes, cool, strain, and add vinegar.
Brown with Coffee
- Brew a strong cup of coffee and add vinegar.
- Saturate eggs for a warm, vintage look.
Frequently Asked Questions
Q: Can I eat the eggs after dyeing them with natural dyes?
A: Yes—because you’re using food-safe, natural ingredients, the eggs remain safe to eat. However, be aware that some dyes (like onion skins or coffee) may add subtle flavors to the egg white.
Q: How long do naturally dyed eggs last?
A: As with any hard-boiled egg, they should be stored in the refrigerator and eaten within one week.
Q: Why do I need to use vinegar?
A: Vinegar is acidic and helps the color molecules bind to the porous eggshell, resulting in more vivid and longer-lasting color.
Q: Can I use brown eggs?
A: Absolutely! Brown eggs take dyes beautifully, often creating deeper, earthy tones. It’s a wonderful way to create a natural palette.
Q: My colors aren’t as bright as I expected. What happened?
A: Natural dyes yield more subtle, earthy results than artificial ones. For richer color, increase soaking time or the concentration of your dye baths. Overnight soaking in the fridge is especially effective.
Eco-Friendly Tips & Final Thoughts
- Compost leftover dye ingredients, like boiled veggies or fruit pulp.
- Reuse dye baths for multiple rounds—some colors intensify with more eggs!
- Share your creations and discoveries—every batch of eggs tells a different color story.
Natural egg dyeing is as much science experiment as it is craft, inviting you to play with nature’s palette. Embrace the surprises and celebrate the unique, organic artistry of each egg you create. Happy dyeing!
References
- https://luckyandme.com/blogs/posts/how-to-dye-easter-eggs-naturally-with-kitchen-ingredients
- https://www.youtube.com/watch?v=c_I10ix7V3I
- https://fivemarys.com/blog/2018/3/26/natural-easter-egg-dyes-serious-saturation-ukranian-dyes
- https://mary.today/natural-easter-egg-dyes-serious-saturation-ukrainian-dyes/daily-life/
- https://coolestfamilyontheblock.com/2011/04/19/natural-dyed-easter-eggs/