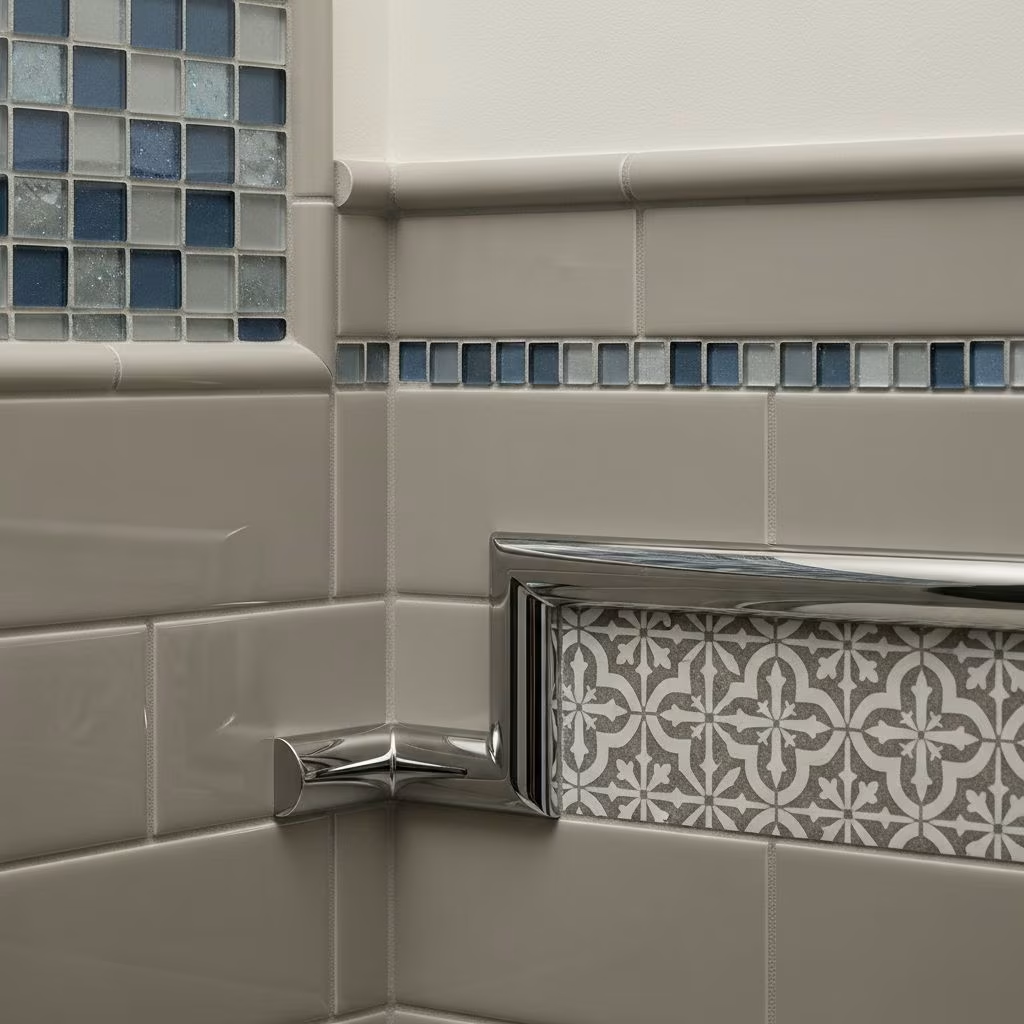
In tiling, finishing details can transform a basic installation into a professional-looking, cohesive space. Tile trims, borders, and edgings not only protect vulnerable edges but also add a sophisticated touch, refine transitions, and help your surfaces stand up to everyday wear. Whether you’re updating a bathroom, tiling a backsplash, or tackling a floor project, understanding your options ensures that the job looks outstanding—and lasts for years. This in-depth guide will demystify the types, uses, installation tips, and design inspirations for tile trim, borders, and edgings.
What Is Tile Trim & Why Does It Matter?
Tile trim refers to specialized pieces designed to create a neat, protected edge or provide a decorative border at the termination of your tile installation. Because tile edges are often left exposed or have sharp cuts, trim:
- Prevents chipping and damage to tile edges
- Gives a polished, finished look to tile projects
- Improves safety by covering sharp corners or raw edges
- Protects against moisture and wear in wet or high-traffic areas
- Offers design flexibility—bold accents or subtle borders
Types of Tile Trim, Borders, & Edgings
The right trim transforms functional edges into design highlights. Here are the main categories:
Bullnose Tile Trim
Bullnose tiles have a rounded edge along one side, making them perfect for finishing off the sides of a backsplash, shower niche, or countertop. They’re widely used with ceramic or porcelain tile installations and are available as single-edged (for linear borders) or double-edged (for corners).
Metal Tile Trim
Metal trims—usually aluminum, stainless steel, or brass—deliver a streamlined, contemporary look that pairs well with modern designs. Popular finishes include chrome, brushed nickel, black, or even specialty colors.
- Ideal for minimalist, industrial, or modern spaces
- Offers L-shaped, square, or rounded edge profiles for different needs
- Durable and corrosion-resistant options for wet areas
Natural Stone Trim and Accent Borders
Natural stone trims (marble, travertine, granite) add a touch of luxury and organic beauty to tiled spaces. Mosaic or accent border strips often incorporate stone, glass, or even metallic details for added interest.
Glass Tile Edging
Glass tile borders are ideal for creating bright, reflective accent lines. Glass trims are usually used with glass tile projects but can work as accent pieces with other materials.
Baseboard Tile Trim
Much like wood baseboards, baseboard tile trims finish the joint between wall and floor tiles for a seamless, wipe-clean edge. These are practical in bathrooms and kitchens to protect against splashes and mopping.
Corner and Specialty Trims
Trim profiles exist for outside corners, inside corners, stair treads, counters, and other specialty applications. For tricky junctions, look for profiles such as:
- Quarter-round for rounded wall/floor transitions
- Schluter profiles and similar systems for modern, consistent finishes
- Mosaic border tiles for decorative accents
Where to Use Tile Trim
Homeowners and pros use trim in these key locations:
- Ends of backsplashes (countertop or free wall)
- Edges of wall tile installations (showers, bathtubs, accent walls, fireplace surrounds)
- Transitions from tiled to non-tiled surfaces
- Around windows, niches, and alcoves
- Corners—especially outside corners and steps
- Along countertops or shelf edges
A strong finishing touch at these points makes the installation look intentional and professional.
Factors to Consider When Choosing Tile Trim
Selecting the right trim is about more than just style. Pay attention to:
- Material compatibility: Match trim material and thickness to your tile’s material and size for a seamless look and compatibility.
- Edge profile: Choose between rectilinear, bullnose, quarter-round, or square-edge based on the installation and visual preference.
- Finish and color: Decide if you want a bold contrasting accent (e.g., black trim with light tiles), or a trim that blends in softly with the tile.
- Environmental resistance: In wet or outdoor locations, opt for trims that resist moisture, rust, and corrosion.
- Maintenance and durability: Consider how easy the trim is to clean and if it can withstand everyday foot traffic, chemicals, and impacts.
- Budget: Trim materials vary widely in cost—stone and custom trims cost more than basic ceramic or plastic trims.
How to Calculate the Amount of Tile Trim Needed
Planning ahead is key to avoiding mid-project shortages or excess. Here’s a simple calculation method:
- Measure the total length of all edges that need finishing—include exposed sides, niche edges, and any areas where tiles meet other surfaces.
- Add 10% to your total measurement to account for cutting mistakes and future repairs.
- Divide the total required length by the standard trim piece length (usually 8 ft or ~2.5 meters) to get the number of pieces needed.
- Round up—better to have a little extra than not enough.
Example: 21 feet of edge to cover + 10% = 23 feet. For 8-foot trim pieces: 23 ÷ 8 = 2.88—so purchase 3 full pieces.
Installation Tips for Tile Trim and Borders
Getting a refined finish requires proper technique and attention to detail:
- Use the same adhesive for trim as for your field tiles, unless the manufacturer specifies otherwise.
- Dry-fit trim pieces before setting to verify fit and make fine adjustments.
- For metal trims, file cut edges to smooth any burrs before installation.
- Install trim with the finished edge facing out—this side should align with the edge of your tile, not the wall.
- Keep trim just slightly above the final surface of the tile to accommodate grout lines for a uniform finish.
- Press trim pieces gently into adhesive, ensuring full contact for strength and moisture resistance.
- Wipe away adhesive residue before it dries to avoid difficult cleanup later.
- Use painter’s tape, if needed, to hold trims in place while the adhesive cures.
Creative Tile Trim and Border Ideas
Add personality and polish to your project with these design ideas:
- Contrasting trims: Highlight clean lines with high-contrast colors or metallic finishes against neutral tile.
- Patterned or mosaic borders: Install a band of smaller, patterned tiles or mosaics as a border to break up large wall expanses.
- Classic bullnose edge: Use bullnose tiles for timeless appeal, especially at bathtub surrounds and countertops.
- Stone or marble trims: Elevate the feel of showers and vanities with natural stone edge trims.
- Contemporary square-edged metal trims: Create a crisp, modern line at the end of backsplashes or around niches.
- Glass accents: Use slender glass trims alongside ceramic or porcelain for a light-catching detail.
- Wide border strips or chair rails: In traditional designs, install a wide decorative band at eye level or above wall tile as a chair rail.
Frequently Asked Questions (FAQs)
Q: What is the best type of tile trim for wet areas?
A: Metal and PVC trims (especially stainless steel and anodized aluminum) are highly moisture-resistant and ideal for showers, bathrooms, and kitchen backsplashes.
Q: Can I install tile trim after the tiles are set?
A: Tile trim is typically installed as you set the tiles, but surface-mount trims or self-adhesive strips can be added after. For most seamless results, plan and incorporate trim during the main installation.
Q: How do I cut tile trim?
A: Use a miter saw or a hacksaw for straight cuts; for corners, use a miter box to achieve perfect angles. Always file down rough edges for a smooth finish.
Q: Do trims work only for wall tiles?
A: No. Tile trims are equally effective for floor tiles, steps, countertops, and even outdoor tiling projects where protection and a neat edge are needed.
Q: Should tile trim color match the tiles?
A: Matching trim to tile is a timeless approach for a seamless look, but contrasting trims add design drama. Let your overall aesthetic and the space’s style guide your choice.
Summary Table: Common Trim Profiles
| Trim Type | Main Features | Best Use Cases |
|---|---|---|
| Bullnose | Rounded edge, matches tile, seamless finish | Walls, countertops, bathtub surrounds |
| Metal | Contemporary, various finishes, durable | Wet areas, modern designs, corners |
| Stone | Natural variation, high-end look, robust | Luxury baths, showers, feature walls |
| Glass | Bright, reflective, sleek appearance | Accent borders, backsplashes |
| Quarter-Round | C-shaped, softens corners, subtle | Wall/floor transitions, baseboards |
| Schluter/Specialty | Custom profiles, protection, sharp lines | Transitions, niches, steps, creative needs |
Final Tips for a Professional Finish
- Plan your trim layout before you start tiling—this avoids awkward cuts or visible seams.
- Mix and match profiles (e.g., bullnose with metal edge) for eye-catching detail, but keep within the overall style of the room.
- Always double-check manufacturer’s compatibility, especially with natural stone or glass trims.
- Don’t rush! Take extra care at corners and visible transitions for a polished look.
- Clean, dry, and seal trims as recommended to maintain beauty and integrity over time.
Conclusion
Tile trims, borders, and edgings are the unsung heroes of tiling projects. They ensure structural integrity, allow for personal style, and are the final detail that signals careful craftsmanship. With the knowledge in this guide, you’ll be prepared to choose, install, and style the right finish for any tile project.
References
- https://apollotile.com/blogs/our-blogs/tile-trim-guide
- https://www.youtube.com/watch?v=XFgZ_bBm_nI
- https://www.niuyuantrims.com/what-is-tile-trim/
- https://www.youtube.com/watch?v=7ncxsM4K3cI
- https://www.homedepot.com/c/ab/how-to-finish-tile-edges/9ba683603be9fa5395fab901ed9ee99a
- https://www.fireclaytile.com/blog/full/tile-school-turning-a-corner