Encountering a stripped screw can halt your DIY or repair project, but it doesn’t have to mean disaster. With a variety of practical techniques and the right tools, you can remove stripped screws safely and efficiently, preserving your materials and completing your task with confidence. This detailed guide covers proven methods, expert tips, and answers to the most common questions, ensuring you’re prepared for any stripped screw challenge.
What Does It Mean for a Screw to Be Stripped?
A stripped screw refers to a screw whose head has been worn down, making it difficult or impossible for a screwdriver or bit to grip and turn it. This usually occurs when excess force is applied, improper tools are used, or the screw material is soft. Common signs include rounded, flattened, or worn recesses on the screw head (such as Phillips or slotted slots) and failed attempts to turn the screw without engagement.
Why Screws Strip (and How to Prevent It Next Time)
- Using the Wrong Tool: Applying a mismatched screwdriver or drill bit often causes excess wear.
- Applying Excessive Force: Over-torquing a screw can round off the head.
- Poor-Quality Screws: Cheaper or soft-metal screws deform faster.
- Drilling at an Angle: Misalignment increases the risk of stripping.
Prevention: Use the correct-sized driver, apply consistent pressure, stop if the screw becomes resistant, and switch to hand tools for final tightening.
Essential Tools and Supplies for Screw Extraction
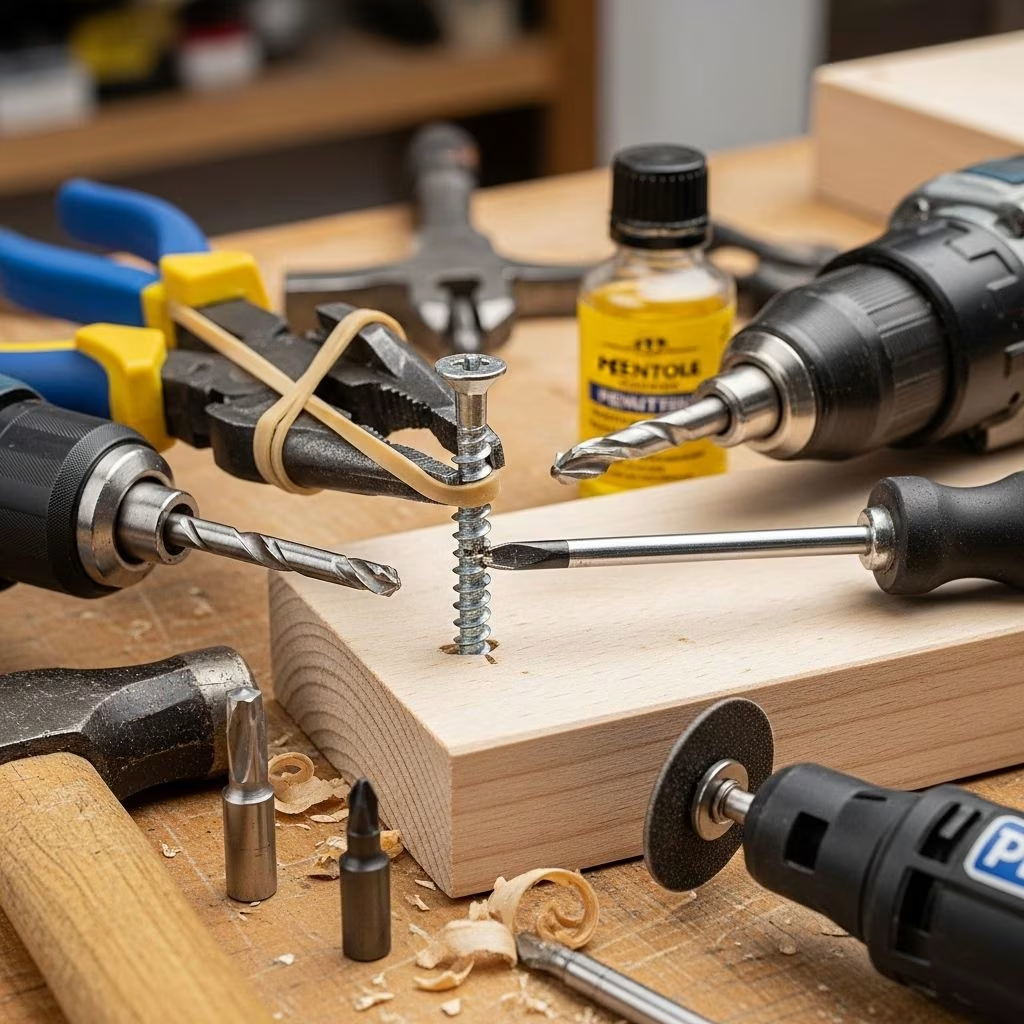
- Pliers: For gripping exposed screw heads
- Flathead and Phillips Screwdrivers
- Rubber Bands: For extra grip between tool and screw
- Utility Knife or Rotary Tool: To make a new slot in the screw head
- Duct Tape or Electrical Tape
- Super Glue or High-Strength Glue
- Extractor Kit: Special tools designed for screw removal
- Hammer (optional): To tap the tool into the screw head
- Hairdryer, Heat Gun, or Ice: For temperature-based loosening methods
Step-by-Step Methods for Removing Stripped Screws
1. Gripping and Turning with Pliers
If the screw head protrudes above the material, lock pliers (such as locking pliers or vise grips) onto the head. Once secure:
- Turn the pliers counterclockwise while applying even pressure.
- Wiggle if needed, especially if the screw is lodged tightly.
- Remove the screw when loosened and replace with a new one to finish your project.
2. Flathead Screwdriver (or Larger Bit)
Flathead screwdrivers can succeed when others slip. Here’s how:
- Choose a flathead screwdriver with a blade as wide as possible for the screw head.
- Insert it firmly into the screw, angling slightly if needed for bite.
- Press downward and turn slowly, keeping constant pressure.
- This method’s leverage is especially effective for screws with soft, partially stripped heads.
Pro Tip: Try gently tapping the screwdriver with a hammer to wedge it deeper into the head for more grip.
3. Rubber Band Method (or Substitute with Duct Tape)
Extra friction can make all the difference:
- Place a wide rubber band over the screw head, covering it completely.
- Insert your screwdriver or drill bit so it presses into both the band and the head.
- Slowly turn counterclockwise while pressing down firmly. The band fills gaps in the stripped slots, increasing grip.
If you don’t have a rubber band handy, a layer of duct tape can act in a similar fashion. Just wrap a piece over the head before trying to turn the screw.
4. Super Glue or Gorilla Glue Technique
- Add a small drop of high-strength glue to the screw head.
- Immediately press the tip of the screwdriver or bit into the glue and hold for 30-60 seconds (follow manufacturer’s instructions for setting time).
- Once set, twist gently to remove the screw.
Important: Remove glue residue from the tool tip afterward to prevent damage or sticking.
5. Temperature Trick: Heat and Freeze
Changing temperatures can contract and expand materials, breaking the bond between screw and wood or metal:
- Heat the area around the screw head with a hair dryer or heat gun for several minutes.
- Immediately follow with an ice cube applied directly to the screw.
- Repeat as necessary; the rapid temperature swing helps free stuck fasteners.
- Attempt removal with pliers or a screwdriver after treatment.
6. Tap with a Hammer and Manual Driver
- Place a manual screwdriver into the stripped screw head.
- Tap the handle with a hammer to seat the driver firmly, hoping to create new edges inside the slot.
- Apply even pressure and attempt to turn the screw; the increased friction can help it budge.
7. Make a Slot with a Rotary Tool or Hacksaw
If the head is completely rounded:
- Use a rotary tool fitted with a cutting wheel, or carefully use a hacksaw, to cut a straight groove across the top of the screw.
- Insert a flathead screwdriver into the new slot and turn counterclockwise.
- This is particularly effective for screws in hard-to-reach places or with very worn heads.
8. Use an Extraction Tool or Screw Extractor Kit
For stubborn cases, purpose-built extraction tools are best:
- Select a screw extractor bit sized for your screw.
- Follow extractor kit instructions—typically, you’ll drill a starter hole in the screw head, then use the extractor bit (in reverse) to bite and unscrew.
- Extractor bits grip by biting into the stripped head, so go slowly and apply steady pressure.
9. Try a Left-Handed Drill Bit
- Left-handed bits function like traditional drill bits but are designed to turn in the opposite direction.
- As the bit bites into the screw, the counterclockwise rotation can loosen and extract it.
- Best for screws stuck well within the surface when other grip methods fail.
Comparison Table: Methods and Their Applications
| Method | Tools Needed | Best for | Skill Level |
|---|---|---|---|
| Pliers | Pliers | Protruding screw heads | Beginner |
| Flathead Screwdriver | Flathead screwdriver | Partially stripped heads | Beginner |
| Rubber Band/Duct Tape | Rubber band, tape, screwdriver | Minor stripping | Beginner |
| Glue | Glue, screwdriver | Slipping drivers | Intermediate |
| Temperature Trick | Heat gun, ice | Stuck screws (wood/metal) | Intermediate |
| Hammer & Manual Driver | Hammer, manual driver | Stubborn, embedded screws | Beginner |
| Rotary Tool/Hacksaw | Rotary tool/hacksaw, screwdriver | Completely rounded heads | Advanced |
| Extractor Kit | Extractor set, drill | Severely stripped/embedded screws | Intermediate |
| Left-handed Bit | Left-handed drill bit, drill | Deeply embedded screws | Advanced |
Pro Tips and Safety Advice
- Protect the Work Surface: Place masking or painter’s tape around the screw to avoid scratches or accidental gouging.
- Slow and Steady: Apply even pressure and avoid rushing to reduce the risk of further damage.
- Use Penetrating Oil: On metal-to-metal fastenings, a drop of oil can help loosen seized screws—allow several minutes for the oil to seep in.
- Switch Out Worn Tools: Worn screwdriver tips can worsen stripping—use sharp, undamaged bits.
- Stay Safe: Wear safety glasses when using power tools or cutting into metal. Keep hands clear of sharp or hot surfaces.
After Extraction: Repairing and Replacing
- Replace the stripped screw with one of similar size and thread, ideally using a higher-quality screw.
- If the hole is enlarged or damaged, fill it with a wood plug, toothpicks and wood glue, or a plastic anchor before reinserting a new screw.
- Clean your tools thoroughly after glue or oil use.
Frequently Asked Questions (FAQs)
Q: What’s the easiest method for beginners?
A: The rubber band method is a simple and effective technique, requiring only a rubber band and your existing screwdriver. It works well for screws with moderate stripping where there’s still some head profile left.
Q: Can I use household items if I don’t have extraction tools?
A: Yes. Rubber bands, duct tape, super glue, and pliers—all common household items—can be used for screw removal in many situations.
Q: When should I use an extractor kit?
A: An extractor kit is best for severely stripped or embedded screws that resist all other removal methods. They’re especially effective when the screw head no longer has any functional slot or grip area.
Q: How do I prevent screw stripping in the future?
A: Always use the correct driver size and type, keep bit tips sharp, apply steady downward pressure, and stop if you feel resistance or slipping. Consider using hand tools rather than power tools as you finish tightening.
Q: Is it safe to use a rotary tool or hacksaw around wood or delicate finishes?
A: Proceed with caution. Protect the surrounding area with tape and use slow, controlled movements to avoid accidental damage.
Conclusion
Removing stripped screws is a common repair hurdle, but with the right approach, patience, and tools, you can overcome it without damaging your workpiece. Whether you prefer simple manual fixes or advanced extraction tools, the methods outlined here cover nearly every scenario. Master these techniques to tackle your next DIY project with greater confidence and skill.
References
- https://kitchencabinetkings.com/blog/how-to-remove-stripped-screws/
- https://shop4fasteners.co.uk/blog/16-ways-to-remove-stripped-screws/
- https://www.youtube.com/watch?v=rpbL8h-7jSY
- https://www.youtube.com/watch?v=_mTFQbaT3Zc
- https://www.ifixit.com/Answers/View/7393/What+are+your+tips-tricks+for+removing+or+extracting+stripped+screws
- https://www.homedepot.com/c/ah/how-to-remove-stripped-screws/9ba683603be9fa5395fab90160abf30b
- https://www.youtube.com/watch?v=TEYgVsPcWjE