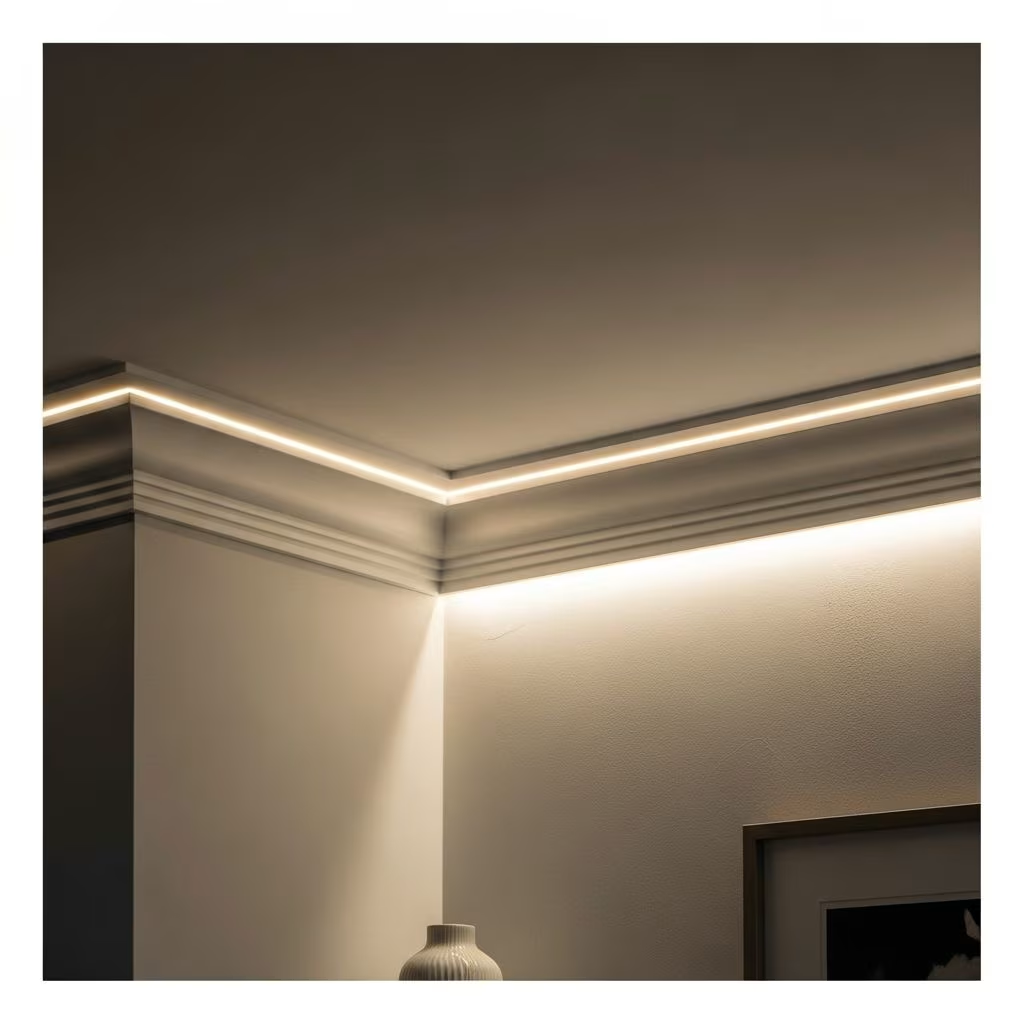
Crown molding with integrated uplighting is a stylish, energy-efficient way to modernize any room. The soft, indirect light adds architectural interest and welcoming ambiance, making it a smart upgrade for living rooms, bedrooms, dining spaces, or home theaters. This guide will walk you through every step, from initial planning and materials to installation, finishing, and frequently asked questions.
Why Install Crown Molding with Uplights?
Combining crown molding and LED uplighting brings several advantages:
- Visual Enhancement: Creates depth and drama by highlighting your ceiling and upper walls with a warm or cool glow.
- Energy Efficiency: Uses low-wattage LEDs, minimizing electricity costs.
- Flexibility: Change light colors or brightness for mood lighting.
- Accent Architectural Features: Showcases unique ceiling details, paint, or artwork with indirect rays.
Project Planning and Preparation
A successful installation begins with careful planning. Consider these key steps before picking up any tools:
1. Choose the Right Crown Molding
Not all crown molding is ideal for uplighting. Choose profiles with:
- A recessed or flat area wide enough to conceal LED strips or rope lights.
- Sufficient projection from the wall to hide lighting components and allow effective light diffusion.
- Durable material – wood, MDF, or specialty plastics designed for lighting.
2. Determine LED Placement and Spacing
Optimal uplighting depends on:
- Mounting molding at least 3 to 8 inches below the ceiling for maximum light spread and blend.
- Ensuring a continuous line around the room, keeping the depth consistent using a chalk line and level.
- Avoiding direct view of the LED strips to prevent hotspots or harsh shadows.
3. Measure and Calculate Materials
- Room Perimeter: Measure the lengths of all walls where you plan to install molding. Add 10–15% extra for waste from corner cuts and mistakes.
- Backer Strips (if needed): Many installations require backer boards or wedges fastened to the wall as a base for the molding and to create space for the LEDs.
- LED Strips/Rope Lights: Purchase the total length needed, ideally in a single run to avoid visible seams in illumination.
4. Plan Your Electrical Source and Controls
- Decide if your LEDs will plug into a switched outlet, or if a new electrical line or dimmer switch is necessary.
- Consider installing a dedicated, concealed outlet behind the molding for a professional look.
- If unsure about wiring, consult a qualified electrician and check local codes and permit requirements.
Gather Tools and Supplies
Assemble the following tools and materials:
- Appropriate crown molding (wood, MDF, or PVC with LED channel)
- LED strip lights or low-voltage rope lights, plus appropriate connectors and power supply
- Backer strips (1×2 or similar boards)
- Measuring tape, pencil, chalk line, and level
- Miter saw for precise angled cuts
- Stud finder to locate secure nailing points
- Nail gun, hammer, or finishing nails
- Wood filler or caulk
- Paint and finishing materials
- Screwdriver, wire strippers, and drill
- Optional: mounting hardware specific to LED strips
Step-by-Step Installation Instructions
Step 1: Plan and Mark the Layout
- Start by sketching your room and marking all walls that will receive molding.
- Using a level and chalk line, mark a straight line around the room 3–8 inches below the ceiling. This line marks the bottom edge of your molding.
- Check that all lines are level around corners and across transitions.
- Locate wall studs using your stud finder—they’ll be the primary support for nailing backer strips and molding.
Step 2: Install Backer Strips or Wedges
- Position wood backer strips or pre-cut triangular wedges along the marked line, spaced every 2 feet or so.
- Fasten these securely into the studs with finishing nails or screws.
- Ensure strips are level and set flush to the chalk line; this foundation is crucial for a straight, professional look.
Step 3: Prepare and Cut Crown Molding
- Measure each wall segment carefully. Cut molding pieces to fit, using a 45-degree miter for corners.
- For inside corners, consider coping one piece for a seamless joint—this provides a cleaner fit than just mitering two pieces together.
- Label each piece before installation, especially if you’re working in a room with several corners or angles.
Step 4: Attach Crown Molding
- Hold each piece of molding against the backer strip and ensure it matches up to your chalk line.
- Use a nail gun or finishing nails to fasten molding to the backer strip and into the wall/studs behind. Work from one end of the wall, securing each piece and maintaining tight corners.
- Periodically step back and check for straightness and tight joints; subtle misalignments become obvious with the lighting turned on.
Step 5: Install LED Strip or Rope Lights
- Following manufacturer’s instructions, adhere or clip your LED strip or rope light into the groove or cavity behind the molding.
- Aim for a continuous, unbroken line and avoid crossing wires where possible.
- Position LEDs so they illuminate the ceiling without being directly visible from below.
- Connect strips or segments using approved connectors for consistent brightness.
Step 6: Connect and Test Electrical Components
- Plug the LED system into your dedicated, concealed outlet, or wire it to a wall switch or dimmer as planned.
- Turn on the lights and check for brightness, color consistency, and any shadows.
- Address any loose connections or dark gaps before moving to finishing touches.
Step 7: Finish, Caulk, and Paint
- Fill nail holes and seams with wood filler or caulk.
- Allow to dry, then sand smooth for an even finish.
- Paint or touch up as desired—use paint with a compatible finish for both the molding and adjacent wall/ceiling surfaces.
- Clean the area and perform a final check with uplighting on. Adjust molding or light position as needed for a uniform glow.
Tips and Tricks for a Professional Finish
- Use mockups for inside and outside corners to visualize cuts, especially if you’re a beginner.
- Choose high-CRI (Color Rendering Index) LED strips for more natural light and color accuracy.
- If using smart LEDs, install compatible controllers or remote dimmers with easy access.
- For very long runs, consider power injection points to maintain even brightness end-to-end.
- If your molding is particularly heavy or intricate, enlist a helper for installation.
Quick Reference Table: Tools and Materials Checklist
| Item | Purpose |
|---|---|
| LED strip/rope lights | Provides ambient uplight |
| Crown molding (suitable profile) | Main decorative and functional trim |
| Backer strips/wedges | Supports molding, creates light cavity |
| Miter saw | Accurate corner cuts |
| Stud finder | Locates secure nailing points |
| Level/chalk line | Ensures straight installation |
| Nail gun/finishing nails | Secures trim to wall/backer |
| Wood filler/caulk | Seals gaps, preps for paint |
| Paint/brushes | Completes the finish |
| Electrical outlet/extension | Powers LEDs discreetly |
Common Mistakes to Avoid
- Inconsistent Leveling: If your chalk line isn’t straight and level, your finished molding and light effect will look uneven and amateurish.
- Mounting Too Close to Ceiling: Insufficient spacing reduces the visual ‘wash’ of light and may cause hot spots.
- Poor Electrical Planning: Not having a switched outlet or easy access to the LED power supply can result in inconvenience and unsightly wires.
- Wrong Molding Profile: Too shallow or elaborate profiles may not conceal lights or create the desired optical effect. Use profiles designed for indirect lighting.
Safety and Electrical Considerations
- Always turn off electricity at the circuit breaker before handling wiring or outlets.
- Comply with local electrical codes; permits may be required for new wiring.
- If unsure, hire a qualified electrician for installation and inspection.
- Choose UL-listed LED components for reliability and safety.
Maintenance and Upgrades
- Dust molding and lights regularly to maintain brightness and finish.
- Replace or upgrade LED strips as new, more efficient models become available.
- Touch up paint or sealant as needed to keep the installation looking sharp.
Frequently Asked Questions (FAQs)
Q: What type of crown molding works best for LED uplighting?
A: Profiles with a deep recess or specifically designed channels for lighting are ideal. Wood, MDF, and some advanced polymers offer durability and ease of installation for LED uplights.
Q: How far below the ceiling should the crown molding be installed?
A: For best effect, install the molding 3–8 inches below the ceiling. More space provides broader light diffusion and a softer glow.
Q: Do I need special tools to install crown molding with uplighting?
A: Yes, a miter saw for accurate cuts, level, stud finder, nail gun or hammer, caulk gun, and basic electrical tools for your LEDs are all important.
Q: Can I use regular rope or strip lights, or do I need lighting made for crown molding?
A: Many standard LED strips or rope lights work, as long as they fit behind your selected molding profile. However, choose high-quality lights designed for long-term indoor use with proper safety certifications.
Q: Is this a project I can tackle myself without electrical experience?
A: Basic installation is DIY-friendly if you are comfortable using tools and following safety instructions. For complex wiring or code compliance, consult a licensed electrician.
Conclusion
Adding crown molding with uplighting is an attainable DIY project that brings instant visual impact and a modern touch to any room. With careful planning, the right materials, and attention to detail, you can create dramatic, energy-efficient lighting that enhances your home’s value and atmosphere. As always, prioritize safety and don’t hesitate to seek professional help for electrical work or advanced carpentry techniques.
References
- https://www.takethreelighting.com/lighting-your-crown-molding-with-leds.html
- https://www.lensblx.com/how-to-install-crown-molding-with-led-lighting.html
- https://www.youtube.com/watch?v=N8CsXiJKNo4
- https://www.do-it-yourself-help.com/how-to-install-crown-molding-lighting.html
- https://www.youtube.com/watch?v=JbtzAazZjjE
- https://wishihadthat.com/how-to-install-crown-molding.aspx