


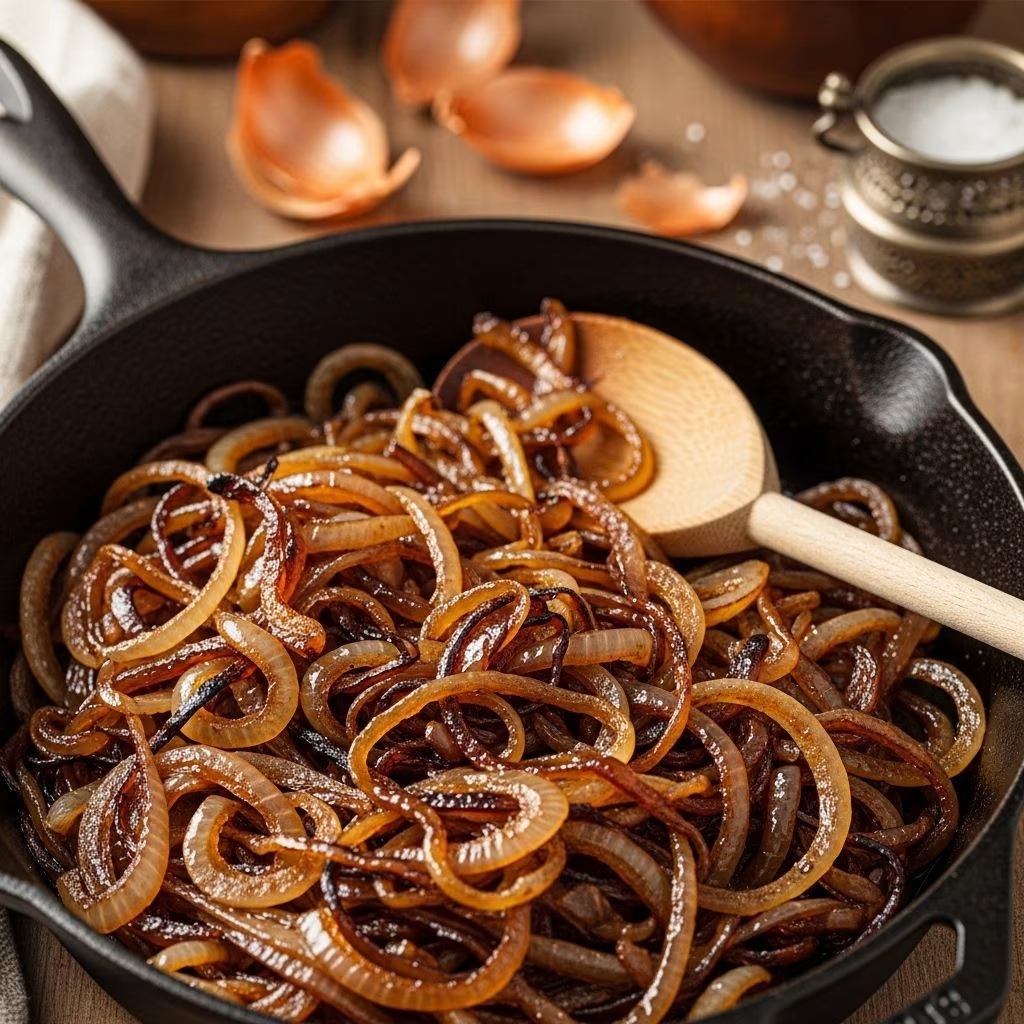
Caramelized onions hold a special place in the kitchen, offering unparalleled sweetness and depth to any dish. Achieving deeply caramelized, golden-brown onions is a simple process, but it does require patience and a few essential techniques. This guide walks you through every step, provides tips for perfect results, shares creative ways to use your onions, and answers your most common questions about this essential kitchen skill.
What Are Caramelized Onions?
Caramelized onions are onions that have been slowly cooked over low heat until their natural sugars break down and brown, creating a sweet, soft, and richly flavored result. Far from being a quick sauté or a basic stir, proper caramelization transforms the character of the onion, making it a fantastic base, topping, or ingredient for countless savory dishes.
Why You Should Make Caramelized Onions at Home
- Versatility: Use them in dips, sandwiches, soups, pastas, pizzas, and more for an instant flavor boost.
- Make ahead: Batch-cook and store for easy, quick additions to meals throughout the week.
- Budget-friendly: Simple, inexpensive ingredients transform into a gourmet-quality topping.
- Customizability: Control oil, salt, and timing for your personal taste preferences or dietary needs.
How to Caramelize Onions
Perfect caramelized onions require just a few ingredients and a good amount of patience. Here’s how to achieve them:
Ingredients
- 2 tablespoons extra-virgin olive oil
- 4 medium yellow onions, halved and thinly sliced (about 2 pounds)
- 1/2 teaspoon sea salt
- Optional: a splash of water for deglazing if needed
Equipment
- 12-inch cast iron skillet or large heavy-bottomed pan
- Wooden spoon or heatproof spatula
Step-by-Step Instructions
- Slice the onions.
Pell and halve the onions from root to tip, then slice them evenly into thin strips. Uniform slices ensure even cooking. Before adding to the pan, separate the layers.
- Heat the oil and start cooking.
Warm the olive oil in your skillet over medium heat. Add all the onions and stir well to coat with oil. Sauté for 5 minutes, stirring frequently, so the onions soften slightly.
- Reduce the heat and continue to cook.
Sprinkle in the salt. Reduce the heat to medium-low. Continue cooking, stirring every few minutes. If onions start to stick or brown too quickly, lower the heat or add a splash of water to deglaze. Scrape up the flavorful brown bits from the bottom as they form.
- Develop color and flavor.
Patiently cook the onions for a total of 50-80 minutes. The exact time depends on your pan and stove. Stir frequently, especially in the last 20–30 minutes, as the color deepens. They are ready when they’re deeply brown, soft, jammy, and sweet.
Tips for Perfect Caramelized Onions
- Be patient. Rushing the process with high heat will result in burnt, bitter onions instead of sweet, mellow ones.
- Use a wide pan. A larger surface area helps water evaporate, aiding caramelization.
- Stir but don’t over-stir. Frequent stirring is vital once browning begins, but let the onions rest for a few minutes at a time to develop color.
- Deglaze as needed. Use water to loosen brown bits and prevent burning. For extra flavor, try a splash of wine, balsamic, or broth.
- Monitor heat closely. Adjust as necessary; if the onions threaten to burn, lower the heat and keep an eye on them.
- Don’t skimp on time. Real caramelization can take up to 80 minutes, especially for a large batch. Try not to shortcut the process.
Serving Suggestions
Caramelized onions are incredibly versatile. Here are favorite ways to use them:
- In dips: Add depth and sweetness to French onion dip or creamy cheese dips.
- In soup: Essential for classic French onion soup, lending it rich, sweet character.
- On burgers and sandwiches: Layer them generously on veggie burgers, grilled cheese, steak sandwiches, and more.
- With eggs: Stir into frittatas, omelets, breakfast burritos, or pile onto scrambled eggs for a savory treat.
- In pasta: Mix into roasted vegetable pastas, creamy pastas, or even mac and cheese for extra richness.
- On pizza: Spread on top of pizza crusts with mozzarella, goat cheese, or alongside roasted vegetables.
- With vegetables: Toss with roasted or steamed green beans, Brussels sprouts, or potatoes for a boost of savory flavor.
Caramelized Onions Recipe
Ingredients
- 2 tablespoons extra-virgin olive oil
- 4 medium yellow onions, halved and thinly sliced (about 2 pounds)
- 1/2 teaspoon sea salt
Instructions
- Heat the olive oil in a 12-inch cast iron skillet or heavy-bottomed pan over medium heat.
- Add the sliced onions. Cook, stirring frequently, for 5 minutes, until the onions start to soften and turn translucent.
- Sprinkle with sea salt. Reduce the heat to medium-low.
- Continue cooking, stirring frequently, for 50–80 minutes. If the onions begin to stick, lower the heat or add a splash of water to deglaze as needed. Scrape the bottom and avoid burning.
- The onions are ready when they are deeply browned, soft, sweet, and jammy throughout.
Caramelized Onion Cooking FAQs
How long does it take to caramelize onions?
It can take anywhere from 50 to 80 minutes, depending on the heat, pan, and quantity. Rushing the process will prevent full sweetness and depth from developing.
Which onions are best for caramelizing?
Yellow onions are most common for caramelizing, but white, red, or sweet onions all work. Each variety will yield a slightly different flavor profile—red onions can add a richer color and sharper sweetness.
Can you caramelize onions faster?
There aren’t authentic shortcuts; true caramelization is a slow process. You can increase the heat very slightly toward the end to boost browning, but it requires vigilant stirring to prevent burning. Too much heat too quickly leads to bitter, burnt onions rather than sweet and soft ones.
How do you store caramelized onions?
- Cool completely, then transfer to an airtight container.
- Refrigerate for up to 5 days.
- For longer storage, freeze individual portions for up to 2 months.
Can you make caramelized onions ahead of time?
Yes! Batch-cook and store in the fridge or freezer for quick access all week.
What if my onions stick or start to burn?
Turn the heat down, add a splash of water (or wine/broth for extra flavor), and gently scrape the fond (brown bits) from the pan. Stir more frequently until the situation is under control.
Are caramelized onions healthy?
They are naturally low in calories and rich in flavor. Olive oil adds healthy fats, and you can adjust the salt to your dietary preferences.
Expert Variations and Tips from Readers
- Add a splash of whiskey or Irish cream for a subtle boozy kick at the end (allow to cook off alcohol).
- Mix with cooked green beans or other vegetables for an easy, flavorful side dish.
- Use in scrambled eggs or frittata muffins for a quick breakfast upgrade.
- Try different fats, like butter or ghee, for varied richness (or combine with olive oil).
- Experiment with a sprinkle of sugar for extra sweetness, but it’s not necessary if you use proper technique.
Table: Caramelized Onions vs. Sautéed Onions
| Feature | Caramelized Onions | Sautéed Onions |
|---|---|---|
| Cooking Time | 50–80 minutes | 5–10 minutes |
| Color | Deep brown, golden | Translucent to lightly browned |
| Flavor | Sweet, rich, mellow | Sharp, tangy, more pungent |
| Texture | Soft, jammy | Slightly crisp to tender |
| Best Uses | Soups, dips, pizza, burgers, pastas | Quick stir-fries, as a base in many dishes |
Creative Serving Ideas from the Community
- Serve warm with steak, chicken, or pork for a simple, elegant topping.
- Toss with steamed green beans for an easy crowd-pleaser side dish.
- Mix into creamy mashed potatoes or on top of baked potatoes.
- Spoon onto crostini, crackers, or bread for an appetizer or party snack.
- Use as a filling for savory tarts, hand pies, or galettes.
Frequently Asked Questions (FAQs)
Q: How can I prevent my onions from burning?
A: Always keep the heat low and add a splash of water as needed to deglaze the pan. Stir more frequently as they begin to brown.
Q: Can I caramelize more onions at once?
A: Yes, but use a large enough pan to prevent overcrowding. Expect a slightly longer cooking time for larger batches.
Q: What recipes highlight caramelized onions?
A: French onion soup, dips, burgers, panini, omelets, pizzas, roasted vegetable salads, and more.
Q: Should I use butter or oil?
A: Either works—olive oil yields a lighter flavor, while butter adds richness. Try both or a mix for complexity.
Q: Is it OK to add sugar to the onions?
A: Onions naturally develop sweetness as they caramelize. A sugar pinch isn’t necessary, but some cooks add it for extra depth.
Conclusion: Mastering Caramelized Onions
With attention, patience, and these expert tips, anyone can master the art of caramelized onions. Elevate simple dishes with this kitchen staple, enjoy new depths of flavor, and transform everyday meals into memorable treats. Experiment and find your favorite ways to serve and enjoy caramelized onions—they’re sure to become a staple in your cooking routine.


