In the world of protective hairstyles, the snake stitch braid stands out as a true visual masterpiece. This structured, sculptural look, popularized by experts like New York-based braider Lesia Durant-King, is making waves as one of the most innovative braid styles you can wear this year. Whether you’re looking to refresh your hair game, protect your ends, or impress with high-impact style, the snake stitch braid is a stunning contender. This comprehensive guide covers everything from essentials and preparation to expert tips, aftercare, and styling inspiration.
What Is the Snake Stitch Braid?
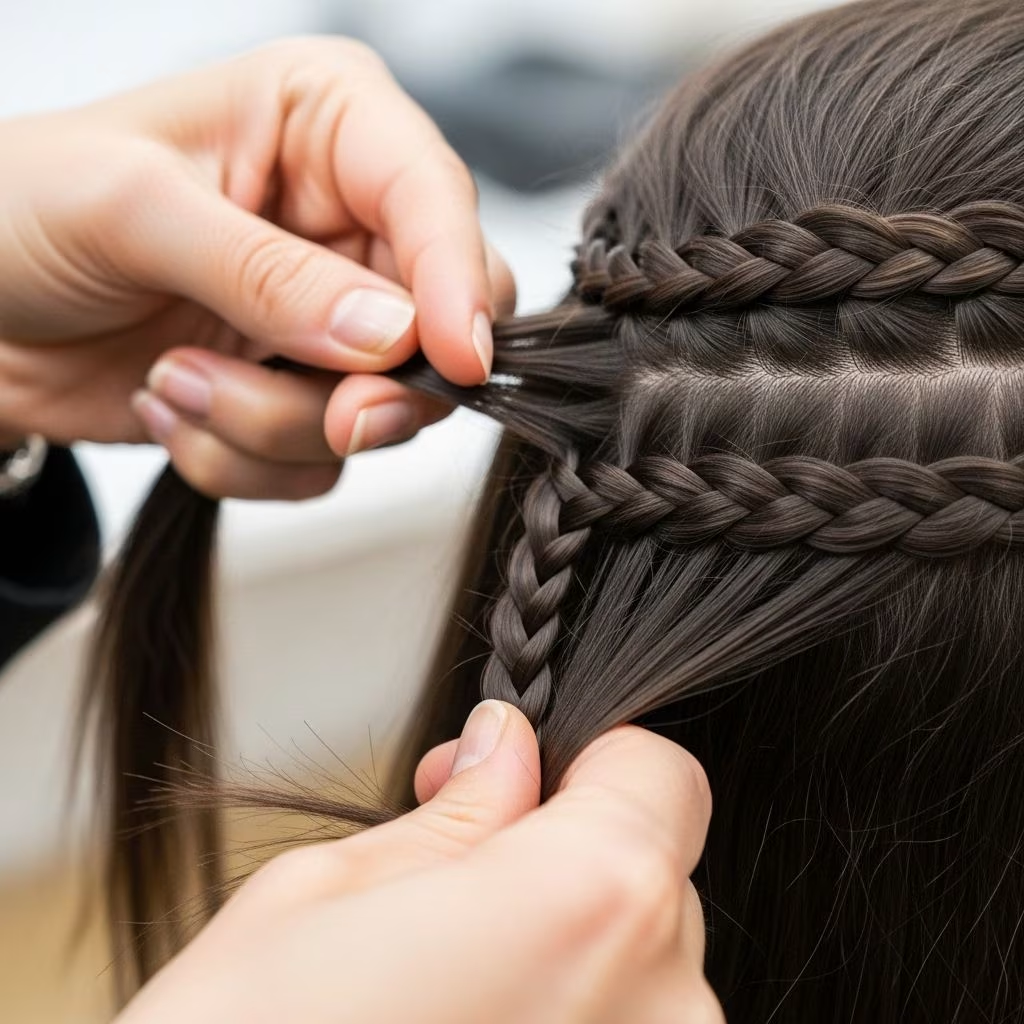
The snake stitch braid is a unique braided hairstyle that features a repeating up-and-down pattern, creating a mesmerizing, undulating effect that mimics the slithering shape of a snake. Unlike traditional cornrows or box braids, the snake stitch technique intricately weaves hair in alternating directions for maximum visual interest and texture. The look is not only striking but also serves as an excellent protective style, preserving hair health while turning heads.
- Design: A pattern of continuous stitched braids flowing in a wave-like trajectory.
- Protective Benefits: Shields natural hair, supports growth, and minimizes daily styling needs.
- Styling Versatility: Can be adorned with accessories, formed into buns, or blended with other styles.
Why Try the Snake Stitch Braid?
There are countless braided styles, yet the snake stitch braid stands apart for several reasons:
- Trend Appeal: Tipped as the hottest braid of the year thanks to its intricate artistry and popularity on platforms like The Braid Up.
- Customizable: Adjust the width, spacing, and pattern for a style as bold or subtle as you wish.
- Protective Style: Less manipulation means healthier, longer hair over time.
Ready to turn your hair into a sculptural masterpiece? Here’s exactly how to achieve the look, care for your braids, and style them with confidence.
How to Create the Snake Stitch Braid: Step-by-Step Instructions
1. Prep Your Hair
Great braids start with well-prepped hair! Ensure your scalp and strands are ready for the long-lasting style:
- Cleanse Thoroughly: Use a moisture-rich, sulfate-free shampoo to keep your hair hydrated and avoid dryness.
- Condition Deeply: Apply a nourishing conditioner, focusing on hydration and manageability.
- Detangle Carefully: Remove knots with a wide-tooth comb or fingers.
- Protect from Heat: Use a heat protectant before blow-drying to guard against damage.
- Dry Completely: Blow-dry your hair for a smooth base and ease of braiding.
2. Section Your Hair with Precision
Parting is crucial for this look. Clean, symmetrical sections make all the difference.
- Decide on Layout: Select the area for your snake stitch braids (center part, side, or a combination).
- Use a Rattail Comb: Perfect sectioning provides crisp lines and a neat final result.
- Clip Away Other Sections: Use alligator clips to keep hair organized and out of the way.
3. Start the Braid: The Stitching Technique
This is where the artistry truly emerges. The signature ‘snake’ pattern is achieved by braiding in alternating up-and-down curves:
- Braid Downward: Begin braiding close to the scalp, moving in a downward direction.
- Curve the Braid: At your desired point, curve the braid upward by changing your hand position.
- Braid Upward: Stitch the braid upward, holding the pattern firmly with each pass.
- Alternate Directions: Continue alternating, forming multiple ‘waves’ across the section.
- Maintain Tension: Keep a balanced, gentle tension for neatness without causing scalp pain.
- Secure the End: Fasten the braid with a small elastic or bead.
4. Repeat and Customize
For a full snake stitch look, repeat the process on adjacent sections. Vary the pattern width and number of curves to suit your taste. Add color, parting shapes, or decorative beads for a personalized look.
5. Finishing Touches
- Mousse Application: Apply a foaming mousse along the scalp and over the braids to minimize frizz and set the style.
- Edge Control: Smooth edges with a styling gel or wax for a sleek finish.
- Sheen Spray: Use a light, oil-based spray to add shine and seal in moisture.
Pro Tips from the Experts
New York stylist Lesia Durant-King and braiding pros offer these essential insights:
- Prep Is Paramount: Never skip the initial wash, conditioning, and blowout step. It ensures the style lasts and prevents buildup.
- Mousse Is a Must: Regular application tames flyaways and gives the style a professional finish day after day.
- Always Protect at Night: Wrap your hair in a silk scarf or bonnet to keep the braids neat, reduce frizz, and extend their lifespan.
- Keep Your Scalp Moisturized: Use a light scalp oil or leave-in mist to maintain scalp health and comfort.
How to Make Your Snake Stitch Braids Last
The snake stitch braid’s intricate detail deserves to look fresh as long as possible. Follow these best practices:
- Daily Maintenance: Sleep with a silk scarf or bonnet nightly. This keeps your braids sleek for up to 4–6 weeks.
- Refresh Shine: Spritz with an oil-based sheen spray or mist to avoid dullness and dryness.
- Control Frizz: Smooth a little mousse or edge control on roots and ends as needed.
- Avoid Heavy Products: Too much product can cause buildup and itchiness.
Product Picks: Essentials for Snake Stitch Braids
| Product | Purpose | Pro Tip |
|---|---|---|
| Sulfate-Free Shampoo | Cleanses hair and scalp without stripping moisture | Pick one with hydrating ingredients |
| Nourishing Conditioner | Boosts softness and manageability | Detangle while rinsing out |
| Heat Protectant | Shields hair during blow-drying | Apply evenly before using heat tools |
| Foaming Mousse | Reduces frizz, sets and defines braids | Apply after braiding; tie hair down for best results |
| Silk Scarf/Bonnet | Guards braids overnight | Replace as needed for consistent protection |
| Edge Control Gel | Smooths baby hairs and edges | Use a soft brush or finger for blending |
| Sheen Spray | Adds a healthy, glossy finish | Lightly mist; don’t saturate |
Styling Inspiration: Ways to Rock the Snake Stitch Braid
- Classic Center Part: Let the braids flow down the center with a symmetrical wave design.
- Side-Part Snake Stitch: Sweep the pattern to one side for a modern, asymmetrical look.
- Combo with Buns: Twist the snake stitch braids into buns or updos for a bold statement.
- Accent with Beads or Cuffs: Decorate with metallic or wooden beads for extra flair.
- Mixed Patterns: Pair snake stitch with classic cornrows or box braids for a multi-dimensional style.
- Color Play: Use ombre extensions or bold colored yarns to make each curve pop.
Expert Q&A: Frequently Asked Questions About Snake Stitch Braids
Q: How long do snake stitch braids typically last?
A: With proper maintenance, they can stay looking fresh for 4–6 weeks. Nightly wrapping and moisturizing are key.
Q: Will this style work on all hair types?
A: The snake stitch braid works best on hair that can hold structured braids, but can be adapted for most hair types with the right products and technique. Consult a stylist for fine or very straight hair.
Q: Do I need extensions for the snake stitch braid?
A: Extensions aren’t required but are often used to add length, volume, or creative colors.
Q: Is the style good for hair growth?
A: Yes! Like other protective styles, monitored snake stitch braids reduce manipulation, which supports healthy growth—just be sure not to braid too tightly or leave them in too long.
Q: Any aftercare myths to avoid?
A: Avoid heavy oils or gels that weigh down braids. Don’t skip regular scalp cleansing—use a witch hazel or lightweight spray to avoid buildup.
Snake Stitch Braid: Trending Now
The Braid Up series and stylists like Lesia Durant-King have helped catapult the snake stitch braid into the beauty spotlight. This braid’s complex yet wearable structure is inspiring braiding professionals and beauty lovers nationwide. Expect to see this style featured in editorial shoots, on social media feeds, and wherever innovative braiding artistry is celebrated.
Summary: Why the Snake Stitch Braid Deserves the Hype
- Combines structural beauty with practical hair protection
- Works for a range of hair lengths and textures
- Completely customizable to fit your style mood
- Promotes healthy hair and length retention
- Keeps you on-trend and creatively expressing yourself
Eager to try the snake stitch braid? Connect with a professional braider or watch the latest tutorials to see the technique in action, then make it your own with unique color choices, patterns, and accessories. Remember, a little mousse, careful prep, and diligent maintenance will keep your new style looking top-tier from day one to week six!
Frequently Asked Questions (FAQs)
Q: Will the snake stitch braid damage my hair?
A: If installed and cared for properly, the snake stitch braid is a gentle, protective style. Always avoid excessive tension and moisturize your scalp regularly.
Q: How long does it take to get snake stitch braids done?
A: Timing depends on braid complexity and the number of sections, but most stylists suggest 3–5 hours for a full-head style.
Q: Can I wash my hair with this style?
A: Yes—use a gentle cleansing shampoo or scalp spray, taking care not to rough up the braid pattern. Rinse gently and dry with a hooded dryer or let air dry under a scarf.
Q: What’s the best way to accessorize snake stitch braids?
A: Metallic cuffs, colorful beads, and decorative strings are all great choices. Add them selectively along the braid for accent and personality.
References
- https://www.youtube.com/watch?v=lvcJkg7FIcQ
- https://www.cosmopolitan.com/style-beauty/beauty/a40461759/snake-stitch-braid-how-to/
- https://www.youtube.com/watch?v=p2c7mezQSWE
- https://www.youtube.com/watch?v=f2gN7XRZL-U
- https://www.dailymotion.com/video/x8mnuwz
- https://www.youtube.com/playlist?list=PLrx4fxhgMUObLCxt_QbtT-1Qqx0oN2-EN
- https://www.youtube.com/watch?v=OzcXudsHBr0