How to Sew Clothes for Complete Beginners
Sewing your own clothes is more than just a practical skill. It’s a creative outlet, a sustainable way to update your wardrobe, and a means to express your unique style. If you’ve ever found yourself wishing to make that dreamy skirt or tailor a shirt just for your fit, learning to sew clothing is a rewarding journey anyone can begin at home. This guide covers all the essentials—from gathering supplies and choosing fabrics to working with patterns, troubleshooting common problems, and building confidence at the machine.
Why Learn to Sew Your Own Clothes?
Making your own garments lets you customize fit, style, and fabrics exactly to your taste. Beyond the empowerment, you’ll also gain:
- Sustainability: Reduce fast-fashion waste by making clothes designed to last.
- Cost savings: While supplies can be an upfront investment, sewing clothing can be budget-friendly over time—especially for special pieces.
- Tailored fit: Adjust patterns and designs for your unique body.
- Creative satisfaction: Enjoy the process and pride of wearing your handmade work.
Essential Tools and Supplies You’ll Need
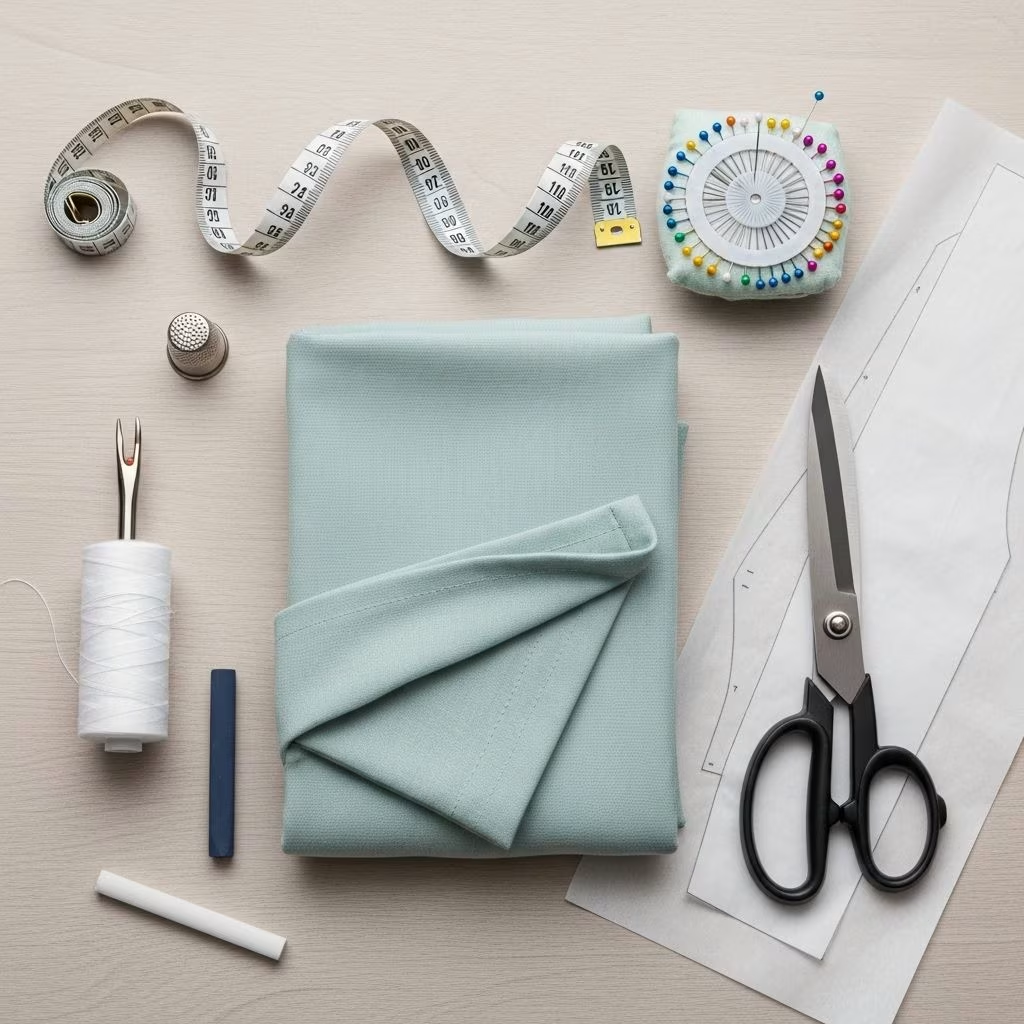
You don’t need a room full of pricey equipment to get started. Focus on the following must-have items that cover all beginner needs:
- Sewing Machine: A basic model that does straight and zig-zag stitching is perfect for beginners. Borrow, buy secondhand, or invest in a new one—just make sure it runs smoothly and comes with a user manual.
- Fabric Scissors: Use sharp shears reserved solely for fabric to avoid messy cuts.
- Pins & Pin Cushion: For holding fabric pieces together before sewing.
- Needles: Both machine and hand sewing needles in various sizes for light to heavy fabrics.
- Tape Measure or Ruler: For accurate pattern measurements and garment sizing.
- Seam Ripper (Stitch Un-picker): Mistakes happen; this tool helps you gently undo stitches.
- Iron and Ironing Board: Press seams as you sew for crisp, professional results.
- Chalk, Marking Pencil, or Disappearing Fabric Pen: To transfer pattern markings onto fabric.
- Thread: Polyester or cotton in a color that matches your fabric.
- Notions: Depending on your pattern, you may need extras like buttons, zippers, elastic, interfacing, or bias tape.
Tip: Many supplies can be thrifted or borrowed to save on cost while you build your toolkit!
Choosing the Right Fabrics for Your First Project
Fabric selection can make or break a beginner’s experience. As you start out, prioritize materials that are forgiving, easy to handle, and budget-friendly.
- Cotton fabrics: Look for medium-weight cotton (like quilting cotton, poplin, or broadcloth). These don’t stretch or slide around, making them much easier to cut and sew than slinky or knit fabrics.
- Avoid slippery/challenging materials: Silk, satin, chiffon, and stretch knits can be tricky for first projects.
- Affine with the pattern: Every pattern recommends specific types of fabric that will hold shape and drape as intended. Always check these recommendations before buying.
- Start with affordable options: Practice on inexpensive fabrics or repurposed materials (like an old bedsheet) before cutting into your special fabric.
Understanding Patterns: Commercial vs. DIY
Patterns act as the blueprint for your garment—they show you how to cut fabric and piece everything together. There are two main approaches:
- Commercial Patterns: Bought online or at fabric stores, these come with tissue-paper pattern pieces and instructions. Brands include Simplicity, McCall’s, Butterick, and indie companies.
- Self-made Patterns: Drafted from your measurements or by tracing existing clothes. Great for simple items, but commercial patterns are best for learning basic construction techniques.
Pattern packets typically include:
- Pattern sheets: Large sheets with outlines for each component (sleeves, bodice, etc.)
- Instruction booklet: Step-by-step assembly directions, size charts, fabric recommendations, and notions list.
Sizing Note: Pattern sizing is different from ready-to-wear clothing—use the pattern’s sizing chart and your body measurements (not your usual store size) for a good fit. Read through the instructions fully before you start!
Reading and Using Sewing Patterns
Commercial sewing patterns can look intimidating, but understanding their structure helps everything make sense:
- Measure yourself and compare to the pattern’s size chart.
- Read all instructions before making any cuts, noting fabric layout, direction, seam finishes, and order of assembly.
- Gather all required supplies before you start cutting (refer to the Notions section).
- Pin (or trace) and cut pattern pieces according to required size and fabric grainline.
Don’t be discouraged if the lingo is confusing the first time! Online guides, sewing blogs, and tutorial videos can help break down tricky steps or sewing vocab.
Preparing Your Workspace and Materials
Proper prep saves headaches later. Follow these steps before you start stitching:
- Pre-wash your fabric to shrink and remove finishes that impact movement or color.
- Press the fabric so it’s smooth, making it easier to cut accurately.
- Organize your tools near your workspace for efficiency and a safe, mess-free experience.
Basic Sewing Machine Skills Every Beginner Needs
Learning to use a sewing machine is key, but you only need to master a few basics at first:
- Winding the bobbin: Practice loading your lower thread bobbin and threading the top thread correctly.
- Straight stitch: Used for seams, topstitching, and general construction.
- Backstitch: Securely locks stitches at the beginning and end of a seam.
- Zig-zag stitch: Useful for finishing raw edges to prevent fraying or sewing stretch fabrics.
- Changing needles and adjusting tension: Learn your machine’s controls for fabric thickness and desired stitch style.
Take time to practice on fabric scraps, adjusting your machine’s stitch length, and experimenting with tension settings before starting your main project.
Sewing Your First Project: Step-by-Step Process
For a positive first experience, choose a simple project—think elastic-waist pajama pants, a loose skirt, or a tote bag. Below is a streamlined overview you’ll follow for most garments:
- Cut out pattern pieces—following the recommended layout for your fabric width and pattern grainline.
- Transfer markings—use chalk/pens to note darts, notches, and placement lines.
- Pin pieces together—line up fabric right sides facing and pin along the seam lines.
- Sew the seams—machine stitch along the pinned areas, backstitching at the start and finish for durability.
- Press seams open or to one side—setting stitches with your iron after every seam helps garments look polished.
- Fit and adjust as you go—try on the garment after major seams (like side or shoulder seams). Make small adjustments now, rather than waiting for the end.
- Finish raw edges—with a zig-zag stitch or pinking shears to reduce fraying.
- Follow the instructions for finishing touches—like attaching a waistband, inserting elastic, sewing hems, adding closures like buttons or zippers.
Pro Tip: Enjoy the process and don’t be afraid to make mistakes—you can always use your seam ripper and try again!
Common Beginner Sewing Mistakes (& How to Avoid Them)
- Skipping the pre-wash: Leads to shrinking and distorted seams after your first wash. Always pre-wash and iron fabric first.
- Poor pattern reading: Don’t skip reading instructions or double-checking sizing—even experienced sewists reference the guide.
- Wrong needle or tension: Using a too-heavy or fine needle, or incorrect tension, causes puckered or skipped stitches. Test tension and needles on scrap before main sewing.
- Not pressing as you go: Skipping the iron results in uneven, wrinkled, or warped seams.
- Trying complex fabrics or designs too soon: Stick to simple shapes and steady fabrics at first. Build up to curves, knits, and trickier details after a few projects.
Staying Organized (Bonus Tip!)
Consider keeping a sewing journal to track each project—note pattern details, fabric, adjustments made, and what you’d do differently next time. This is especially helpful as your skills progress and you revisit favorite patterns.
Tips for Building Sewing Confidence
- Start simple: Choose basic designs without zippers or complex fitting.
- Practice on scraps: Every new stitch or technique should be tried on a scrap before your real garment.
- Wear your early makes proudly: Even imperfect clothes are wearable and show real progress.
- Seek out online tutorials and communities: Video guides and forums offer help translating tricky instructions or solving problems.
- Enjoy the process: Mistakes are part of learning; don’t rush or put too much pressure on yourself.
Frequently Asked Questions (FAQ)
What’s the easiest thing to sew for a complete beginner?
Start with loose, elastic-waist garments like pajama pants, a simple skirt, or a tote bag. These involve straight seams and minimal fitting challenges.
Do I need a fancy sewing machine to begin?
No. Any reliable machine that can do straight and zig-zag stitches will work. Older machines are often sturdy, and you can find affordable options secondhand.
How do I know which needle or thread to use?
Match your needle size to your fabric weight (light needles for lightweight fabrics, heavier for denim or canvas) and thread type to your fabric—polyester thread is a versatile option for most projects.
I’m struggling to understand the pattern instructions. What should I do?
Patterns can sound like another language! Look for YouTube tutorials or online sewing blogs for walkthroughs of your specific pattern or technique. Don’t hesitate to ask questions in sewing communities.
How can I make sure my clothes will fit?
Take your measurements accurately and always check against the pattern’s size chart. Try the garment on as you sew, adjusting seam allowances as needed.
Sewing Terminology Cheat Sheet
- Selvage: The finished edge of fabric, which runs parallel to the weave and doesn’t fray.
- Grainline: The direction of the threads—patterns are cut aligned with this for best drape and stretch.
- Right side/Wrong side: The ‘right’ side is the print or finished side meant to show; the ‘wrong’ side is interior.
- Seam allowance: The area between the edge of the fabric and the stitching line—typically 3/8″ or 5/8″.
- Dart: A folded, stitched shape for fitting curves (like bust or waist).
- Backstitch: Reversing stitches at the start and end of a seam to lock threads in place.
- Press: Using an iron to set seams after stitching.
Final Thoughts: Enjoy Your Sewing Journey
Learning to sew opens a world of possibilities, whether you want to build a unique wardrobe, save money, or make gifts for loved ones. The key is patience—allow yourself to learn one project at a time and celebrate every improvement. Armed with these tips, you’re on your way to sewing clothes you’ll be proud to wear!
Additional Resources
- Look for beginner sewing books with step-by-step photos.
- Follow sewing bloggers and YouTube channels for visual tutorials.
- Join online sewing forums or local groups to swap advice and support.
References
- https://emilylightly.com/2020/10/how-to-start-sewing-your-own-clothes/
- https://thesewingdivas.wordpress.com/2008/04/30/mitered-hem-hp-cosmopolitan-dress/
- https://www.youtube.com/watch?v=VrDbvfsHx1Q
- https://www.cosmopolitan.com/style-beauty/fashion/a35270713/how-to-sew-clothes-for-beginners/
- https://www.cosmopolitan.com/uk/fashion/style/a37637058/sewing-wedding-guest-outfits/
- https://www.youtube.com/watch?v=4EjxTIMmSrA
- https://maison-fauve.co.uk/products/cosmopolitan-playsuit-dress-sewing-pattern
- https://librarytalespublishing.com/products/the-beginners-guide-to-sewing