Pumpkin Pie in a Cup: The Ultimate No-Bake Pumpkin Dessert
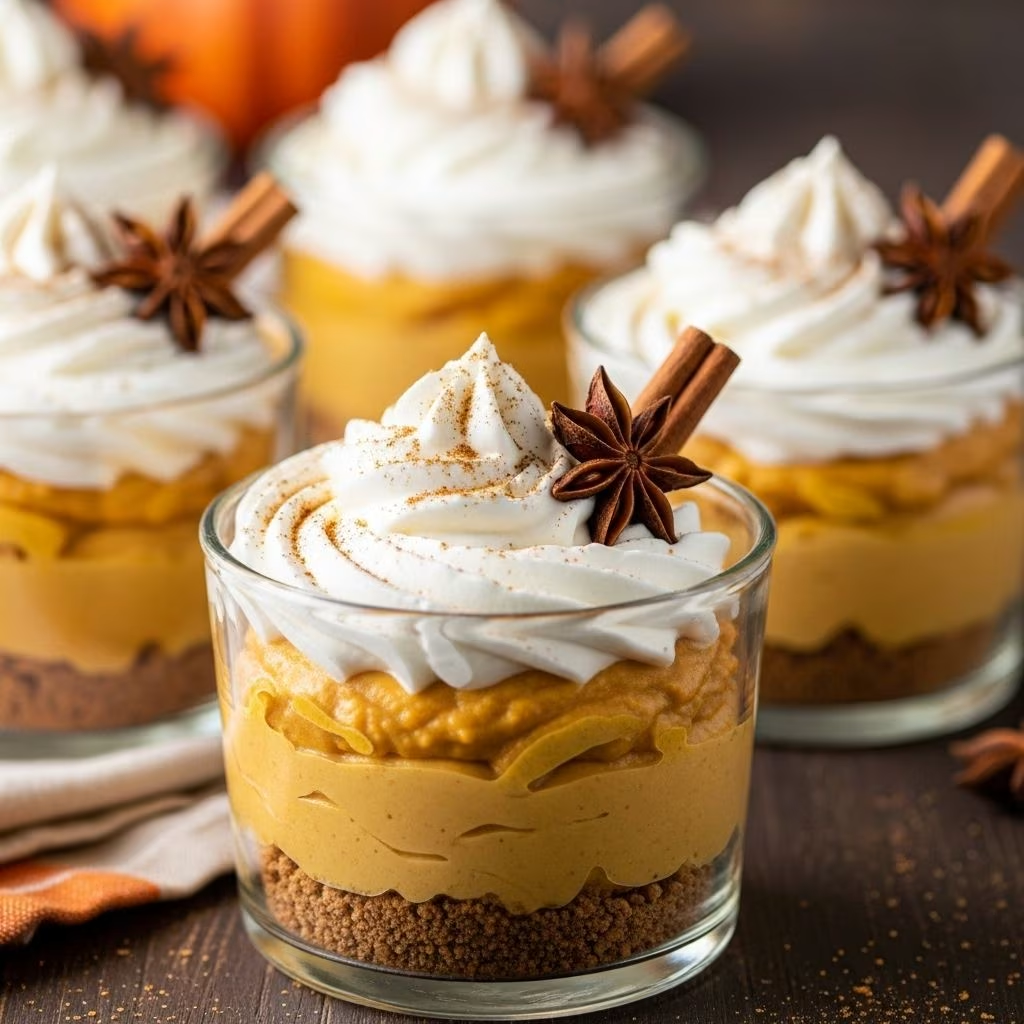
If you’re craving pumpkin pie but don’t want to turn on the oven, this pumpkin pie in a cup recipe delivers all the satisfying, spiced flavors in a fuss-free, no-bake format. Perfect for autumn gatherings, Thanksgiving, or simple weeknight treats, it’s portion-controlled, quick to make, and endlessly customizable. Whether you have leftover pumpkin puree or need a dessert for a crowd, pumpkin pie in a cup is the answer to your sweet-tooth cravings.
Why Pumpkin Pie in a Cup?
- No-bake convenience: Skip the oven and time-consuming crust making—this dessert comes together in minutes.
- Perfect portions: Serve individual cups for easy presentation and portion control.
- Flexible & allergy friendly: Make it gluten-free, dairy-free, lower sugar, or suit other dietary needs.
- Great for gatherings: Prepare in advance for parties, holidays, or potlucks—assemble at the last minute to keep it fresh.
- Autumn flavors all year: Enjoy pumpkin-pie goodness whenever you crave it—not just at Thanksgiving!
Key Ingredients
This recipe captures the essence of classic pumpkin pie with simple, accessible ingredients that you likely have in your pantry. Here’s what you need:
- Pumpkin Puree: Use canned pure pumpkin (not pumpkin pie filling) for authenticity and ease.
- Cottage Cheese: Adds rich creaminess and a protein boost. Fat-free, 2%, or full-fat work.
- Sugar or Sweetener: White sugar or a 1:1 sugar substitute for a lower-calorie version.
- Pumpkin Pie Spice: A blend of cinnamon, nutmeg, ginger, and cloves. Substitute with individual spices as needed.
- Vanilla Extract: For depth and warmth.
- Orange Zest: Adds brightness to balance the spice (optional but recommended).
- Graham Crackers: Crushed for the classic pie “crust” effect.
- Pinch of Salt: Enhances all the other flavors.
Optional toppings include light whipped cream or a non-dairy whipped topping, and an extra sprinkle of cinnamon or pumpkin pie spice.
Step-by-Step Instructions: How to Assemble Pumpkin Pie in a Cup
- Crush the Graham Crackers:
Seal 4 graham cracker squares in a zip-top bag and crush with a rolling pin or the bottom of a measuring cup. Set aside. - Blend the Pumpkin Pie Filling:
In a high-powered blender, combine 15 ounces pumpkin puree, 1/3 cup fat-free cottage cheese, 1/2 cup sugar (or sweetener), 1 teaspoon pumpkin pie spice, 1 teaspoon vanilla extract, 1/4 teaspoon orange zest, and a pinch of salt. Blend until completely smooth and creamy. - Chill the Mixture:
For best flavor and texture, refrigerate the pumpkin mixture in an airtight container for at least 1-2 hours or until you’re ready to assemble. This step helps the flavors meld and the filling set. - Layer the Cups:
Spoon a layer of crushed graham crackers into the bottom of small cups or jars. Add a generous dollop of pumpkin filling. Repeat layers as desired but finish with filling on top. - Top and Serve:
Just before serving, add a dollop of whipped cream or topping and a sprinkle of spice. If desired, top with reserved graham cracker crumbs for crunch.
Expert Tips for Perfect Pumpkin Pie Cups
- Choose the right cups: 4-6 ounce cups or jars offer the ideal individual portion.
- Don’t over-assemble: Add graham cracker crumbs just before serving to prevent sogginess.
- Refrigerate ahead: Make filling ahead and store up to 2-3 days; assemble cups when ready to serve.
- Texture tweaks: Want a richer, thicker pie? Use full-fat cottage cheese or let the filling set overnight for a firmer consistency.
- Adjust sweetness: Taste the filling before refrigerating; add more sweetener or spice if you like.
Variations & Customizations
Customize your pumpkin pie in a cup to fit any taste or dietary preference:
| Variation | How to Make It |
|---|---|
| Gluten-free | Use gluten-free graham crackers or omit crumbs for a crustless version. |
| Dairy-free | Substitute cottage cheese with a thick non-dairy yogurt or coconut cream. |
| Low-sugar | Use a sugar substitute such as stevia, monk fruit sweetener, or allulose. |
| Nutty crunch | Add toasted pecans, walnuts, or pumpkin seeds between layers. |
| Pie in a Mug (Microwave) | Mix all filling ingredients with 1 beaten egg and 1/4 cup evaporated milk, microwave 2-3 minutes in a mug, and enjoy warm. |
How to Store Pumpkin Pie in a Cup
- Store assembled cups in the fridge for up to 24 hours, but best to add graham crackers and topping upon serving to avoid sogginess.
- Filling mixture can be made 2-3 days ahead and kept in an airtight container in the refrigerator.
- Do not freeze: Texture may suffer after thawing due to dairy and pumpkin mixture separation.
Serving Suggestions
- Add a swirl of whipped cream and a sprinkle of cinnamon or pumpkin pie spice for classic presentation.
- Garnish with mini pumpkin seeds, candied pecans, or shaved chocolate for a creative twist.
- Serve in clear glass cups, jars, or parfait glasses for elegant layering.
- Mini versions in 2-ounce cups are fun for party trays and kids’ snacks.
Great Pairings for Pumpkin Pie Cups
- Spiced apple cider
- Hot coffee or chai tea
- Vanilla ice cream (served on the side for an extra treat)
- Harvest fruit salad (apple, pear, pomegranate, and dried cranberries)
Nutrition Highlights
This dessert is easy to lighten up compared to traditional pumpkin pie. The use of cottage cheese instead of cream gives a protein boost and keeps it lower in fat. By swapping regular sugar for a sugar-free substitute and using fat-free dairy, you can make this treat fit wellness goals without sacrificing flavor.
- Lower in calories and fat compared to classic pumpkin pie.
- Added protein from cottage cheese or dairy alternative.
- Can be adapted for gluten-free, dairy-free, and low-sugar diets.
- High in fiber from the pumpkin puree.
Frequently Asked Questions (FAQs)
Q: Can I make pumpkin pie in a cup ahead of time?
A: Yes, prepare the pumpkin filling up to 2–3 days in advance and store in an airtight container in the fridge. Assemble cups right before serving to keep graham crackers crisp.
Q: How long does pumpkin pie in a cup last?
A: The filling will last 2–3 days in the refrigerator. Assembled cups are best consumed within 24 hours for the best texture.
Q: Can I use something other than cottage cheese?
A: Yes, try using Greek yogurt for a slightly tangier flavor or a dairy-free alternative for plant-based diets.
Q: Is this recipe gluten-free?
A: The recipe is gluten-free if you use gluten-free graham crackers or skip the crumb layer entirely.
Q: Can I serve it warm?
A: While the no-bake version is typically chilled, you can make a microwave pumpkin pie in a cup by adding an egg and evaporated milk, microwaving 2-3 minutes, and serving warm.
Q: What can I use instead of pumpkin pie spice?
A: Use 1 teaspoon of cinnamon plus a pinch each of nutmeg, ground ginger, and cloves as a substitute for pumpkin pie spice.
Other Pumpkin & No-Bake Desserts to Try
- Healthy Pumpkin Pie
- Pumpkin Spice Muffins
- No-Bake Raspberry Cheesecake Jars
- Banana Cream Pie in a Jar
- Air Fryer Apple Crisp
- Crustless Pumpkin Pie in a Mug (microwave version)
Pumpkin Pie in a Cup Recipe: Quick Reference
| Prep Time | Cook Time | Total Time | Servings |
|---|---|---|---|
| 5 minutes | 0 minutes | 5 minutes (excluding chill) | 4-6 cups |
Conclusion: Easy, Delicious, and Festive
Pumpkin pie in a cup is a delightful twist on a seasonal favorite. With its no-bake simplicity, customizable ingredients, and endless topping options, this dessert is perfect for both busy weeknights and festive gatherings. Whether you’re making it for kids, for a party, or just to satisfy a pumpkin pie craving, it brings all the warmth and spice of autumn in a single serving—no oven required!
References
- https://healthyfoodiegirl.com/pumpkin-pie-cups/
- https://www.mommafitlyndsey.com/pumpkin-pie-in-a-cup/
- https://foodmeanderings.com/crustless-pumpkin-pie-in-a-cup/
- https://www.prevention.com/food-nutrition/recipes/a20481029/pumpkin-pie-in-a-cup/
- https://simplydesserts.us/keto-crustless-pumpkin-pie-cups/
- https://callascleaneats.com/mini-pumpkin-pie-cups/
- https://www.prevention.com/food-nutrition/g20450493/healthy-pumpkin-recipes/
- https://danishealthyeats.com/single-serve-pumpkin-pie-paleo-gluten-free/
- https://www.12minuteathlete.com/healthy-pumpkin-pie-cups-recipe/