


The Magic of Butterfly Sugar Cookies
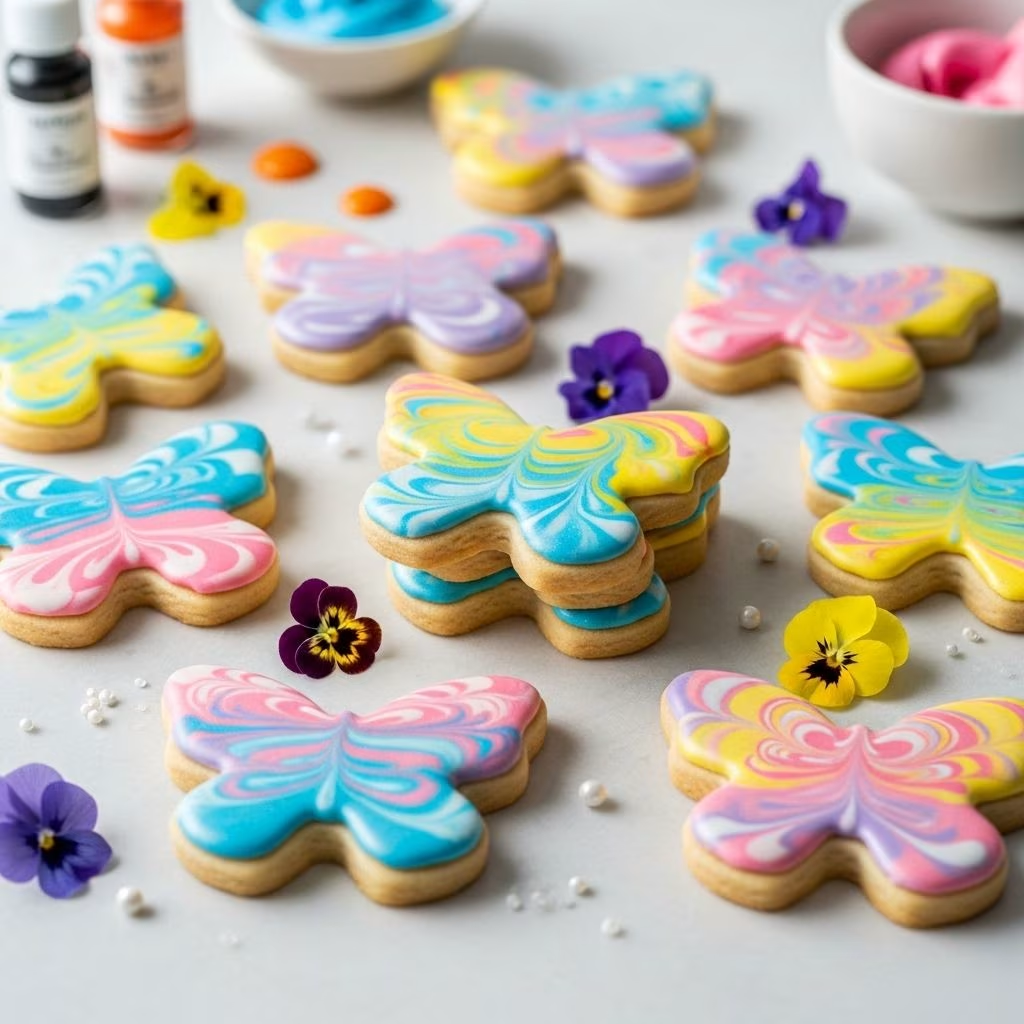
There’s something truly enchanting about butterfly sugar cookies that captures the essence of spring and summer celebrations. These delightful treats combine the classic appeal of homemade sugar cookies with an elegant decorating technique that looks far more complicated than it actually is. The secret lies in the marbled icing method, which creates beautiful swirled patterns reminiscent of butterfly wings without requiring advanced piping skills or artistic expertise.
What makes this recipe particularly special is its accessibility to bakers of all skill levels. The marbled decorating style eliminates the need for precise piping work, steady hands, or elaborate decorating tools. Instead, you simply dip your cookies into swirled icing, allowing the natural flow and movement to create organic, wing-like patterns that are unique to each cookie.
Essential Ingredients for Perfect Butterfly Cookies
The foundation of exceptional butterfly sugar cookies begins with selecting the right ingredients and understanding their roles in creating the perfect texture and flavor profile.
Cookie Base Components
The cookie dough requires 2 sticks plus 5 tablespoons of salted butter, which provides richness and helps create the tender, melt-in-your-mouth texture that makes these cookies so irresistible. The butter should be properly softened to room temperature to ensure smooth mixing and proper incorporation with the other ingredients.
Granulated sugar (1½ cups) not only sweetens the cookies but also contributes to their structure and helps create the characteristic crispy edges. The addition of grated orange zest from one orange elevates the flavor profile, adding a bright citrus note that complements the sweetness and adds complexity to each bite.
Two large eggs serve as binding agents while contributing to the cookies’ tender texture, and vanilla extract enhances the overall flavor foundation. The dry ingredients include 4 cups of all-purpose flour, which provides structure, 1 tablespoon of baking powder for proper lift, and ½ teaspoon of kosher salt to balance the sweetness and enhance all the other flavors.
Marbled Icing Essentials
The show-stopping marbled icing requires 2 pounds of sifted powdered sugar, which creates the smooth, glossy finish that makes these cookies so visually appealing. The icing base includes ⅓ cup of whole milk and 2 large pasteurized egg whites, which work together to create the proper consistency for dipping.
The magic happens with the addition of red and orange food coloring, which creates the vibrant swirls that mimic butterfly wing patterns. Using gel food coloring typically produces more vibrant colors with less impact on the icing consistency compared to liquid food coloring.
Step-by-Step Cookie Preparation
Creating the perfect butterfly sugar cookies requires attention to detail and proper technique at each stage of the process.
Mixing the Dough
Begin by combining the softened butter, granulated sugar, and orange zest in the bowl of an electric mixer. Beat this mixture on medium speed until it becomes smooth and well-incorporated, which typically takes 3-4 minutes. The mixture should appear light and fluffy when properly creamed.
Add the eggs and vanilla extract, beating again while scraping down the sides of the bowl halfway through to ensure even mixing. This step is crucial for incorporating air into the dough and creating a uniform texture.
In a separate bowl, sift together the flour, baking powder, and salt. Sifting helps eliminate lumps and ensures even distribution of the leavening agent. With the mixer on low speed, alternate adding the dry ingredients and milk to the butter mixture, beginning and ending with the dry ingredients.
Chilling and Shaping
Divide the completed dough in half and flatten each portion into disks. Place each disk in separate resealable plastic bags and refrigerate for approximately 2 hours, or until the dough becomes firm enough to roll without sticking.
Proper chilling is essential for several reasons: it prevents the cookies from spreading too much during baking, makes the dough easier to handle, and helps maintain clean, sharp edges when cutting butterfly shapes.
Baking Techniques for Optimal Results
Preheat your oven to 350°F and line two baking sheets with parchment paper for easy removal and cleanup. Roll out both pieces of chilled dough to approximately ¼ inch thickness on a lightly floured surface.
Using 2- to 3-inch butterfly cookie cutters, cut out as many cookies as possible from each piece of dough. Place the shaped cookies on the prepared baking sheets, leaving adequate space between each cookie for slight spreading during baking.
Bake the cookies for 8 to 10 minutes, or until they’re just set but not browned. The key to perfect sugar cookies is removing them from the oven while they still appear slightly underbaked – they’ll continue cooking on the hot pan after removal.
Allow the cookies to cool on the baking sheets for 5 minutes before transferring them to wire racks. This brief cooling period prevents breakage while ensuring the cookies maintain their shape during transfer.
Mastering the Marbled Icing Technique
The marbled icing technique is what transforms ordinary sugar cookies into stunning butterfly masterpieces, and the process is surprisingly straightforward.
Creating the Base Icing
Combine the sifted powdered sugar, milk, and pasteurized egg whites in the bowl of an electric mixer. Beat the mixture on medium-high speed until it becomes thick and glossy, which typically takes 5-7 minutes. The consistency should be thick enough to coat the back of a spoon but thin enough to flow smoothly when dipped.
If the icing appears too thin, gradually add more sifted powdered sugar until you achieve the proper consistency. The icing should be stiff enough to create a thick, even layer when you dip the cookie’s surface.
Creating the Marble Effect
Divide the prepared icing among 3 or 4 smaller bowls. This allows you to work with multiple color combinations and prevents the entire batch from becoming muddled too quickly.
Add 2 to 3 drops each of red and orange food coloring to each bowl, scattering the drops over the surface of the white icing. Using a toothpick, drag it through the colored drops several times to create swirled patterns, but avoid over-mixing – the goal is to maintain distinct color separation that will create the marbled effect.
Dip the top side of each cooled cookie into the swirled icing, allowing excess to drip off before placing the cookie on a wire rack to dry. Each cookie will have a unique pattern based on how the colors have swirled in that particular area of the bowl.
Decorating Tips and Techniques
The beauty of the marbled icing technique lies in its forgiving nature and the unique results it produces with each cookie.
Working with Multiple Bowls
As you work through decorating your cookies, you’ll notice that the icing in each bowl gradually becomes more mixed and less distinct. When the first bowl becomes too muddled to produce clear color separation, simply move on to the next bowl with fresh color swirls.
This rotation system ensures that you maintain vibrant, well-defined patterns throughout the entire batch of cookies while preventing waste of perfectly good icing.
Drying and Storage
Allow the decorated cookies to dry completely on wire racks for approximately 1 hour. Proper drying is essential to prevent smudging and to achieve the glossy, professional finish that makes these cookies so visually appealing.
Once fully dried, the cookies can be stored in airtight containers at room temperature for up to one week, making them perfect for advance preparation for parties or special events.
Customization and Variations
While the classic red and orange color combination creates beautiful traditional butterfly patterns, this technique lends itself to numerous creative variations.
Color Combinations
Consider experimenting with different color palettes to match specific themes or seasons:
Spring butterflies: Combine pink, purple, and yellow for soft, garden-inspired patterns
Summer vibes: Use bright blues, greens, and yellows for tropical butterfly effects
Autumn themes: Mix deep reds, oranges, and golds for rich, warm-toned butterflies
Winter elegance: Create monochromatic effects using different shades of blue or purple
Alternative Flavor Profiles
While orange zest provides a delightful citrus note, you can customize the flavor profile by substituting lemon zest for a brighter, more tart flavor, or lime zest for a unique tropical twist. Almond extract can replace vanilla for a more sophisticated flavor profile that pairs beautifully with the marbled icing technique.
Troubleshooting Common Issues
Even with careful attention to technique, bakers occasionally encounter challenges when making butterfly sugar cookies.
Dough-Related Problems
If your dough becomes too soft to roll, return it to the refrigerator for additional chilling time. Conversely, if the dough cracks when rolled, allow it to sit at room temperature for 10-15 minutes to soften slightly.
Cookies that spread too much during baking typically indicate insufficiently chilled dough or an oven temperature that’s too low. Ensure proper chilling time and verify your oven temperature with an oven thermometer.
Icing Consistency Issues
Icing that’s too thin will create a translucent coating that lacks the desired opacity and coverage. Gradually add more sifted powdered sugar until you achieve the proper consistency. Icing that’s too thick may not flow smoothly when dipping; thin it gradually with small amounts of milk.
Storage and Serving Suggestions
Properly stored butterfly sugar cookies maintain their quality and visual appeal for extended periods, making them excellent choices for gift-giving or advance party preparation.
Store decorated cookies in single layers separated by parchment paper to prevent the icing decorations from sticking together. Airtight containers at room temperature provide optimal storage conditions for maintaining both flavor and texture.
These cookies make stunning centerpieces for spring and summer gatherings, baby showers, birthday parties, or any celebration that calls for something special and beautiful. Their individual uniqueness means each guest receives a truly one-of-a-kind treat.
Frequently Asked Questions
Q: Can I make the cookie dough ahead of time?
A: Yes, the cookie dough can be prepared up to 3 days in advance and stored in the refrigerator, or frozen for up to 2 months. Thaw frozen dough in the refrigerator overnight before rolling.
Q: What if I don’t have butterfly cookie cutters?
A: This marbled icing technique works beautifully with any cookie shape. Try flowers, hearts, or simple circles – the marbled effect will create beautiful patterns regardless of the shape.
Q: Can I use regular egg whites instead of pasteurized?
A: Pasteurized egg whites are recommended for food safety since the icing isn’t cooked. If using regular egg whites, consume the cookies within 2-3 days and keep them refrigerated.
Q: How do I prevent the icing from becoming too muddled?
A: Use multiple small bowls of icing and switch to a fresh bowl when the colors become too mixed. Also, avoid over-stirring when creating the initial color swirls.
Q: Can I add glitter or other decorations to the wet icing?
A: Absolutely! Edible glitter, sanding sugar, or small pearl decorations can be sprinkled onto the wet icing for additional visual impact. Add them immediately after dipping for best adhesion.
References
- https://www.thepioneerwoman.com/food-cooking/recipes/a35534467/butterfly-sugar-cookies-recipe/
- https://www.thepioneerwoman.com/food-cooking/recipes/a62909913/cut-out-sugar-cookies-recipe/
- https://www.thepioneerwoman.com/food-cooking/recipes/a9471/my-favorite-sugar-cookies/
- https://www.thepioneerwoman.com/food-cooking/meals-menus/g63009292/pioneer-woman-cut-out-cookie-recipes/
- https://www.thepioneerwoman.com/food-cooking/meals-menus/g39172803/mothers-day-cookies/


