The Cold-Start Chicken Searing Method: A Kitchen Revolution
If you’ve ever searched for restaurant-quality, succulent chicken with perfectly crisp, golden skin, you’ve likely encountered hundreds of searing guides. Nearly all of them start with the same refrain: ‘Let your pan get scorching hot before adding meat.’ But what if much of what we’ve been taught about pan-searing is due for a rethink? The cold-start chicken searing method flips tradition on its head and produces dramatically better results. In this article, we’ll explore how this technique works, the science behind it, common pitfalls, best-use cases, and practical steps for transforming the way you cook chicken at home.
What Is the Cold-Start Searing Method?
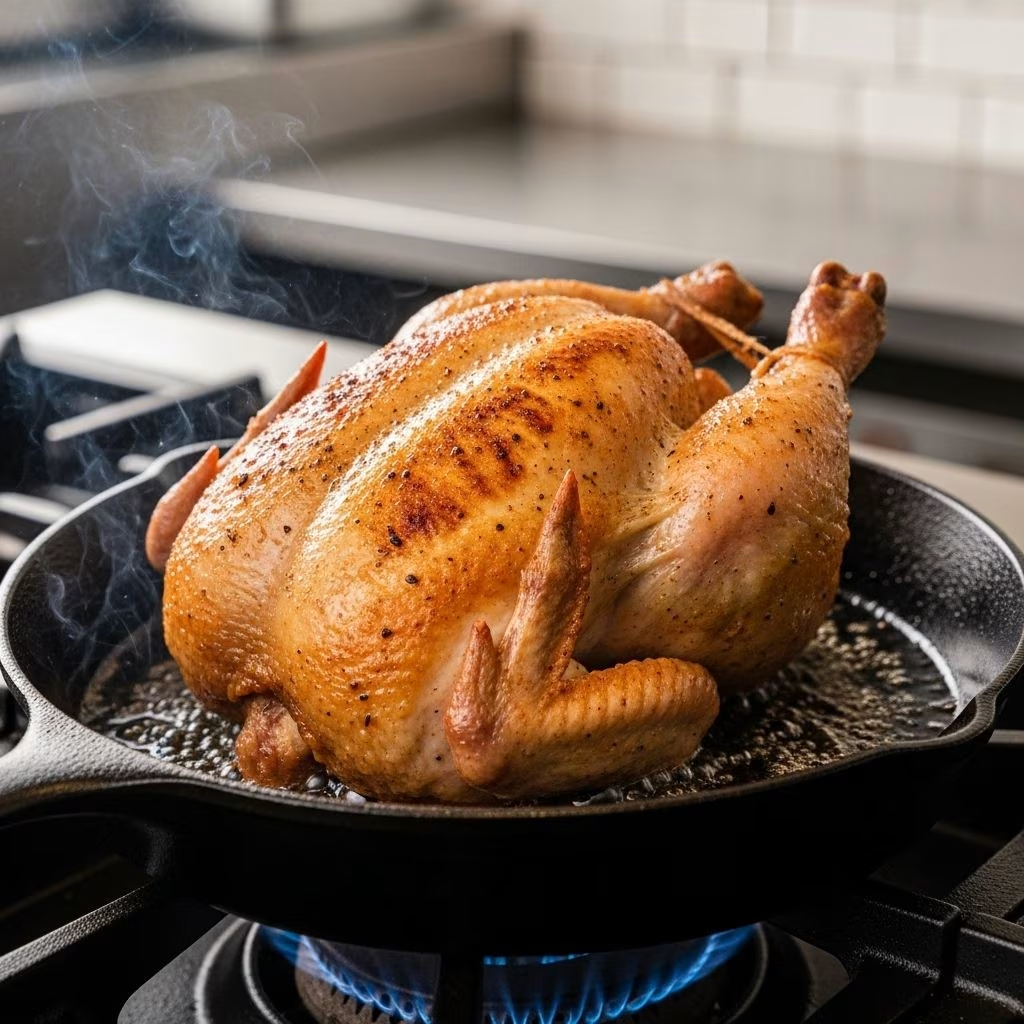
The cold-start searing method involves beginning the cooking process by placing your chicken in a cold, unheated pan, often skin-side down, and then gradually heating it over a medium or medium-low flame. Instead of the abrupt sizzle associated with hot pans, this gentle approach grants better control over both texture and juiciness. By the time the pan reaches the temperature where browning happens, much of the fat has rendered and the skin becomes gorgeously crisp while the meat stays moist.
Key Steps of the Method
- Start Cold: Place chicken in an unheated pan (preferably skin-side down for bone-in, skin-on pieces).
- Render Slowly: Use moderate heat to give time for fat to melt and the skin to gently brown.
- Finish: Once the skin is crisped and golden, flip and finish cooking as needed.
Why Cold-Start Works: The Kitchen Science
Traditional advice urges cooks to preheat their pan as a way to ‘seal in’ juices, but modern food science reveals that meat isn’t sealed in any appreciable way when dropped into a hot pan. In fact, chicken skin can contract and toughen quickly at very high heat, leading to dryness and sometimes rubbery results. The cold-start searing method improves upon this by:
- Slowly rendering fat beneath the skin so it bastes the meat and encourages better browning.
- Giving skin time to gradually crisp instead of seizing up and shrinking on contact with aggressive heat.
- Preventing protein contraction, which helps avoid tough, unevenly cooked chicken.
In essence, starting cold lets the chicken heat up gently, preserving its natural juices and allowing flavorful fat to render out slowly rather than being expelled by panic-inducing temperatures. The result: skin that is evenly crisped and meat that’s deeply juicy.
Comparing Cold-Start and Hot-Start Searing
| Technique | Texture | Juiciness | Browning |
|---|---|---|---|
| Hot-Start Searing | Potentially tough/rubbery skin, can burn quickly | Moisture often lost rapidly | Can brown, but may burn before fat renders |
| Cold-Start Searing | Evenly crisp, tender skin | Excellent juiciness retained | Deep, golden, and uniform browning |
Step-by-Step: How To Cold-Start Sear Chicken
- Select the Right Cut: Bone-in, skin-on chicken thighs, drumsticks, or breasts work best. Skinless or boneless cuts won’t benefit as much from this method.
- Pat Chicken Dry: Remove excess moisture with paper towels for maximum crispness.
- Season Generously: Salt and pepper the meat side. For extra flavor, marinate or use a spice rub, but avoid wet marinades on the skin.
- Arrange in a Cold Pan: Lay the chicken pieces skin-side down in a single layer in a cold, ungreased skillet (cast iron or stainless steel preferred).
- Apply Moderate Heat: Place the pan on the stove and set to medium or medium-low. Avoid high heat.
- Let Fat Render: As the pan heats, chicken fat will pool. Tilt the pan occasionally and spoon out excess fat if desired, or use it to baste.
- Monitor Browning: After 15–25 minutes, the skin should be deep golden and crisp. If needed, adjust heat to prevent burning.
- Flip and Finish: Flip chicken and cook the meat side until an instant-read thermometer reads 155–160°F. Let rest for 5–10 minutes (carryover heat reaches safe 165°F).
Visual Cues: Knowing When Your Chicken Is Perfect
- Skin Appearance: Deep golden brown, with even color and visible crispness.
- Chicken Fat: Rendered fat collects in the pan—indicative that the skin has lost much of its fat for maximum crunch.
- Thermometer Reading: Chicken’s thickest part should approach 155–160°F before resting.
- Sizzle Sound: Should intensify steadily but never become excessively loud or violent (a sign of overheating).
Common Mistakes and Troubleshooting Tips
- Starting with wet chicken: This prevents browning and crisping. Always pat dry thoroughly.
- Using high heat: Avoid the temptation! Start low to prevent skin from burning before rendering out fat.
- Moving chicken too soon: Let skin release on its own. When fully crisped, it will detach easily from the pan.
- Crowding the pan: Overcrowding creates steam and sogginess. Cook in batches if needed.
- Neglecting resting time: Give chicken time to rest. This equalizes temperature and locks in moisture.
Best Uses and Ideal Cuts for the Cold-Start Method
- Perfect For:
- Bone-in, skin-on chicken thighs
- Bone-in, skin-on drumsticks
- Bone-in, skin-on breast pieces
- Less Ideal For:
- Boneless, skinless chicken (does not benefit from rendering skin fat)
- Duck breasts (cold-start method works similarly well!)
- Pork belly or fattier cuts of pork
Why Not Always Use the Hot Pan?
The classic hot-sear method has its places—for thin, tender steaks or quick browning of pre-cooked proteins. But in the case of fatty, skin-on chicken, cold-starting offers several distinct advantages:
- Juicier results thanks to gentle, controlled heat application.
- Superior browning and crispiness without burning.
- Reduced stickiness: Properly rendered skin lifts clean with minimal sticking.
Frequently Asked Questions (FAQs)
Q: Is cold-start searing chicken truly safe?
Yes. As long as the final internal temperature is at least 165°F (71°C), it is safe. Many cooks actually finish chicken slightly lower, around 155°F to 160°F, then let it rest off-heat to allow carryover cooking to reach a food-safe level.
Q: Can this method be used for boneless chicken breasts or cutlets?
The cold-start approach works best for skin-on, bone-in pieces because it takes advantage of the slow fat rendering process. Boneless, skinless pieces can still be cooked this way, but they will not benefit from the same crisping and flavor development.
Q: What kind of pan is best for cold-start searing?
Cast iron or stainless steel pans are ideal for this method due to their superior heat retention and even temperature distribution. Nonstick pans can also work, although they generally don’t produce as crisp a skin.
Q: How can I keep the chicken from sticking?
A properly cold-started chicken, when allowed to crisp fully, will release naturally from the pan thanks to the rendered fat. If it sticks, let it cook longer; forced movement risks tearing the skin.
Q: Can this method be used with other meats?
Absolutely! Cold-start searing is fantastic for duck breasts and skin-on pork belly, as they also benefit from gradual fat rendering and gentle browning.
Expert Tips for Mastering the Cold-Start Method
- Marinate for Flavor: While the skin should remain dry, feel free to marinate or season the meat side. Simple combinations of salt, pepper, herbs, and garlic yield excellent results.
- Experiment with Aromatics: Add smashed garlic cloves, sprigs of rosemary, or thyme to the pan partway through cooking for more aroma.
- Use Rendered Fat: Spoon rendered chicken fat over the top of the meat during the final minutes for rich flavor and a glossy finish.
- Don’t Rush: Patience is key. Slow rendering means crispier skin and juicier meat.
Adjustments for Skin-On Breasts and Other Cuts
Chicken breasts, being thicker and containing less connective tissue, require slight adjustments compared to thighs:
- Lower heat for longer duration to avoid overcooking the delicate white meat.
- Consider tenting with foil after browning to finish gently through without losing moisture.
Can You Use Oil or Butter?
You can add a small amount of neutral oil if concerned about sticking, especially in less seasoned pans. Excess fat from the chicken skin, however, is usually enough to both lubricate the pan and impart flavor. Butter can be added in the last minute for a nutty finish, but starting with it may lead to burning since butter solids brown too quickly at higher heat required for browning skin.
When Is Cold-Start Searing Not the Best Choice?
- For very thin cutlets or pounded chicken breasts, a hot-start pan is quicker and more effective—there isn’t enough fat or skin to benefit from the rendering process.
- If you need fast cooking or intend to finish under the broiler, the cold-start method may be too slow or cumbersome.
Nutritional and Flavor Advantages
Cold-start searing not only yields superior texture and flavor but also renders out a considerable portion of subcutaneous fat from the skin. This means each bite has less greasiness, more flavor, and a much-improved mouthfeel. Plus, unlike pan-frying in an excess of added oil, this method utilizes the chicken’s own fat, making it more calorie-conscious and naturally rich.
Summary Table: Key Takeaways
| Aspect | Hot-Start | Cold-Start |
|---|---|---|
| Texture | Risk of tough, uneven skin | Consistently crisp, delicate skin |
| Moisture | Juice loss is common | Juicier, more evenly cooked meat |
| Difficulty | Requires fast attention, risk of burning | Forgiving, easy to monitor |
| Flavor | Good, often less complex | Fat rendering enriches flavor |
Conclusion: Why You Should Try Cold-Start Chicken Searing
For cooks of all levels, understanding and mastering the cold-start searing method is a must. The science-backed approach delivers reliably juicy, flavorful, and beautifully crisp-skinned chicken with less risk and more reward. Whether you’re after weeknight convenience or aiming to impress guests, starting with a cold pan may be your ticket to the best chicken you’ve ever made at home.