


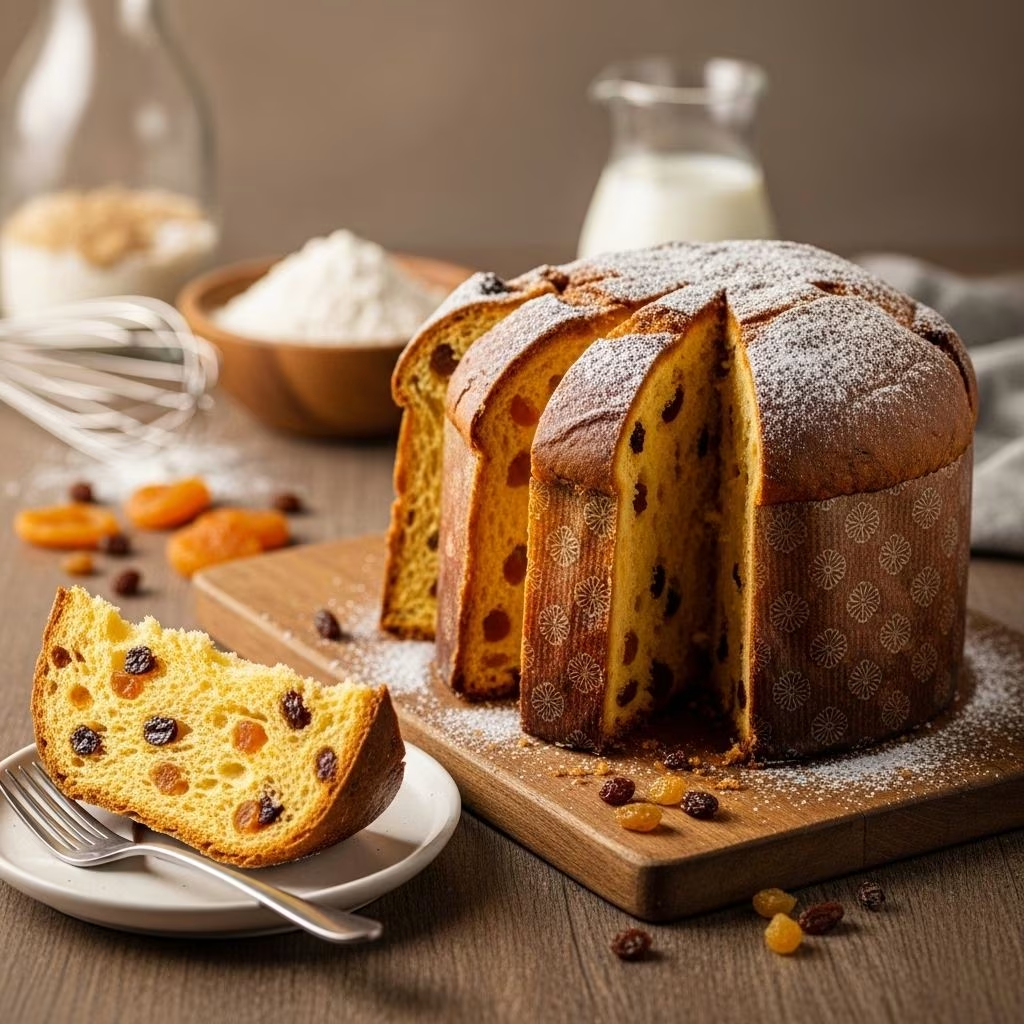
Gluten-Free Panettone: The Ultimate Guide to Festive Italian Bread
Panettone, the classic Italian Christmas bread, is celebrated for its airy, buttery crumb and festive mix-ins of citrus, vanilla, and dried fruits. Traditionally made with wheat flour, eggs, and butter, panettone poses a particular challenge for gluten-free bakers—yet the payoff is a show-stopping loaf that brings festive cheer to every table.
Why Gluten-Free Panettone?
For those living with celiac disease or gluten intolerance, holiday baking often involves trade-offs. Store-bought gluten-free panettone often lacks the height, texture, and authentic flavor of the traditional loaf. Homemade gluten-free panettone allows bakers to control every ingredient, achieve a superior crumb, and celebrate Christmas with a bread that is just as special as the original.
Understanding Panettone: Bread, Cake, or Both?
Panettone sits at the crossroads between bread and cake. It features a soft, open crumb created by a rich, yeasted dough and owes its ethereal character to meticulous proofing and high moisture content. Traditionally, panettone is baked in a tall, round mold, giving it a dramatic visual appeal at the center of the holiday table.
- Texture: Light, open, and airy
- Flavors: Buttery, citrusy, with hints of vanilla and bursts of juicy fruit or chocolate
- Presentation: Towering, domed, often wrapped in colorful paper
Key Ingredients for Gluten-Free Panettone
The transition to gluten-free baking requires careful ingredient selection to replace the structure and elasticity provided by gluten. Here are the core ingredients and their roles:
- Gluten-Free Flour Blend: A well-balanced blend is essential for structure and lightness. A common combination includes white rice flour, potato starch, and tapioca starch. Premium blends designed for bread or enriched doughs, such as Caputo Fioreglut, may contain wheat starch (gluten-free by Codex standards, but not suitable for wheat allergy sufferers) .
- Psyllium Husk: Whole psyllium husk is often used as a binder—providing suppleness to the dough, capturing moisture, and mimicking gluten’s elasticity.
- Eggs: Contribute richness, lightness, and color.
- Butter: Delivers a tender crumb, classic buttery flavor, and moisture.
- Yeast: Gives rise and creates the characteristic airy texture. Dried active yeast or instant yeast both work well.
- Citrus Zest & Extracts: Infuse dough with Italian flavors—orange, lemon, and vanilla are common.
- Mix-Ins: Sultanas, raisins, candied peel, and/or chocolate chips add festive variety.
- Sugar & Honey: Sweeten and deepen flavor; honey also helps the yeast and increases softness.
Essential Equipment
- Mixing bowls and spatulas
- Kitchen scale for accurate measurements
- Electric stand mixer or hand mixer with dough hooks
- Chopping board and sharp knife
- Zester or fine grater
- Cling film or reusable cover
- Traditional panettone paper molds or deep cake tin (for 750g loaf)
- Cooling rack and skewers (for hanging the loaf upside down after baking)
Making Gluten-Free Panettone Step-by-Step
Although gluten-free panettone requires a few extra considerations, the process follows a familiar structure: mixing, proofing, shaping, baking, and cooling.
1. Prepare the Flour Blend
Combine all gluten-free flours and starches thoroughly in a large mixing bowl. Sift together to ensure even distribution—which helps maximize rise and uniform crumb.
2. Activate the Yeast
Warm milk gently (to about 100°F/38°C) and dissolve a teaspoon of sugar or honey. Stir in the yeast and leave for 5-10 minutes until foamy and active.
3. Mix the Dough
- Rub chilled, cubed butter into the flour blend until crumbly.
- Lightly beat eggs in a separate bowl.
- Add eggs, hydrated psyllium, and activated yeast to the flour mixture.
- Mix in sugar, salt, vanilla, citrus zests, and extracts.
- Using a mixer with dough hooks, mix until a thick, sticky batter forms.
- Beat for 4–5 more minutes—this helps aerate the dough and develop structure.
4. First Proof
Cover the bowl with cling film or a plate (without touching the dough) and place it in a warm, draft-free spot. Let dough rise for 1–2 hours until doubled in size.
5. Add Fruit or Chocolate
After the first proof, gently fold in your choice of dried fruit (sultanas, raisins, candied peel) or chocolate chips. Scatter the mix-ins over the dough and use a spatula to distribute evenly without deflating the rise.
6. Shape and Pan
- Scrape dough into a prepared panettone mold or lined tall tin.
- Smooth the top with a wet spatula for an even dome.
7. Final Proof
Allow the covered mold to rise again in a warm place for 1–2 hours until the dough nearly reaches the rim. Use a gently-warmed kitchen or proofing box if your kitchen is cool.
8. Bake
- Preheat oven to 350°F (175°C).
- Brush top of dough with egg wash if desired for shine.
- Bake for 45–55 minutes, rotating as needed to ensure even color.
- If browning too quickly, tent loosely with foil during the last 20 minutes.
9. Cool Upside Down
This iconic step helps preserve the tall, airy crumb as the panettone cools. Insert long skewers through the base of the loaf immediately after baking, then suspend the loaf upside down between chairs or over a deep roasting tin.
Flavor Variations: From Traditional to Chocolate
- Classic Fruited: Sultanas, raisins, and candied citrus peel for tradition.
- Chocolate Chip: Swap fruit for semi-sweet chocolate chips for a kid-friendly, decadent twist.
- Exotic Additions: Dried cranberries, dried apricots, or nuts can be added for unique flavor profiles.
Tips for Perfect Gluten-Free Panettone
- Use an accurate scale: Measuring by weight ensures best results, especially for gluten-free flours and psyllium.
- Proof in a warm space: Gluten-free doughs are sensitive to temperature; always proof at 75–80°F (24–27°C).
- Psyllium husk is essential: Skipping or reducing psyllium may lead to flat or gummy texture.
- Let cool completely: Resist cutting into panettone while still warm—it continues to set as it cools and will slice much better if left for several hours.
- Hang upside down as directed: Ensures the loaf remains lofty and doesn’t collapse.
Troubleshooting and Frequently Asked Questions
| Problem | Likely Cause | Recommended Fix |
|---|---|---|
| Dense or gummy crumb | Not enough psyllium, underproofing, or overhydration | Weigh ingredients, ensure correct proofing time, and avoid excess liquid |
| Bread didn’t rise well | Inactive yeast or a cold kitchen | Check yeast activity, proof in a consistently warm environment |
| Collapsed after baking | Removed from mold while too hot, not hung upside down | Support loaf by suspending upside down until fully cool |
| Dough too sticky to handle | Normal for gluten-free, but excessive wetness can be an issue | Lightly flour hands, do not overwork, use spatula for shaping |
Storage and Serving
- Best enjoyed fresh within 1–2 days of baking for peak texture and flavor.
- Store in an airtight container at room temperature.
- Freeze slices for up to a month; thaw at room temperature and refresh in a warm oven if desired.
- Serving ideas: Enjoy plain, with coffee, or toasted and slathered in butter. Panettone also makes an excellent base for festive bread pudding or French toast.
Recipe Example: Basic Gluten-Free Panettone
This simplified recipe outlines core steps for a classic gluten-free panettone (750g loaf):
- 10g dried active yeast
- 400ml semi-skimmed milk
- 1 tsp honey or sugar
- 80g caster sugar
- 18g whole psyllium husk
- 500g gluten-free bread flour mix
- 0.5 tsp fine salt
- 3 large eggs
- 120g unsalted butter, cubed and softened
- 1 tsp vanilla bean paste or extract
- Zest of 1 orange, zest of half a lemon (or 30g candied peel)
- 120g sultanas/raisins or 150g chocolate chips
Follow the process detailed above for mixing, proofing, and baking. Customize mix-ins to taste.
Frequently Asked Questions (FAQs)
Q: Is gluten-free panettone as light as the traditional version?
A: When made with a proper flour blend and rising agents, gluten-free panettone can achieve an impressively light, airy crumb—almost indistinguishable from the original.
Q: Why do you need to hang panettone upside down?
A: Hanging prevents the loaf from collapsing under its own weight as it cools, which is essential for maintaining its signature tall, fluffy shape.
Q: Can I use xanthan gum instead of psyllium husk?
A: While xanthan gum provides some binding, psyllium husk is superior for replicating the stretchiness of gluten and achieving a more authentic texture in enriched breads.
Q: Should I use fruit or chocolate chips in panettone?
A: Both are delicious—traditionalists favor dried fruit and citrus for holiday flavor, but chocolate chips make a rich contemporary variant that many love, especially children.
Q: My panettone seems to dry quickly. How can I keep it moist?
A: Store panettone tightly wrapped in plastic at room temperature and avoid slicing until ready to serve. Consider adding a slice of apple or orange to the container for extra moisture (remove after a day to prevent mold).
Bringing Gluten-Free Panettone Into Your Holiday Tradition
Baking gluten-free panettone from scratch is more than just a culinary challenge—it’s a way to ensure everyone can share in the warmth, tradition, and joy of the holiday table. With practice, the right ingredients, and a focus on technique, gluten-free bakers can craft a loaf that stands tall, tastes sweet, and becomes a new centerpiece for years to come.
References
- https://www.glutenfreealchemist.com/gluten-free-panettone-ultimate-recipe-italian/
- https://www.billyparisi.com/panettone/
- https://www.mygfguide.com/gluten-free-panettone/
- https://www.glutenfreealchemist.com/gluten-free-chocolate-chip-panettone-recipe/
- https://www.simpleglutenfreekitchen.com/2014/01/your-very-own-gluten-free-panettone.html


