


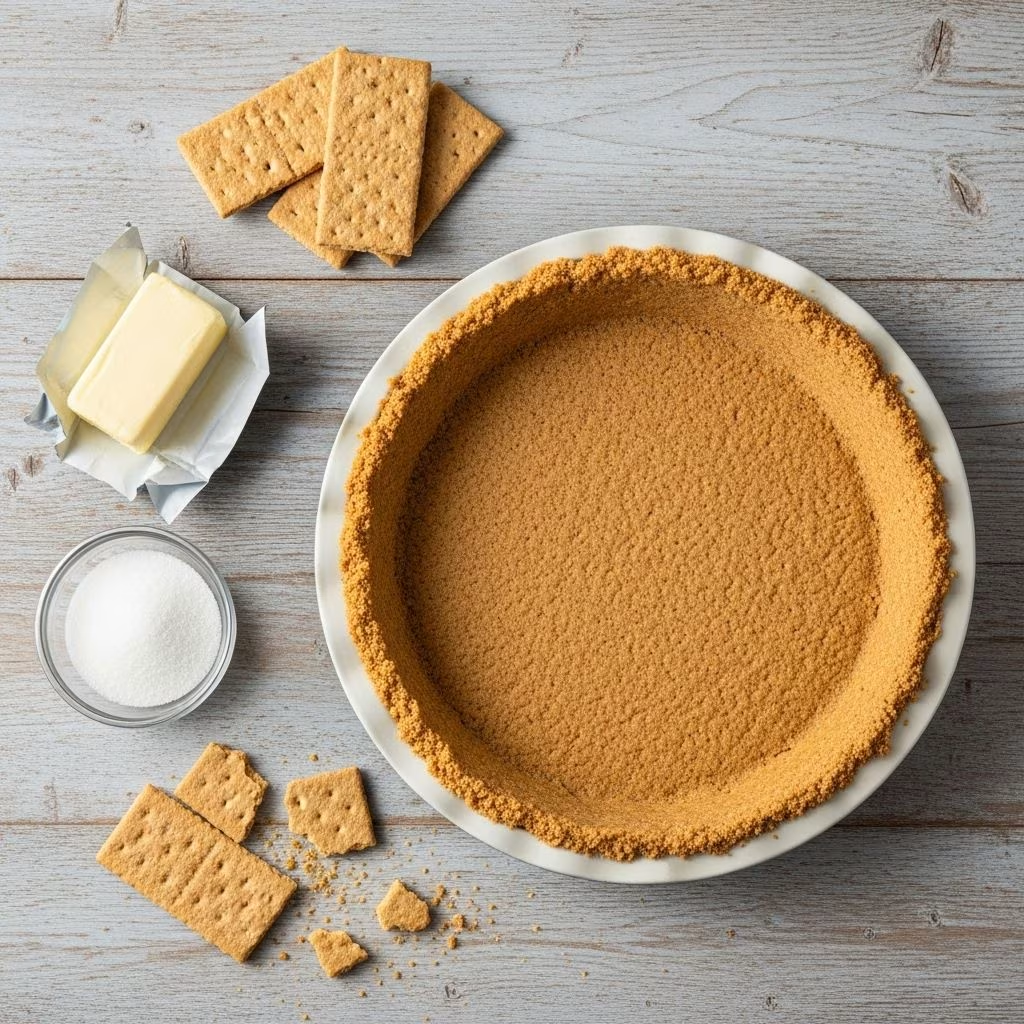
Homemade Graham Cracker Crust: The Easiest & Tastiest Pie Base
Master an essential baking skill: the homemade graham cracker crust. With just three ingredients, you can craft a delicious and versatile crust that pairs perfectly with pies, cheesecakes, tarts, and even no-bake desserts. This guide walks you through every step, answers common questions, and offers expert tips to ensure flawless results each time.
Why Choose a Graham Cracker Crust?
- Simplicity: Only three pantry-friendly ingredients required.
- Time-Saving: Prep and bake in under 20 minutes.
- Versatility: Works beautifully for creamy, fruity, and chocolatey fillings.
- Flavor & Texture: Buttery, crisp finish that complements a range of desserts.
Essential Ingredients
| Ingredient | Amount |
|---|---|
| Graham cracker sheets | 12 (about 6.4 oz.) |
| Granulated sugar | 2 tablespoons |
| Salted butter, melted | 6 tablespoons |
Tip: Use salted butter to balance the sweetness and add depth to the flavor.
Step-by-Step Directions
- Preheat your oven to 350°F (175°C).
- Crush the graham crackers to fine, sandy crumbs.
- In a food processor, pulse crackers with sugar until evenly ground.
- No food processor? Place crackers in a zip-top bag and crush with a rolling pin. Aim for a uniform, sandy consistency—no large chunks.
Tip: Don’t over-bake. Crust should be firm but not hard, and just lightly browned around the edges.
Expert Tips for a Perfect Graham Cracker Crust
- Uniform crumbs: Ensure crackers are finely crushed—large chunks can lead to uneven texture.
- Firm pressing: Use a cup or glass to evenly compress crumbs. This gives a sturdy, non-crumbly base.
- Butter temperature: Melted but not hot butter aids in evenly moistening the crumbs.
- Even baking: Rotate the pie plate halfway through baking for uniform color.
- Cool completely: Before wrapping or filling, let the crust cool fully to avoid sogginess.
Make-Ahead & Storage Tips
- Baked crust: Once cooled, wrap tightly in plastic. Store at room temperature for up to three days.
- Unbaked crust: Wrap securely and freeze for up to three months. Thaw completely at room temperature before baking.
- Holiday prep: Make crusts in advance to relieve last-minute baking stress.
- Cheesecake tip: For no-bake cheesecakes, chill the crust (rather than bake) for the ideal texture.
Creative Ways to Crush Graham Crackers
No food processor? Here are alternatives:
- Zip-top bag + rolling pin: Place graham crackers inside, squeeze out air, and roll/crush until finely ground.
- Mortar and pestle: For small amounts, use a sturdy mortar for crushing.
- Manual crumbler: Use a potato masher or sturdy glass in a mixing bowl.
Crushing crackers by hand can be oddly satisfying and is also great for involving young helpers in the kitchen.
Substitutions & Variations
- Sugar swaps: Brown sugar adds extra molasses flavor. Powdered sugar gives a finer crumb texture.
- Butter alternatives: Unsalted butter with a pinch of salt works; coconut oil can be substituted for a hint of coconut.
- Cracker type: Try chocolate graham crackers, vanilla wafers, or digestive biscuits for new flavor profiles.
- Gluten-free: Use gluten-free graham-style crackers.
Perfect Pairings: What to Fill Your Graham Cracker Crust With
- Key lime pie: Bright, tart, and creamy filling.
- Lemon cream pie: Silky citrus custard.
- Chocolate cream pie: Rich, velvety chocolate custard.
- Pumpkin cream pie: Seasonal, spiced goodness.
- Cheesecake: Classic, no-bake or baked.
- Berry tarts: Fresh berries atop vanilla or cream cheese filling.
- Banoffee pie: Bananas and caramel for decadent delight.
Frequently Asked Questions (FAQs)
Do you have to use a food processor for graham cracker crumbs?
No. While a food processor gives even crumbs, you can crush graham crackers in a zip-top bag with a rolling pin or other sturdy utensil. Aim for a fine, sandy texture with no large pieces.
Can you make a graham cracker crust ahead of time?
Absolutely. A baked crust can be wrapped and kept at room temperature for up to three days. An unbaked crust can be frozen for up to three months. Thaw fully before baking for best results.
Should I bake the crust before adding the filling?
Yes—especially for creamy pie fillings or cheesecakes. Baking sets the crust, produces deeper flavor, and helps prevent sogginess. For no-bake desserts, chilling is sufficient if you prefer a softer crust.
Can a graham cracker crust be made gluten-free?
Yes. Simply substitute gluten-free graham-style crackers and proceed with the recipe as usual.
How do I prevent my crust from crumbling when sliced?
Compress crumbs firmly, especially up the sides of the pan. Use enough butter, and allow the crust to cool completely before filling or slicing.
Can I use other cookies for the crust?
Definitely. Try chocolate graham crackers, vanilla wafers, or even Biscoff cookies for exciting new combinations. Adjust butter as needed—some cookies are drier and require extra moisture.
Graham Cracker Crust Troubleshooting & Pro Tips
- Crust seems too dry: Add a bit more melted butter.
- Crust sticks to the pan: Use a nonstick pie plate or line with parchment paper.
- Soggy crust: Allow crust to cool fully before wrapping or filling. For juicy fillings, add a layer of melted chocolate or brush with egg white before baking to create a moisture barrier.
- Too crumbly: Increase pressure when pressing crust and bake a few extra minutes if needed.
Holiday Baking & Make-Ahead Convenience
A graham cracker crust is a holiday essential—especially for busy cooks. It saves time and can be made well ahead of any festive meal or family gathering. Keep extra pre-baked crusts on hand for last-minute dessert inspiration!
Related Pies, Tarts & Dessert Inspiration
- Classic Key Lime Pie: Tangy and creamy, sets perfectly atop a graham crust.
- Apple Pie: Learn how apple pie became an American classic.
- Peach Cobbler: Easy cinnamon roll peach cobbler for a summer twist.
- Berry Tart: Fresh fruit tart topped with berries and cream.
- Pineapple Pie: A tropical favorite for all seasons.
- Birthday Cake Pie: Celebrate with a playful spin on pie.
- Blackberry Pie: Rich, seasonal, and a crowd-pleaser.
Browse more ideas on pies, tarts, and desserts to unleash your creativity in the kitchen.
Summary Table: Graham Cracker Crust Recipe Essentials
| Step | Key Tips |
|---|---|
| Crushing crackers | Fine, sandy crumbs; avoid large chunks |
| Mixing | Butter and sugar fully in crumbs |
| Pressing | Even pressure, up sides of pan |
| Baking | 10 minutes at 350°F, lightly golden |
| Cooling/Storage | Cool before filling or wrapping |
Graham Cracker Crust: FAQ
Q: What pies or desserts pair best with a graham cracker crust?
A: Key lime, lemon cream, chocolate, pumpkin, and cheesecake are classics, but berry tarts and banoffee pies also shine with this crust.
Q: Can I freeze a graham cracker crust for future use?
A: Yes. Freeze unbaked crusts up to three months. Thaw at room temp before baking.
Q: Why is my crust so crumbly?
A: Make sure you pressed the mixture firmly, used enough butter, and baked for the full recommended time. A little extra butter can help.
Q: Can I double the recipe for a larger pie?
A: Yes—simply increase all ingredients proportionally and use a larger baking dish. Adjust baking time as needed.
Q: Are there any healthy modifications?
A: Substitute coconut oil for butter, or use less sugar. For extra fiber, try whole wheat graham crackers or gluten-free varieties.
Bake, Serve, and Savor!
Homemade graham cracker crust is the foundation for many memorable desserts. With expert tips, troubleshooting, FAQs, and endless pairing ideas, every home baker can confidently enjoy the process and flavor of scratch-made crust. Make it ahead, try creative fillings, and let your next pie start with the golden crunch of a classic graham base.
References
- https://www.thepioneerwoman.com/food-cooking/recipes/a32972780/classic-key-lime-pie-recipe/
- https://inspiredbycharm.com/graham-cracker-cream-pie/
- https://www.thepioneerwoman.com/food-cooking/recipes/a62670776/graham-cracker-crust-recipe/
- https://www.thepioneerwoman.com/food-cooking/recipes/a87225/how-to-make-a-crumb-crust/


