


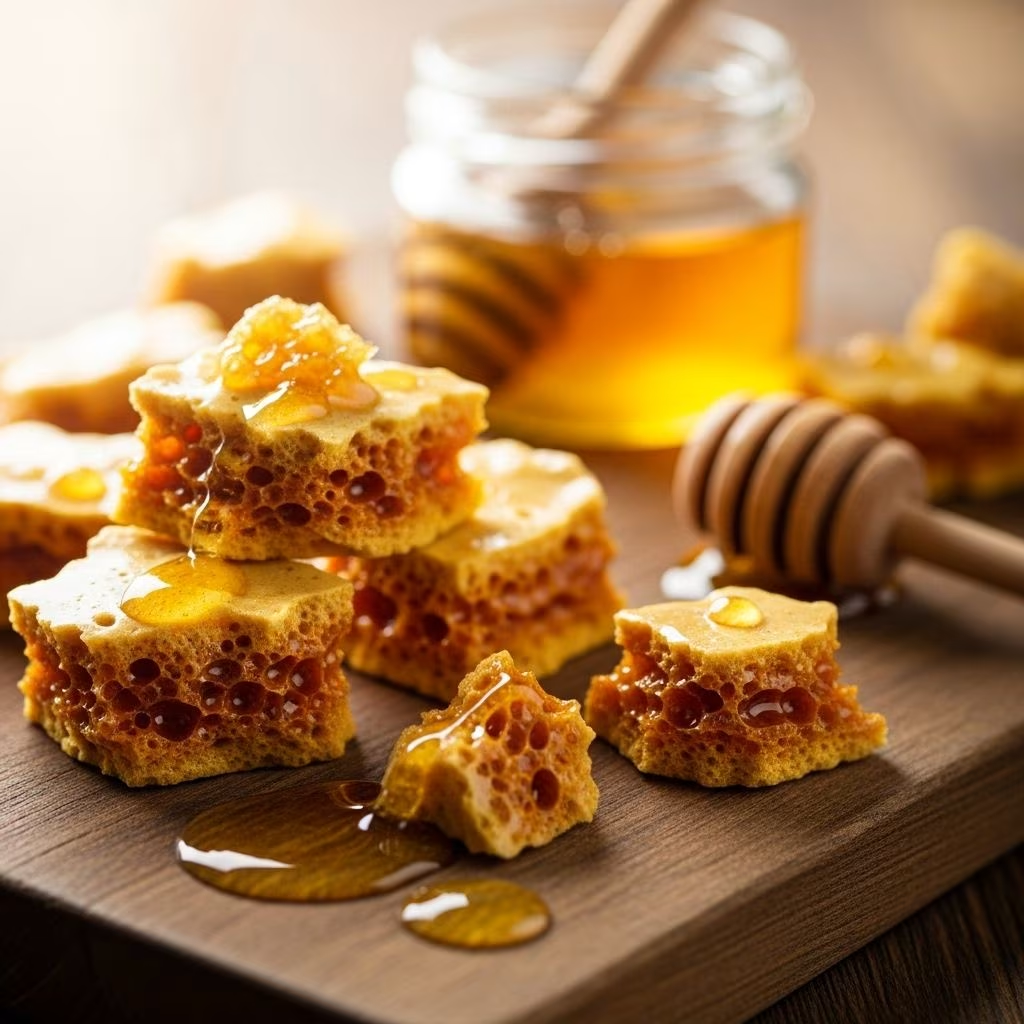
Homemade Honeycomb Candy: Sweet, Crunchy, and Magical
There’s a certain magic to honeycomb candy. With its crunchy, airy texture and sweet flavor kissed with honey, it’s a treat that feels both whimsical and nostalgic. Though it looks impressive—with its tall, bubbly structure twisting and towering like edible architecture—it’s surprisingly simple to make at home with just a handful of pantry staples. Whether you’re a seasoned candy maker or new to making confections, this guide will walk you through every step of creating the perfect homemade honeycomb candy.
What is Honeycomb Candy?
Honeycomb candy, also known globally by names like sponge toffee, seafoam, or cinder toffee, is a crunchy, brittle candy formed by mixing baking soda into a caramel base of cooked sugar, honey, and sometimes corn syrup. As the hot mixture reacts with baking soda, it foams vigorously, creating thousands of tiny air bubbles—the hallmark of its unique, porous texture. Once cooled and set, the candy shatters, almost melting in your mouth with a deep, sweet flavor and satisfying snap.
Why Make Honeycomb Candy at Home?
- Whimsical Enjoyment: It’s a treat that looks far more difficult than it is. It’s as fun to make as it is to eat.
- Gift Ready: Boxed honeycomb pieces make delightful edible gifts.
- Pantry Friendly: The recipe takes just sugar, honey, baking soda, corn syrup, water, and a moment of your time.
- Satisfying Crunch: The signature bubbles give every bite an addictive crunch and airy finish.
Essential Equipment and Ingredients
- 8×8-inch baking pan (line with parchment paper)
- Candy thermometer (vital for precise results)
- Whisk (for quick mixing)
- Saucepan (preferably deep, as mixture foams up rapidly)
- Ingredients:
- 1 cup granulated sugar
- 1/4 cup honey
- 1/4 cup light corn syrup
- 1/4 cup water
- 1 1/2 teaspoons baking soda (pre-measured)
- Optional: Melted chocolate, for dipping
Step-by-Step Guide to Perfect Honeycomb Candy
Step 1: Prepare Your Tools and Ingredients
Before heating a thing, line your baking pan with parchment paper. Measure out your baking soda into a small bowl for easy access. Have a whisk ready. Once the sugar hits the perfect temperature, things move very quickly, so preparation is critical for success.
Step 2: Heat the Sugar Mixture
- Combine the sugar, honey, corn syrup, and water in a deep saucepan.
- Stir gently just to combine, then place over medium-high heat.
- Let the mixture cook undisturbed. As it heats, it will cloud, then clear, and eventually bubble vigorously.
- Clip your candy thermometer in the pan. Cook until the mixture reaches 300°F (hard crack stage)—this typically takes 10–15 minutes.
- Don’t stir during this time! Stirring can encourage crystallization, leading to grainy candy.
Step 3: The Magic—Add Baking Soda
- As soon as the thermometer reads 300°F, remove the pan from the heat.
- Quickly add the pre-measured baking soda all at once.
- Immediately whisk vigorously. The mixture will foam and expand dramatically as the baking soda reacts with the sugar syrup, creating millions of tiny bubbles.
- Only stir until just combined and uniformly foamy—do not over-mix as this can deflate the bubbles.
Step 4: Transfer and Set
- Quickly pour the foamy mixture into the parchment-lined pan.
- Do not spread or flatten the top. Allow it to settle naturally. Rapid movement could collapse the bubbles you worked so hard to create.
- Let the pan sit at room temperature, uncovered, for at least one hour so the candy can cool and harden completely.
Step 5: Break into Pieces
- After it has set, lift the parchment from the pan and place on a solid surface.
- Use a sharp knife to whack (not slice) the honeycomb into serving-size pieces. The candy has a brittle texture, so breaking is more effective than cutting.
Troubleshooting & Tips
- Candy Thermometer: A must-have! Don’t guess when the sugar is ready; precise temperature means perfect candy texture and flavor.
- Don’t Under- or Over-cook: If undercooked, the candy will be sticky and chewy rather than light and crisp. Overcooked sugar mixtures can become bitter.
- Humidity Matters: Honeycomb absorbs moisture quickly and will get sticky if left uncovered. Store in a sealed container at room temperature for best crunch.
- Dipping in Chocolate: For added protection and flavor, dip cooled honeycomb pieces in melted chocolate and leave to set on parchment—a delicious bonus!
- Do Not Refrigerate: The candy will attract moisture and lose crispness in the fridge or in humid climates.
- Quick Reactions Needed: Once the baking soda goes in, work fast—the window to pour into the pan before the mixture hardens is very short.
Flavor Variations & Creative Twists
- Chocolate Covered Honeycomb: Dip pieces into melted dark or milk chocolate. Let set completely for a flavor and texture boost.
- Spice it Up: Add a pinch of cinnamon, sea salt, or cayenne to the sugar mixture for a creative kick.
- Coffee-Infused: Dissolve a teaspoon of instant espresso powder in the water for subtle coffee undertones.
- Maple Twist: Substitute maple syrup for some or all of the honey for a different, deeper flavor.
Serving & Storing Honeycomb Candy
- Enjoy honeycomb as-is, or crumble over ice cream, cakes, or yogurt for a surprising crunch.
- Store in an airtight container at cool room temperature for up to a week.
- For gifts, pack pieces in cellophane bags or candy boxes with wax paper between layers to prevent sticking.
- In humid climates, dip in chocolate for better shelf life.
Honeycomb Candy Recipe Card
| Ingredient | Quantity | Notes |
|---|---|---|
| Granulated Sugar | 1 cup | |
| Honey | 1/4 cup | Choose a mild honey for subtle flavor |
| Corn Syrup | 1/4 cup | Prevents crystallization; light preferred |
| Water | 1/4 cup | |
| Baking Soda | 1 1/2 tsp | Measured and ready to add all at once |
| Melted Chocolate (optional) | As needed | For dipping after candy cools |
Frequently Asked Questions (FAQs)
What does honeycomb candy taste like?
Honeycomb candy is sweet and crisp, with a gentle honey flavor and a characteristic airy crunch. It has a toasty, caramel undertone from the cooked sugar and honey blend.
What’s the purpose of baking soda?
Baking soda causes the hot syrup to rapidly foam, forming thousands of air bubbles. That’s what creates the candy’s characteristic airy, sponge-like texture.
Do I need a candy thermometer?
Yes, for best results. A thermometer ensures the syrup reaches the hard crack stage. If it’s not hot enough, the candy will be chewy, not crunchy. If overheated, it can taste burnt.
Can I make honeycomb without corn syrup?
Corn syrup helps prevent sugar crystallization and ensures a smooth texture. If necessary, you can try substituting with golden syrup, but stick to the traditional recipe for best results.
Why is my honeycomb sticky?
Honeycomb candy is highly hygroscopic—it absorbs moisture from the air. If left uncovered, it quickly becomes sticky. Always store pieces in an airtight container at room temperature and avoid refrigeration.
How do I cover honeycomb in chocolate?
After cooling and breaking the candy, dip each piece into melted chocolate, then set on parchment paper to cool until the coating is firm. Store in an airtight container.
Fun Uses and Ideas for Honeycomb Candy
- Garnish: Crumble honeycomb over ice cream or whipped cream-topped desserts.
- Coffee pairing: Serve a piece alongside espresso or strong coffee for a sweet contrast.
- Holiday treats: Pack honeycomb in decorative bags as a festive homemade gift.
- Kitchen science: Teach kids about kitchen chemistry as the baking soda erupts into a foamy frenzy!
- Mix-ins: Break into small bits and stir into cookie or brownie batter for a caramelized crunch.
Pro Tips for Success
- Read through the recipe and prep everything before you begin.
- Work carefully but quickly when adding baking soda — the mixture hardens fast.
- Always use a deep, heavy-bottomed saucepan to allow plenty of room for bubbling.
- Store candy in a cool, dry place for maximum crunch.
- Experiment with chocolate coatings or flavor additions for custom twists.
Quick Honeycomb Candy FAQ
Q: Can I double the recipe?
A: Doubling is not recommended for beginners as the rapid foaming can overflow usual pans. Make single batches for best safety and texture.
Q: Is it safe for kids to help?
A: Kids can help with prep and breaking pieces, but the sugar syrup is extremely hot. Adults should handle boiling and mixing steps.
Q: How long does homemade honeycomb candy last?
A: When stored airtight, honeycomb candy is best enjoyed within a week due to its tendency to absorb moisture and lose crunch.
Q: What pan size should I use?
A: An 8×8-inch square pan works perfectly for the classic thickness, but any similar-sized pan will do. Don’t spread the mixture thin, or you’ll lose the signature fluffy texture.
Q: What’s the best honey to use?
A: Use a mild, light honey for classic flavor. Stronger honeys will impart a more distinct taste profile to the finished candy.
Final Thoughts
Making homemade honeycomb candy is an adventure that merges kitchen chemistry and sweet nostalgia. With simple pantry staples and a few techniques, you can create a whimsical treat perfect for snacking, gifting, or adding pizzazz to any dessert. Remember: prep, precision, and speedy mixing are your tickets to perfectly airy, golden candy every time. Enjoy the magic!
References
- https://www.clumsycrafter.com/chocolate-covered-honeycomb-candy-recipe-its-the-bees-knees/
- https://www.thepioneerwoman.com/food-cooking/recipes/a88050/homemade-honeycomb-candy/
- https://www.thepioneerwoman.com/food-cooking/meals-menus/g32110899/best-halloween-desserts/
- https://www.thepioneerwoman.com/food-cooking/meals-menus/g37907726/christmas-candy-recipes/
- https://www.thepioneerwoman.com/food-cooking/meals-menus/g62332756/honey-recipes/


