


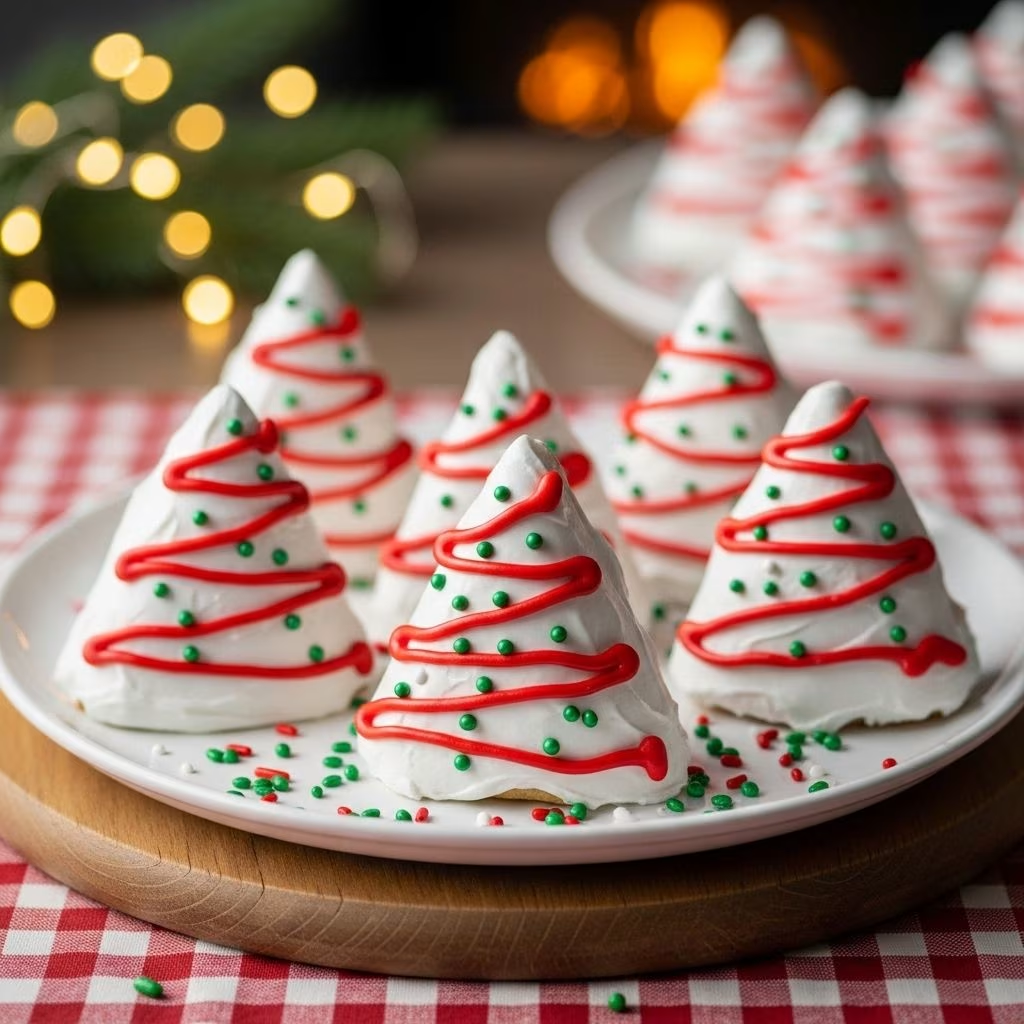
Homemade Little Debbie Christmas Tree Cakes: A Festive Copycat Recipe
If you grew up craving Little Debbie Christmas Tree Cakes every holiday season, you’re not alone. Their soft layers, creamy filling, and whimsical decorations make them a staple in many homes. But what if you could capture that childhood magic in your own kitchen, using real ingredients and your favorite flavors? This comprehensive guide walks you through every step of creating Homemade Little Debbie Christmas Tree Cakes—with tips for customization, decoration, and storage, so you can enjoy these festive treats all season long.
Why Make Homemade Christmas Tree Cakes?
Little Debbie Christmas Tree Cakes have become a nostalgic part of many people’s holidays. Making your own version at home has several benefits:
- Quality Ingredients: Use wholesome, real ingredients—fresh eggs, butter, pure vanilla extract—instead of artificial flavors or preservatives.
- Customization: Adapt the recipe to fit dietary preferences: gluten-free flour blends, non-dairy milks, vegan butters, or plant-based fillings.
- Fun & Festivity: Baking and decorating these cakes is a perfect activity for families or friends. Kids can help shape, frost, and sprinkle!
- Perfect for Gifting: Individually wrapped tree cakes make thoughtful edible gifts for loved ones.
Ingredient Breakdown for Classic Copycat Cakes
The secret to a great copycat Christmas Tree Cake is balancing a light, tender cake with a creamy middle and festive, crunchy coating. Here’s what you’ll need for the classic version:
Cake Layer
- 1/2 cup olive oil or avocado oil
- 1 cup pure cane sugar
- 2 large eggs
- 1/2 cup full-fat coconut milk or whole dairy milk
- 2 tsp pure vanilla extract
- 1 1/4 cups gluten-free flour blend (or all-purpose flour)
- 2 tsp baking powder
- 1/4 tsp sea salt
Creamy Filling
- 1/4 cup organic palm shortening or unsalted butter
- 1 1/2 cups powdered sugar
- 1-2 tbsp milk (coconut or dairy)
- 1 tsp vanilla extract
White Chocolate Coating & Decorations
- 9 oz white chocolate chips (about 3 cups)
- 1 tbsp coconut oil
- Naturally dyed green sanding sugar
- Red icing or naturally dyed red frosting
Optional Vegan Adaptations
- Replace eggs with 1/2 cup applesauce or vegan yogurt
- Use vegan butter and shortening
- Use plant-based white chocolate and colored sugars
Step-by-Step Instructions
Step 1: Make and Bake the Cake
Preparation: Preheat your oven to 350°F (175°C). Prepare Christmas tree-shaped silicone molds or use a baking sheet and cookie cutters.
- Blend oil, sugar, and eggs (or vegan substitutes) until smooth.
- Add milk and vanilla, then stir in dry ingredients (flour blend, baking powder, salt) until a creamy batter forms.
- Pour the batter into molds or a parchment-lined sheet tray, filling each mold about half to three-quarters full.
- Bake for 20–25 minutes, or until lightly golden and cakes spring back when touched.
- Let cakes cool completely before removing from molds.
Step 2: Shape, Split, and Fill
Shaping: If not using molded forms, cut cooled cakes into tree shapes with a cookie cutter.
- Slice each cake horizontally and carefully to create two layers. Freezing cakes briefly can help minimize breakage.
- Blend together all filling ingredients until light and creamy.
- Spread a thin layer of filling over one cake half and sandwich with the second half.
- Arrange filled cakes on a tray and freeze for at least one hour. Freezing helps the cakes maintain shape during dipping.
Step 3: Dipping, Decorating, and Final Assembly
- Melt white chocolate chips and coconut oil in a double boiler or microwave, stirring until smooth (do not overheat).
- Dip or spoon melted white chocolate over each frozen cake. Let excess drip off and place on a wire rack.
- Before the chocolate sets, sprinkle with green sanding sugar and add red icing stripes using a piping bag or small tip.
- Let cakes harden completely—speed this up by placing them back in the fridge or freezer.
Decorating and Assembly Tips
- Choose Your Molds: Silicone molds create defined tree shapes, but cookie cutters offer more flexibility for size and style.
- Freeze Before Dipping: Cold cakes prevent the filling from leaking and help the chocolate coating adhere smoothly.
- Use Natural Dyes: Swap chemical colorings for naturally dyed sanding sugars and frostings for vibrant holiday hues.
- Get Kids Involved: Kids can help with spreading filling, sprinkling sugars, and piping stripes—making this a festive family project.
Serving and Storage Suggestions
- Make-Ahead: Cakes can be baked, filled, and frozen up to 3 days ahead. Dip and decorate the day you serve for a fresh finish.
- Storage: Store finished cakes in an airtight container in the refrigerator for up to 1 week. For longer storage, freeze individually wrapped cakes up to 2 months.
- Gifting: Wrap cakes in cellophane bags with festive ribbon for holiday gifts, party favors, or classroom treats.
Recipe Variations and Dietary Adaptations
Vegan and Dairy-Free Christmas Cakes
- Use applesauce or vegan yogurt as egg substitute (1/4 cup per egg).
- Choose plant-based butter and shortening for the filling.
- Vegan white chocolate is available in many specialty stores.
- Use oat milk, almond milk, or other non-dairy options.
- Flavor boosters: Try almond extract, lemon zest, or orange peel for a unique twist.
Gluten-Free Christmas Tree Cakes
- Substitute gluten-free flour blends that contain xanthan gum or similar binders.
- Test bake time; gluten-free cakes sometimes require extra baking for a firm texture.
- Use gluten-free baking powder and powdered sugar for best results.
Flavor Variations
- Add cocoa powder for chocolate tree cakes.
- Infuse filling with peppermint, rum, or hazelnut extract.
- Decorate with colored chocolate drizzles, edible glitter, or themed sprinkles for different holidays.
Sample Ingredient Comparison Table: Classic vs. Vegan
| Component | Classic Recipe | Vegan Recipe |
|---|---|---|
| Cake | Eggs, dairy milk, flour blend | Applesauce, oat milk, vegan yogurt, flour |
| Filling | Butter, palm shortening, powdered sugar, dairy milk | Vegan butter, vegetable shortening, non-dairy milk, organic sugar |
| Coating | White chocolate chips, coconut oil | Vegan white chocolate, coconut oil |
| Decor | Sanding sugar, red dyed icing | Vegan sugar, plant-based food coloring |
Frequently Asked Questions (FAQs)
Q: Can I make these cakes without a tree-shaped mold?
A: Yes! Bake your cake in a sheet pan and use a sturdy metal or plastic cookie cutter to punch out tree shapes after cooling. Adjust sizes based on your preference.
Q: How do I prevent the cake from breaking when stuffing and assembling?
A: Freeze or refrigerate the cakes before slicing and filling. This firms them up for easier handling and less breakage, especially for kids or beginners.
Q: Is there a way to make the coating extra smooth and glossy?
A: Use high-quality white chocolate and add coconut oil for a smoother finish. Dip cakes while they’re still cold, and let excess chocolate drip off to avoid pooling.
Q: Can I make the cakes gluten-free and vegan at the same time?
A: Absolutely. Use gluten-free flour, dairy-free milk, vegan butter, and vegan white chocolate. Double-check all labels for hidden allergens.
Q: How long do the decorated cakes stay fresh?
A: In the fridge, decorated cakes last about one week. Individually wrapped and frozen, they stay fresh for two months; thaw before serving.
Q: What are the best ways to decorate these for a party?
A: Use festive sanding sugars, edible glitter, piped details, and even holiday-themed candy toppers. Mix up colors and designs for added fun!
Pro Tips for Perfect Homemade Christmas Tree Cakes
- Don’t Overmix: Mix cake batter until just blended to keep cakes tender.
- Keep Fillings Cool: Warm filling will melt the cakes; if room is warm, refrigerate before spreading.
- Uniform Size: If using cutters, press firmly and evenly to ensure all cakes are similar for easier decorating and filling.
- Layer Flavors: Pair citrus or berry extracts with classic vanilla for an extra-special twist.
Celebrate with Homemade Nostalgia
Homemade Little Debbie Christmas Tree Cakes deliver all the nostalgia and festive sparkle of the store-bought version—plus the satisfaction of using your own high-quality ingredients and creative flair. Whether you’re celebrating with family, sharing gifts, or decorating with friends, these cakes are bound to become a holiday tradition you’ll cherish for years to come.


