


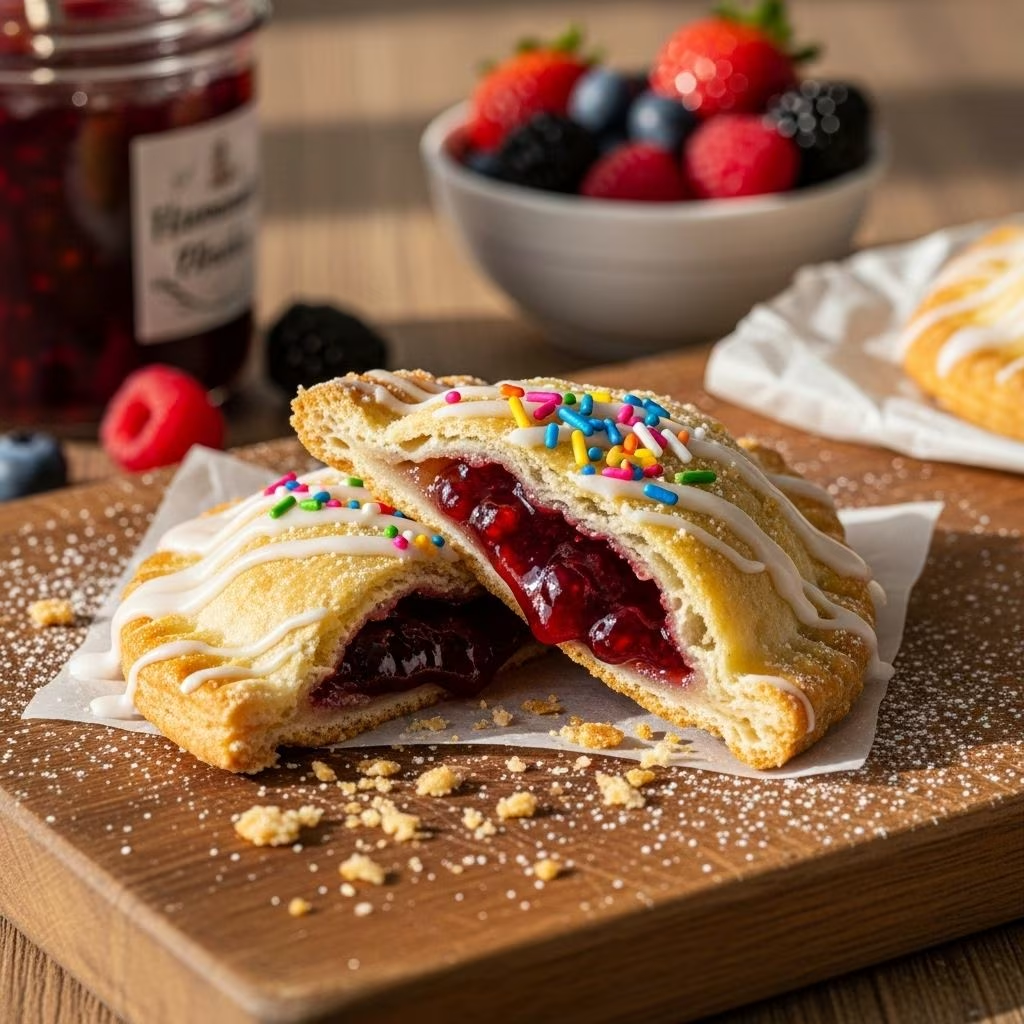
Homemade Pop Tarts: The Ultimate Guide
When you crave breakfast with a nostalgic twist—or just need an excuse to whip up a batch of colorful, fruit-filled pastries, homemade Pop Tarts are a delightful way to transform simple pantry ingredients into a treat everyone will love. Drawing inspiration from classic toaster pastries and The Pioneer Woman’s bold, playful baking style, this guide walks you through every step, from mixing the crust to glazing and decorating your pop tarts.
What Are Homemade Pop Tarts?
Pop tarts originated as convenient, toaster-friendly breakfast pastries filled with fruit or sweetened concoctions and topped with icing. When made at home, they become more than a quick breakfast—they’re a creative, customizable project that brings together flaky pie crust, rich jam fillings, and bright, sweet glaze. Homemade Pop Tarts are surprisingly easy to make and offer endless options for flavor customization, decor, and even special dietary adaptations.
Ingredients for Homemade Pop Tarts
The Pioneer Woman’s recipe starts with a buttery pie crust, a jam filling, and a colorful glaze. You can adjust flavors, but here are the basics:
- Pie Crust:
- 3 cups all-purpose flour (plus extra for rolling)
- 2 tablespoons granulated sugar
- 1 teaspoon salt
- 1 cup cold butter (cubed)
- 1 egg
- 5 tablespoons cold water (add more if needed)
- 1 tablespoon distilled vinegar
- Filling:
- 1 1/4 cups mixed berry jam (or jam of choice)
- 1 egg, lightly beaten (for egg wash)
- 1 tablespoon cornstarch (optional, for thickening jam)
- Glaze:
- 1 1/4 cup powdered sugar
- 2 tablespoons milk
- 1 tablespoon berry jam
- 2 drops neon food coloring
- Multicolored sprinkles
Ingredient Swaps and Personalization
- Jam Flavors: Try strawberry, blueberry, blackberry, or even specialty jams like blueberry lavender or rose.
- Crust Shortcuts: Use store-bought pie dough for faster prep.
- Glaze Variation: Substitute cream for milk for a thicker icing or add vanilla extract for extra flavor.
Step-by-Step Homemade Pop Tart Recipe
This time-tested approach ensures a flaky crust and vibrant filling. Set aside 2 hours—the process is mostly hands-off while the dough chills and the pastries cool.
- Make the Pie Crust:
In a large bowl, combine flour, sugar, and salt. Cut in cold butter using a pastry cutter or two knives until tiny, pea-sized pieces form. Beat the egg lightly, then add to mixture along with water and vinegar. Form into a disc, wrap in plastic, and chill for 1 hour. - Prepare the Jam Filling:
Mix your choice of jam with a tablespoon of cornstarch to help it set while baking. This keeps the filling from leaking out during baking. - Roll Dough and Cut Pastries:
On a floured surface, roll half the dough into a large rectangle (about 12″ x 16″). Cut into rectangles (about 4″ x 6″ each). Spoon 2 tablespoons jam onto half the rectangles, leaving a border. Brush beaten egg around edges.
Top with remaining rectangles, press edges with a fork to seal, and transfer to a parchment-lined sheet pan. Repeat with remaining dough. - Bake:
Preheat oven to 400°F (200°C). Bake for 16–18 minutes, until barely golden. Cool on rack for 20 minutes. - Glaze and Decorate:
While tarts cool, combine powdered sugar, milk, jam, and food coloring in a bowl. Mix until smooth. Spoon glaze over cooled tarts and finish with sprinkles. Let glaze set for at least an hour before packaging or stacking.
Tips for Perfect Homemade Pop Tarts
- Keep Ingredients Cold: Cold butter helps keep crust flaky and tender.
- Parchment Paper: Prevents sticking and helps pastries bake evenly.
- Don’t Overfill: Excess filling may leak out during baking.
- Neat Edges: Use a fork to crimp edges well and prevent filling loss.
- Decoration: Experiment with glaze colors and sprinkles for a festive look.
Customization Ideas
- Chocolate: Swap jam for chocolate-hazelnut spread and finish with cocoa glaze.
- Cinnamon-Sugar: Mix brown sugar and cinnamon for filling. Glaze with a powdered sugar icing and cinnamon sprinkle.
- Seasonal Fruit: Try apple butter, pumpkin butter, or lemon curd as fillings.
- Vegan Options: Use plant-based butter and nondairy milk for crust and glazing.
- Gluten-Free: Substitute gluten-free flour blend for regular flour.
Nutritional Information Table
| Component | Approximate Calories | Main Ingredients | Notes |
|---|---|---|---|
| Pastry (1 large tart) | 320–370 | Flour, butter, egg | Varies by size and type of crust |
| Filling | 60–90 | Jam | Higher for sweeter, thicker jams |
| Glaze & Sprinkles | 45–75 | Powdered sugar, milk, food coloring | Adjust based on glaze thickness |
| Total (per tart) | 425–535 | Ranges based on ingredients & decorating |
Storing and Serving Suggestions
- Storage: Store pop tarts in an airtight container at room temperature for up to 3 days, or refrigerate for 5 days.
- Freezing: Wrap fully cooled, unglazed tarts in plastic and freeze for up to 2 months. Glaze after thawing.
- Reheating: Warm tarts in the toaster oven or conventional oven at 325°F for a few minutes. Avoid microwaving to retain crispness.
- Serving: Serve as breakfast, snack, or dessert. Pair with coffee, milk, or ice cream.
Frequently Asked Questions (FAQs)
Q: Can I use store-bought pie crust for homemade pop tarts?
A: Yes, commercial pie crust works well and saves prep time, though homemade dough provides better flavor and texture.
Q: How do I prevent my pop tarts from leaking jam?
A: Seal edges firmly with a fork and thicken jam with a little cornstarch. Avoid overfilling each tart.
Q: What is the best glaze for homemade pop tarts?
A: A simple powdered sugar glaze mixed with milk and a hint of jam creates an attractive, sweet topping. Add food coloring for brighter hues.
Q: Can I make pop tarts ahead?
A: Yes, unglazed tarts may be baked and stored ahead, then glazed just before serving.
Q: What filling options are popular for homemade pop tarts?
A: Traditional fruit jams such as strawberry, mixed berry, or blueberry; unique preserves; chocolate or nut spreads; even savory fillings work well.
Decorating & Presentation Tips
- Glaze Patterns: Spoon, drizzle, or use a piping bag to apply glaze. Let children experiment with zig-zags, swirls, or dots.
- Sprinkles: Add immediately after glaze for best adherence.
- Colorful Dust: Use edible glitter or colored sugar for bakery-style flair.
- Holiday Themes: Match sprinkles and glaze color to the season (pink/red for Valentine’s, orange/green for Halloween).
Why Bake Pop Tarts at Home?
- Control Ingredients: Avoid preservatives, adjust sweetness/texture, and accommodate dietary restrictions.
- Personalization: Choose your favorite flavors, fillings, and designs.
- Family Fun: Kids love helping fill, seal, and decorate their own tarts. Makes for a memorable baking project.
Expert Advice: The Pioneer Woman’s Baking Tips
- Chill dough for the full time: It makes rolling easier and keeps crust flaky.
- Don’t skip the egg wash: It seals edges, helps icing stick, and gives golden color.
- Let tarts cool before glazing: The icing will set firmly, ensuring a professional finish.
- Batch prep: Double the recipe for parties or freeze extras for grab-and-go breakfasts.
Homemade Pop Tarts: A New Tradition
Whether you’re looking for a fun weekend baking project or want to surprise family with a vibrant breakfast treat, homemade Pop Tarts offer endless potential for creativity and comfort. With adaptable fillings, playful decoration, and the satisfaction of pastry made from scratch, you’re only a roll, fill, and bake away from your new favorite tradition!


