


How to Make a Crumb Crust for Any Dessert
One of the most versatile and downright delicious foundations you can make for your pies, cheesecakes, and bars is the humble crumb crust. Whether you reach for buttery graham crackers, crispy vanilla wafers, rich chocolate cookies, or something a little more adventurous, a homemade crumb crust is quick, satisfying, and yields better results than anything pre-made. This guide will take you through everything you need to know about making the perfect crumb crust, from tools and ingredients to methods and troubleshooting. Let’s get started!
What Is a Crumb Crust?
A crumb crust is an easy, no-fuss pie or cheesecake crust made from finely crushed cookies (such as graham crackers, chocolate wafers, or gingersnaps), a little sugar, and melted butter. Once you mix the ingredients together, the buttery crumbs are pressed into a pie plate or springform pan, forming a sturdy, flavorful base for your favorite fillings.
Why Make Your Own Crumb Crust?
- Customization: Use any cookies or crackers you want for unique flavor twists.
- Freshness: Homemade crust tastes fresher and crisper than pre-made options.
- Ease: No rolling out, no chilling, no fussing with pastry—just crush, mix, and press.
- Fast: From start to finish, you can make a crumb crust in just a few minutes.
- Versatility: Works for pies, cheesecakes, tarts, bars, and even individual servings in jars.
Essential Ingredients for a Crumb Crust
- Cookies or Crackers: Graham crackers are classic, but you can use anything from Oreos to ginger snaps, vanilla wafers, or digestive biscuits.
- Butter: Melted salted butter binds everything together, delivering flavor and structure.
- Sugar: Just a spoonful enhances sweetness, unless your cookies are already extra sweet.
Ingredient Notes
Because different cookies absorb butter differently, the exact amount of butter needed can vary. Graham crackers generally require more butter than richer cookies like chocolate wafers or shortbread. It’s always a good idea to start with the recipe’s recommended amount and adjust if the mixture seems too dry or crumbly.
Step-by-Step: Making the Crumb Crust
-
Choose and Crush Your Cookies
You can crush your cookies in several ways:
- Food Processor: Pulse cookies until you have fine, sandy, uniform crumbs.
- Rolling Pin Method: Place cookies in a heavy-duty zip-top bag, seal tightly, and crush with a rolling pin. First give them a few good whacks, then roll back and forth, flipping the bag until you have small, even crumbs.
Tip: Measure your cookies after crushing for accuracy.
-
Mix with Sugar and Melted Butter
Transfer the crumbs to a bowl. Stir in sugar and melted salted butter. Mix until all crumbs are evenly moistened and the mixture holds together when pressed between your fingers.
- For graham cracker crust: You’ll typically use more butter, as graham crackers are more absorbent.
- For chocolate or sandwich cookies: You may need less butter since they have more fat.
-
Press Into Pan
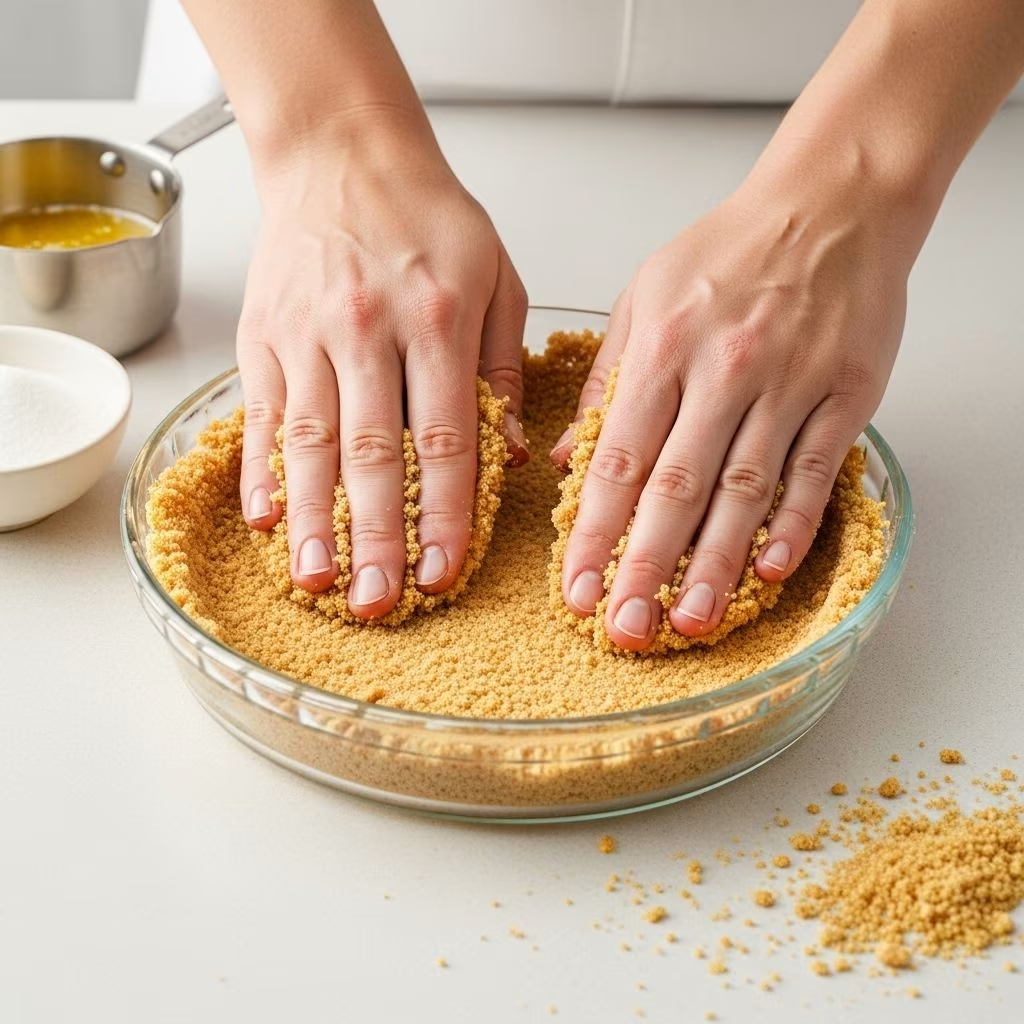
Pour the mixture into your ungreased pie plate or springform pan. Use the bottom of a measuring cup or glass to firmly press the crumbs into an even layer on the bottom and up the sides. This helps compact the crumbs for a sturdy base.
- For a thinner crust: Only press the crumbs into the bottom, leaving the sides bare or lightly coated.
- For a classic look: Press some crumbs up the sides for a pretty edge.
-
Chill or Bake the Crust
If you’re making a no-bake dessert, chill the crust until firm before filling. For more crunch and structure, pre-bake at 350°F for 5–10 minutes, then let cool completely before filling.
Basic Crumb Crust Recipe
| Ingredient | Amount (for 9-inch crust) |
|---|---|
| Crushed graham crackers (or other cookies) | 1 1/2 cups (about 12 graham cracker sheets) |
| Granulated sugar | 2–4 tablespoons |
| Salted butter, melted | 6 tablespoons |
Adjust quantities slightly if you’re using drier or moister cookies or making a larger crust for a cheesecake pan.
Types of Crumbs: Flavor Variations
- Graham crackers: Classic for everything from cheesecakes to key lime pie.
- Chocolate wafers: Best for chocolate-based pies, ice cream pies, and peanut butter fillings.
- Oreo or other sandwich cookies: Use with cream and filling for a rich crust; scrape the filling for a less sweet, crisper option.
- Vanilla wafers or digestive biscuits: Subtly sweet and buttery flavor that works with fruit tarts and citrus pies.
- Gingersnaps: Spicy, crisp crust for pumpkin pies and cheesecakes.
Best Tools for Making and Pressing Crumb Crust
- Food Processor: For even, fine crumbs—especially helpful for large batches.
- Rolling Pin and Zip-Top Bag: A low-tech, satisfying option that minimizes dishes. Choose heavy-duty bags to prevent splitting.
- Measuring Cup or Flat-Bottomed Glass: The perfect tool to firmly and evenly press crumbs into the pan.
- Springform Pan or Pie Plate: Your vessel of choice, depending on the dessert.
Tips for a Perfect Crumb Crust Every Time
- Don’t Over- or Under-Butter: Too little butter and the crust will crumble; too much and it turns greasy. Start with the amount listed and adjust if necessary, depending on your cookie choice.
- Even Packing: Press the crumbs firmly—but not too hard!—into the pan. You want them compact enough to hold together but not so tight they turn rock-solid after baking.
- Cool Before Filling: If you baked your crust, allow it to cool completely; this prevents your filling from melting or separating.
- Make Ahead: The crust can be made a day ahead and kept covered at room temperature. A baked crust will stay crisp for three days, while an unbaked one can go into the freezer for up to three months (thaw before baking).
- Experiment: Mix cookies or crackers for new flavors and textures—just keep the final crumb quantity consistent.
FAQ: Troubleshooting and Expert Advice
Q: Can I use pre-ground, store-bought cookie crumbs?
A: Yes, you can use pre-ground crumbs to save time. Just measure the appropriate volume and proceed with the recipe. Check for added sugar if using commercial graham cracker crumbs; you may want to reduce the sugar you add.
Q: Why is my crust crumbly or falling apart?
A: Most likely, the crumbs were too dry or didn’t have enough butter to bind them. Try adding a little more melted butter, mixing again, and pressing more firmly into the pan.
Q: Can I bake my crust longer for extra crunch?
A: Absolutely! Baking the crust for 7–10 minutes at 350°F, instead of just 5, can give a more golden, crunchy finish—ideal for cheesecakes or pies with softer fillings.
Q: Are all crumb crusts gluten-free?
A: No. Most store-bought cookies and crackers contain wheat. To make your crust gluten-free, use gluten-free graham crackers or cookies.
Q: What’s the best way to crush cookies without a food processor?
A: Place your cookies in a sturdy zip-top bag, seal well, and crush with a rolling pin or heavy can, flipping until you have crumbs with no large pieces left. This classic method is effective and gives you minimum clean-up.
Creative Crumb Crust Ideas and Pairings
- Graham Cracker + Lemon Cream: A match made in dessert heaven for lemon or key lime pies.
- Chocolate Cookie + Peanut Butter: Perfect for peanut butter pies or chocolate cheesecake.
- Gingersnap + Pumpkin: Rich, spicy flavor to give pumpkin pies or bourbon cheesecakes a seasonal spin.
- Oreo + Mint Filling: Dreamy for no-bake chocolate-mint desserts.
- Vanilla Wafer + Fresh Strawberry: Light and sweet, a superb match for strawberry cream pies.
Step-by-Step Crumb Crust Recipe (for a 9-Inch Pie or Springform Pan)
- Prepare the Crumbs: Crush about 12 sheets graham crackers (or about 1 1/2 cups crumbs) using your food processor or rolling pin method.
- Mix Ingredients: In a bowl, combine 1 1/2 cups crumbs and 2–4 tablespoons sugar. Pour in 6 tablespoons melted salted butter, stirring with a fork until every crumb is well coated and holds together when pressed.
- Press Into Pan: Pour crumbs into your ungreased pan. Use a measuring cup or glass to firmly press crumbs into an even layer on the bottom and up the sides.
- Chill or Bake: For a no-bake dessert, chill the crust for 1 hour until firm. For a baked crust, bake at 350°F for 5–7 minutes, let cool completely before filling.
Storing Crumb Crusts: Tips for Planning Ahead
- Baked Crust: Cool fully, then wrap tightly and store at room temperature for up to 3 days.
- Unbaked Crust: Wrap well and freeze for up to 3 months. Let thaw at room temperature before baking.
- Filled Pie: Most crumb crust desserts (especially cheesecakes) will keep well in the fridge for several days once filled.
Final Tips: Making Your Crust Stand Out
- Salted Butter: Adds extra savoriness and counteracts the sweetness of the crust.
- Flavor Additions: Spice up your crumb crust with a pinch of cinnamon, nutmeg, or citrus zest for a boost of aroma.
- Mix and Match: Don’t restrict yourself to a single type of crumb. Try a combination of chocolate and graham, or ginger and vanilla, for uniquely layered flavor.
Frequently Asked Questions (FAQs)
Q: Can I make crumb crusts for savory pies?
A: While crumb crusts are traditionally sweet, you can use crushed crackers (like Ritz or saltines), a little unsalted butter, and herbs for savory pies, perfect for quiches or tomato pies.
Q: Why does my crust stick to the pan?
A: Usually, crumb crusts release easily from the pan, but if you pressed too tightly or your pan wasn’t nonstick, you may have trouble. Try lining the pan base with parchment next time.
Q: Can I double this recipe for a thicker cheesecake crust?
A: Absolutely! Doubling the crumb crust recipe works great for 9- or 10-inch springform pans, especially for tall cheesecakes or desserts where the crust wraps up the sides.
Q: What if my filling is very wet?
A: To prevent sogginess, always pre-bake your crumb crust, then let it cool before adding a liquid or custard filling.
Ready to Try? Your Best Crumb Crust Awaits
Whether you’re whipping up a summery key lime pie, a rich chocolate tart, or a classic New York-style cheesecake, a homemade crumb crust is your starting point for a dessert that gets rave reviews. Get creative with your crumbs and make one today—your dessert game will never be the same!
References
- https://www.thepioneerwoman.com/food-cooking/recipes/a62334576/perfect-pie-crust-recipe/
- https://www.thepioneerwoman.com/food-cooking/recipes/a37778484/cherry-crumb-pie-recipe/
- https://www.thepioneerwoman.com/food-cooking/recipes/a87225/how-to-make-a-crumb-crust/
- https://www.thepioneerwoman.com/food-cooking/recipes/a62670776/graham-cracker-crust-recipe/
- https://www.thepioneerwoman.com/food-cooking/recipes/a61938695/apple-crumble-recipe/
- https://www.bakeat350.net/2016/06/the-pioneer-woman-food-friends-latest-crumb-crusts.html
- https://www.youtube.com/watch?v=OzP5D9rlld8


