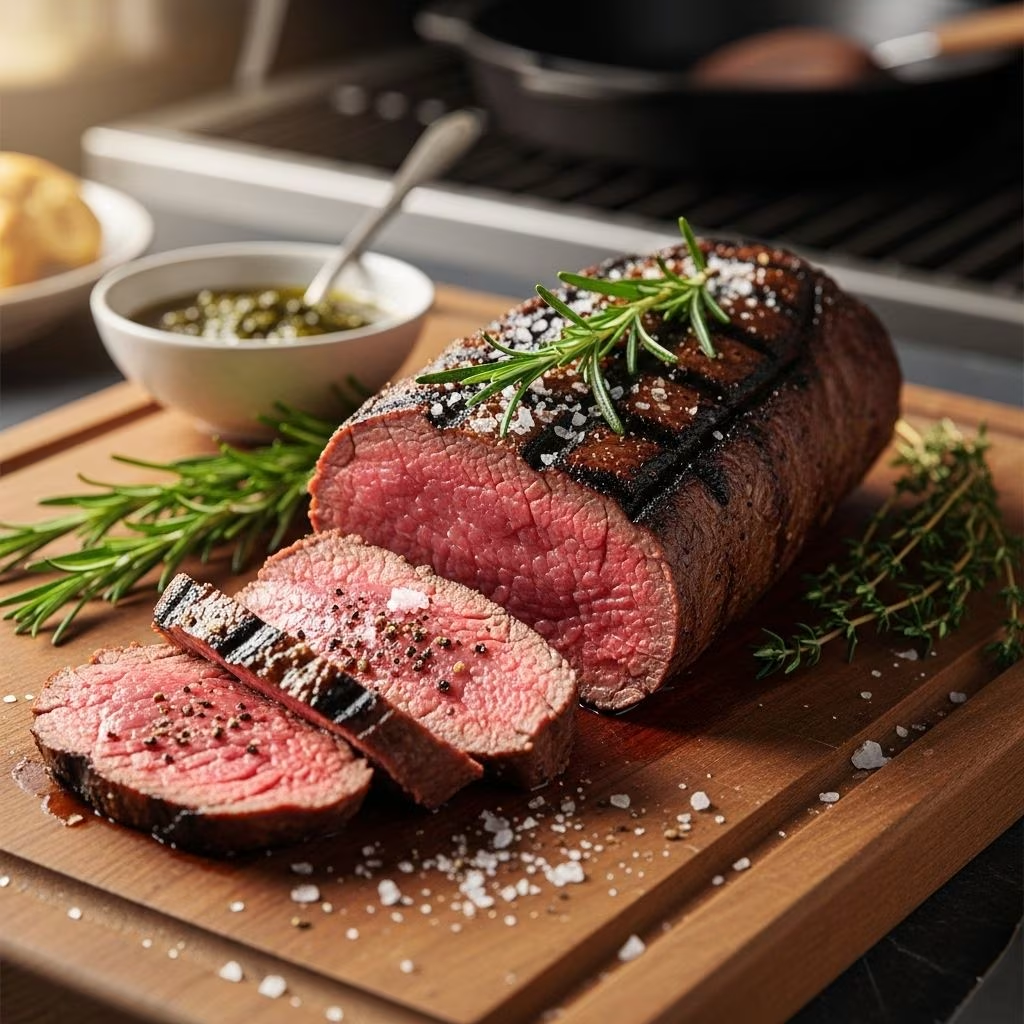
When it comes to special occasion cooking, few dishes can match the elegance and flavor of perfectly grilled beef tenderloin. Ladd Drummond, husband of The Pioneer Woman Ree Drummond, has perfected a legendary grilling technique that transforms this premium cut of meat into an unforgettable centerpiece for any celebration.
This remarkable recipe has become a family tradition, served at gatherings, Fourth of July celebrations, and special family occasions throughout the year. The secret lies not just in the quality of the meat, but in Ladd’s unique approach to grilling that involves bathing the tenderloin in melted butter and using simple yet effective seasonings.
Understanding Beef Tenderloin
Beef tenderloin is often considered the crown jewel of cuts, prized for its incredible tenderness and mild flavor. This cut comes from the loin section of the beef, specifically the psoas major muscle, which does very little work during the animal’s lifetime, resulting in its characteristic tenderness.
What makes tenderloin special: The tenderloin is naturally lean with minimal marbling, which means it can dry out quickly if overcooked. This is precisely why Ladd’s butter-bathing technique works so brilliantly – it provides the necessary fat and moisture to keep the meat succulent throughout the cooking process.
When purchasing beef tenderloin, you’ll typically find it sold as a whole piece weighing between 4-6 pounds. The price point is higher than other cuts, but for special occasions, the investment is well worth the incredible results you’ll achieve.
Essential Ingredients for Success
The beauty of Ladd’s recipe lies in its simplicity. You need only a few high-quality ingredients to create this masterpiece:
- 1 whole beef tenderloin – Choose a well-trimmed piece from a reputable butcher
- 2 sticks salted butter, melted and slightly cooled – The star of the show that keeps everything moist
- 3 tablespoons seasoned salt – Provides the base flavor foundation
- 3 tablespoons lemon & pepper seasoning – Adds brightness and aromatic complexity
The key to success is not skimping on the butter content. While two sticks might seem excessive, this generous amount ensures the tenderloin remains juicy and develops a beautiful crust while cooking.
Preparation: The Critical First Steps
Trimming the Silver Skin
The most crucial preparation step involves removing the tough, silvery membrane that covers portions of the tenderloin. This membrane, often called silver skin, is both tough and unpalatable if left on the meat.
Proper trimming technique: Using a sharp boning knife, carefully slide the blade under the silver skin at one end. Keep the knife angled slightly upward to avoid cutting into the meat. Once you’ve loosened enough membrane, grip it firmly and pull while using the knife to separate it from the meat in smooth, controlled motions.
Take your time with this step – proper trimming ensures every bite will be tender and enjoyable. Leave the sections of tenderloin intact while removing only the problematic membrane.
Setting Up Your Grill Station
Preparation extends beyond the meat itself. You’ll need heavy-duty aluminum foil roasting pans, which serve as protective barriers between the delicate tenderloin and the direct heat of the grill grates. This indirect cooking method prevents the outside from charring while the inside reaches the perfect temperature.
The Grilling Process: Step by Step
Initial Setup and Butter Bath
Place your trimmed tenderloin into the heavy-duty foil pan and pour the melted butter over the entire surface. The meat should be nearly bathing in butter – don’t be conservative here. Sprinkle half of your seasoning mixture over the top surface, ensuring even coverage.
Position the pan on your preheated grill. The initial cooking phase allows the butter to heat up and begin its magic, creating a rich, flavorful environment for the meat to cook in.
The Turning Technique
After approximately 10 minutes, when the butter is hot and bubbling, it’s time for the first turn. This is where proper equipment becomes essential – use long, heavy-duty tongs and wear heat-resistant gloves. The melted butter will be extremely hot, and safety should be your top priority.
Carefully flip the tenderloin to the other side and season the newly exposed surface. From this point forward, you’ll turn the meat every 7-8 minutes, or whenever you notice good browning developing on the current side.
Butter management: If the butter level drops significantly during cooking, don’t hesitate to add more. The butter serves multiple purposes – it prevents sticking, provides moisture, aids in heat distribution, and contributes to flavor development.
Temperature Control and Timing
Achieving the perfect doneness requires careful temperature monitoring. Insert a reliable meat thermometer into the thickest part of the tenderloin, being careful not to touch the pan bottom which could give false readings.
Target temperatures:
- 125°F – Rare to medium-rare (recommended)
- 130°F – Medium-rare to medium
- 135°F – Medium (maximum recommended)
Total cooking time typically ranges from 20-30 minutes, depending on the thickness of your particular tenderloin and your grill’s heat output. Remember that the meat will continue cooking from residual heat after removal, so pulling it at 125-130°F is ideal for most preferences.
Resting and Slicing: The Final Steps
Once your tenderloin reaches the target temperature, carefully transfer it to a large cutting board or baking sheet. This is another moment where those heavy gloves and long tongs are essential – everything will be extremely hot.
Allow the meat to rest for 5-10 minutes before slicing. This resting period is crucial as it allows the juices to redistribute throughout the meat, ensuring each slice will be moist and flavorful.
Slicing technique: Use a sharp carving knife to cut the tenderloin into slices of your preferred thickness. The natural variation in the tenderloin’s shape means the thinner ends will be more well-done while the center remains more rare – this actually works to your advantage, providing options for guests with different preferences.
Safety Considerations
Working with melted butter on a hot grill requires extra attention to safety. The butter reaches extremely high temperatures and can cause severe burns if handled carelessly.
Essential safety equipment:
- Heavy-duty, heat-resistant gloves
- Long-handled tongs (at least 16 inches)
- Heat-resistant apron
- Fire extinguisher nearby
Keep a clear path from the grill to your resting area, and never attempt to transport the hot pan without proper protection. The combination of hot butter, hot metal, and an open flame requires respect and caution.
Serving Suggestions and Accompaniments
Ladd’s grilled tenderloin pairs beautifully with a variety of sides that complement rather than compete with the meat’s rich, buttery flavor. Consider classic steakhouse sides like roasted asparagus, garlic mashed potatoes, or a simple garden salad with vinaigrette.
The tenderloin’s versatility also makes it suitable for both casual family gatherings and elegant dinner parties. Slice it thin for an upscale presentation, or cut thicker portions for a more casual, hearty serving style.
Frequently Asked Questions
Q: Can I use unsalted butter instead of salted?
A: Yes, but you’ll need to adjust your seasoning accordingly. Salted butter contributes to the overall flavor profile, so if using unsalted butter, increase your seasoned salt slightly.
Q: What if my grill doesn’t have a lid?
A: While a lid helps with heat circulation, you can still achieve good results with an open grill. You may need to adjust cooking times and monitor more closely to prevent over-browning.
Q: How far in advance can I trim the tenderloin?
A: You can trim the silver skin up to a day ahead and store the prepared tenderloin in the refrigerator. This actually helps the meat come to a more even temperature before cooking.
Q: What’s the best way to reheat leftover tenderloin?
A: Gently warm sliced tenderloin in a low oven (250°F) just until heated through. Avoid microwaving, which can make the meat tough.
Q: Can this recipe be scaled up for larger crowds?
A: Absolutely! You can cook multiple tenderloins simultaneously using separate foil pans. Just ensure your grill has adequate space and maintain the same timing and temperature guidelines for each piece.
This legendary recipe represents more than just a cooking method – it’s a celebration of quality ingredients, time-tested techniques, and the joy of sharing exceptional food with the people you care about most. Whether you’re marking a special milestone or simply want to create an memorable meal, Ladd’s grilled tenderloin delivers results that will have your guests talking long after the last bite.
References
- https://www.thepioneerwoman.com/food-cooking/recipes/a9878/roasted-beef-tenderloin-recipe/
- https://www.thepioneerwoman.com/food-cooking/recipes/a12122/ladds-grilled-tenderloin/
- https://www.thepioneerwoman.com/food-cooking/cooking-tips-tutorials/a64815560/ladd-drummond-top-tips-for-grilling-tenderloin/
- https://tastykitchen.com/recipes/main-courses/ladds-grilled-tenderloin/
- https://www.thepioneerwoman.com/food-cooking/meals-menus/g64826649/ree-drummond-favorite-fathers-day-recipes/