Introduction to Peanut Butter & Jelly Cups
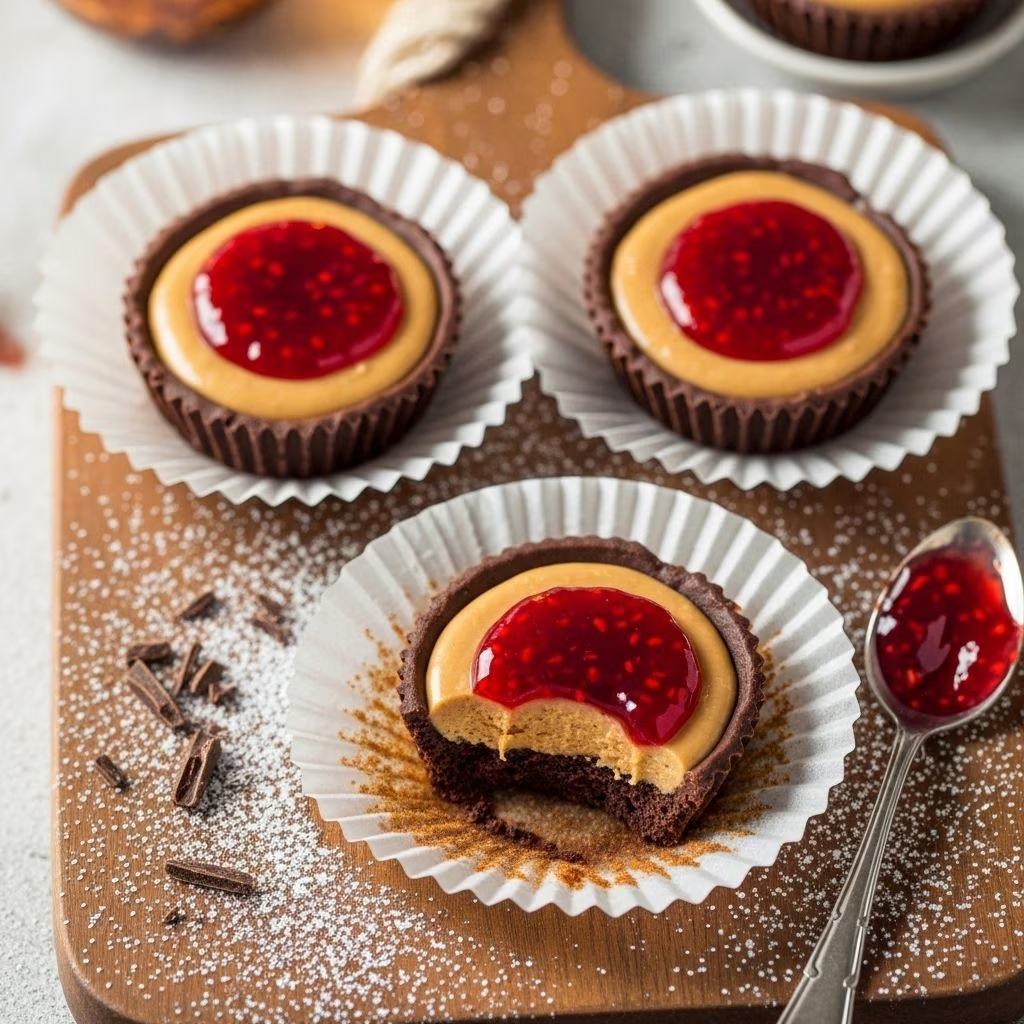
Who doesn’t love the classic peanut butter and jelly sandwich? It’s a timeless favorite among both kids and adults, offering a perfect combination of salty and sweet flavors. The Pioneer Woman takes this beloved sandwich to the next level by presenting it in a fun and creative way: Peanut Butter & Jelly Cups. These delightful treats are wrapped in a layer of rich chocolate, turning the humble PB&J into a decadent dessert.
Ingredients Needed
To make these charming cups, you’ll need just a few ingredients:
– 1 1/2 cups Chocolate Melts, Chips, Or Chopped Bar Chocolate (any kind of chocolate works well)
– 1/4 cup Nut Butter (peanut butter or any other nut butter)
– 1/4 cup Jam Or Jelly (your favorite flavor)
– Sea Salt Flakes (optional for garnish)
Choosing Your Ingredients
– Chocolate: Use chocolate melts for ease as they melt smoothly. You can also use chocolate chips or chop a bar of chocolate for a rich flavor.
– Nut Butter: Peanut butter is traditional, but feel free to experiment with other nut butters like almond or cashew butter.
– Jam or Jelly: Choose your favorite flavor to add a fruity twist.
How to Make Peanut Butter & Jelly Cups
Step-by-Step Instructions
1. Prepare the Chocolate:
– Melt the chocolate in 30-second intervals in the microwave, stirring between each interval until smooth.
– Alternatively, you can use a double boiler for more control over the melting process.
2. Prepare the Nut Butter and Jelly Mixture:
– In a small bowl, mix together the nut butter and jelly until well combined.
3. Assemble the Cups:
– Line a muffin tin with paper liners. This will help you achieve the perfect cup shape.
– For each cup, add about 1 teaspoon of melted chocolate to the bottom of a muffin liner.
– Spread the chocolate evenly and add about 1 teaspoon of the nut butter and jelly mixture on top.
– Finish with another teaspoon of melted chocolate, ensuring the filling is fully covered.
4. Chill the Cups:
– Place the muffin tin in the refrigerator for about 10 minutes, or until the chocolate is set.
5. Optional Garnish:
– Sprinkle a pinch of sea salt flakes on top of each cup for added flair.
Choosing the Right Chocolate
When making Peanut Butter & Jelly Cups, the type of chocolate you use can significantly impact the flavor profile. Here are some options to consider:
– Dark Chocolate: Rich and intense, perfect for those who prefer a stronger chocolate taste.
– Milk Chocolate: Sweeter and creamier, ideal for those who love a milder taste.
– White Chocolate: A sweet and creamy option that adds a unique twist to the classic recipe.
Fun Variations to Try
Spicy PB&J Cups
– Add a pinch of cayenne pepper or red pepper flakes to the nut butter mixture for a spicy kick.
Nutty PB&J Cups
– Mix some chopped nuts like almonds or walnuts into the nut butter mixture for added texture.
Frequently Asked Questions (FAQs)
Q: Can I use other types of nut butters?
A: Yes, feel free to experiment with almond butter, cashew butter, or any other nut butter you prefer.
Q: How long do the cups keep in the refrigerator?
A: They can be stored in an airtight container in the refrigerator for up to a week.
Q: Can I make these cups ahead of time?
A: Yes, you can prepare the chocolate and nut butter mixture ahead of time. However, assemble and chill right before serving for the best results.
Tips and Tricks
– Use a Mini Muffin Tin: For bite-sized treats that are perfect for snacking or gift-giving.
– Experiment with Flavors: Try different jam or jelly flavors to find your favorite combination.
– Garnish with Fresh Fruits: Add a fresh fruit slice or a sprinkle of sea salt for a decorative touch.
References
- https://www.thepioneerwoman.com/food-cooking/recipes/a41533231/homemade-peanut-butter-cups-recipe/
- https://www.youtube.com/watch?v=nRF5uIhtpJk
- https://www.thepioneerwoman.com/food-cooking/recipes/a104955/peanut-butter-jelly-cups/
- https://www.thepioneerwoman.com/food-cooking/meals-menus/g65875133/peanut-butter-jelly-recipes/