


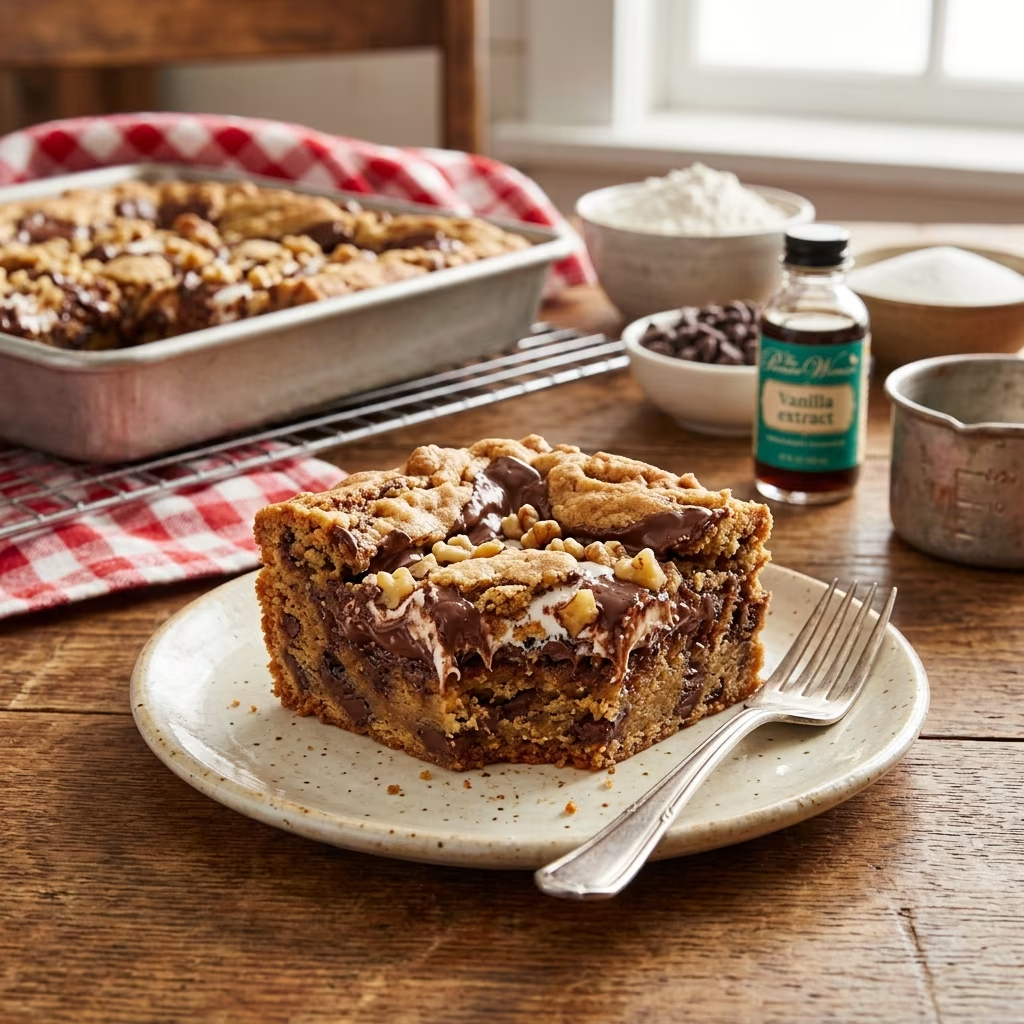
The Magic of Pioneer Woman’s Spreads
This delightfully simple dessert is a beloved family staple in Ree Drummond’s kitchen, fondly referred to as “Spreads” thanks in part to both its unique method and playful name coined by her brother. These buttery cookie bars, topped with a glossy layer of melted chocolate and a cascade of festive toppings, embody the essence of easy, fuss-free baking—a treat that’s as comforting as it is customizable.
Whether you’re a longtime follower of The Pioneer Woman or just in search of a versatile, crowd-pleasing cookie bar for your next gathering, this guide will walk you through everything you need to know to master Spreads, from their origin to step-by-step instructions, pro tips, and tasty variations.
The Origin and Meaning of Spreads
Spreads aren’t your typical cookie bar—they’re a whimsical, “inside out” spin on chocolate chip cookies. The recipe’s name comes from Ree Drummond’s brother, Doug, who regularly requested these treats and dubbed them “Spreads” because:
- You spread the cookie dough directly onto a sheet pan rather than shaping individual cookies.
- You spread melted chocolate chips over the baked cookie base, covering every inch in a glossy layer.
In Ree’s words, the recipe is an “upside-down” cookie bar, simple enough for beginner bakers yet festive and adaptable for all occasions. Traditionally, Spreads were made with margarine, but the modern iteration is even richer with butter, making each bite tender and irresistible.
Ingredients Overview
Classic Pioneer Woman’s Spreads use pantry staples and allow plenty of customization. Here’s what you’ll need for the base recipe:
| Ingredient | Amount | Notes |
|---|---|---|
| Light Brown Sugar | 1 cup | Packed, for chewiness and flavor |
| Butter (softened) | 1 cup (2 sticks) | Unsalted preferred |
| Egg | 1 large | – |
| Vanilla Extract | 1 tsp | For warmth and aroma |
| Kosher Salt | 1/2 tsp | Balances sweetness |
| All-Purpose Flour | 2 cups | – |
| Chocolate Chips | 8 oz (about 1½ cups) | Semi-sweet or milk |
| Assorted Toppings | To taste | M&Ms, nuts, sprinkles, candy bars, etc. (optional) |
Swap-ins, like using margarine for a retro touch or adding toffee bits, are welcome. The genius of Spreads lies in their flexibility.
Step-by-Step Recipe Guide
Follow these straightforward instructions for perfect Spreads every time:
- Preheat your oven to 350°F (175°C).
- Prepare a baking sheet. Line with parchment paper for easy removal.
- Cream butter and brown sugar. In a large bowl (or electric mixer), blend the softened butter with the brown sugar until smooth and fluffy.
- Add wet ingredients. Mix in the egg until incorporated. Stir in vanilla extract.
- Add dry ingredients. Sprinkle in the salt, then gradually add flour. Mix until a soft, cohesive dough appears.
- Spread onto sheet. Use a spatula or your hands to press the dough into a 1/4 to 1/2-inch thick layer. It doesn’t need to cover every edge—aim for evenness.
- Bake. Place the pan in the oven and bake for 15 to 20 minutes, keeping watch for a golden-brown color at the edges.
- Add chocolate chips. Remove the hot sheet from the oven. Sprinkle chocolate chips evenly over the surface and return to the oven for 1 minute.
- Spread the chocolate. Using an offset spatula, gently smooth the now-melted chocolate over the cookie base.
- Add toppings. Sprinkle your favorite toppings onto the chocolate while it’s still melty, so they adhere.
- Set and cut. Let the pan cool completely (or chill it for quicker setting), then cut into squares.
This entire process takes under 30 minutes from start to finish—making Spreads ideal for impromptu cravings, last-minute guests, or festive holiday trays.
Toppings and Creative Variations
The beauty of Spreads lies in how easily they can be personalized. Elevate your bars for any season, taste, or occasion with the following suggestions:
- Classic: Leave them as is—a smooth chocolate top over the buttery cookie base.
- Nutty: Sprinkle chopped pecans, walnuts, or almonds for crunch and richness.
- Festive: Add red and green M&Ms or holiday sprinkles for Christmas. Crushed candy canes are perfect for winter.
- Candy-studded: Use pieces of Snickers, Heath toffee bits, miniature marshmallows, or mini peanut butter cups.
- Cookie Monster: Gently press additional chocolate chips, white chocolate, or butterscotch chips into the melted chocolate.
- Dessert tray favorite: Drizzle with caramel or white chocolate, or add a light sprinkle of sea salt for a gourmet finish.
Tip: Always add toppings while the chocolate is warm—otherwise, they won’t stick firmly.
Essential Baking Tips for Foolproof Spreads
- Let butter soften for easier creaming and a tender texture.
- For thicker, chewier bars, aim for a 1/2-inch dough thickness. Spread thinner for crisper edges.
- If you like less sweetness, try using bittersweet chocolate chips.
- To avoid sticking, use parchment paper and allow the bars to cool before slicing.
- If making ahead, chill the sheet in the fridge to set the chocolate quickly.
- Spreads cut easily with a long knife or pizza cutter for neat squares.
Because Spreads are so adaptable, don’t hesitate to experiment with different combinations. Add a sprinkle of flaky salt for a contemporary touch, or blend in spices like cinnamon for extra warmth.
Serving Suggestions and Storage
- Occasions: Spreads are ideal for bake sales, holiday trays, after-school snacks, birthday parties, or just because.
- Serving: Enjoy at room temperature. For extra indulgence, serve with a scoop of vanilla ice cream.
- Make-ahead: Prepare Spreads up to two days ahead. They keep well in an airtight container at room temperature for 4–5 days.
- Freezing: Cool completely, cut, and freeze Spreads in a tightly sealed container for up to 2 months.
This make-ahead capability makes Spreads an even more appealing contribution to potlucks or cookie exchanges.
Frequently Asked Questions (FAQs)
Q: Can I use margarine instead of butter as in the original recipe?
A: Yes! The earliest version of Spreads was made with margarine for a slightly lighter texture. Butter is now the standard for its flavor, but both work.
Q: Do I need a mixer, or can I mix by hand?
A: Either works. A mixer makes creaming the butter and sugar faster, but the dough is soft and can be mixed easily by hand.
Q: Are there gluten-free or dairy-free options?
A: Substitute a cup-for-cup gluten-free flour blend for the all-purpose flour, and use dairy-free butter and chocolate chips as needed.
Q: Can I double or halve the recipe?
A: Absolutely. Double for a crowd (use a larger pan), or halve for smaller batches. Watch baking time and pan size adjustments.
Q: Why do the edges sometimes bake more quickly?
A: This is typical for sheet recipes. Cover outer edges with foil if needed for the last few minutes, or enjoy the texture contrast!
Q: What’s the best way to cut Spreads without cracking the chocolate?
A: Chill in the fridge until the chocolate is set but not hard, then score lightly with a sharp knife before making deeper cuts.
Nutrition Information (Approximate per Square)
| Calories | Fat | Carbs | Protein |
|---|---|---|---|
| 180 | 10g | 23g | 2g |
(Nutrition will vary based on toppings used.)
Why You’ll Love Pioneer Woman’s Spreads
- Ready in under 30 minutes from pantry ingredients.
- No tricky shaping or scooping—a single pan, one bake.
- Highly customizable for seasons, events, or cravings.
- Kid-friendly and great for group baking, as the decorating is half the fun!
Once you’ve made Spreads, they’ll likely become a new staple in your baking rotation—just like in the Drummond family.
More Cookie Bar Inspiration
- Classic Blondies
- Peanut Butter Chocolate Layer Bars
- Magic Cookie Bars (Seven Layer Bars)
- Brown Butter Sprinkle Bars
All of these recipes, including Pioneer Woman’s Spreads, prove that the best treats are the ones that bring people together—but don’t require a day in the kitchen.
Share Your Creations
If you bake Spreads, have fun with toppings and let your creativity shine! Share your twists, gift them to friends, or enjoy with family. As Ree would say, “These are fun and tasty!”
References
- https://www.kirscuisine.com/post/the-pioneer-woman-s-spreads-cookie-recipe-1
- https://www.foodlibrarian.com/2014/01/spreads-cookies-by-pioneer-woman.html
- https://www.thepioneerwoman.com/food-cooking/recipes/a96593/spreads-video/
- https://www.thepioneerwoman.com/food-cooking/recipes/a11629/spreads-my-brothers-favorite-cookie/
- https://www.youtube.com/watch?v=b196E46c1Fc


