


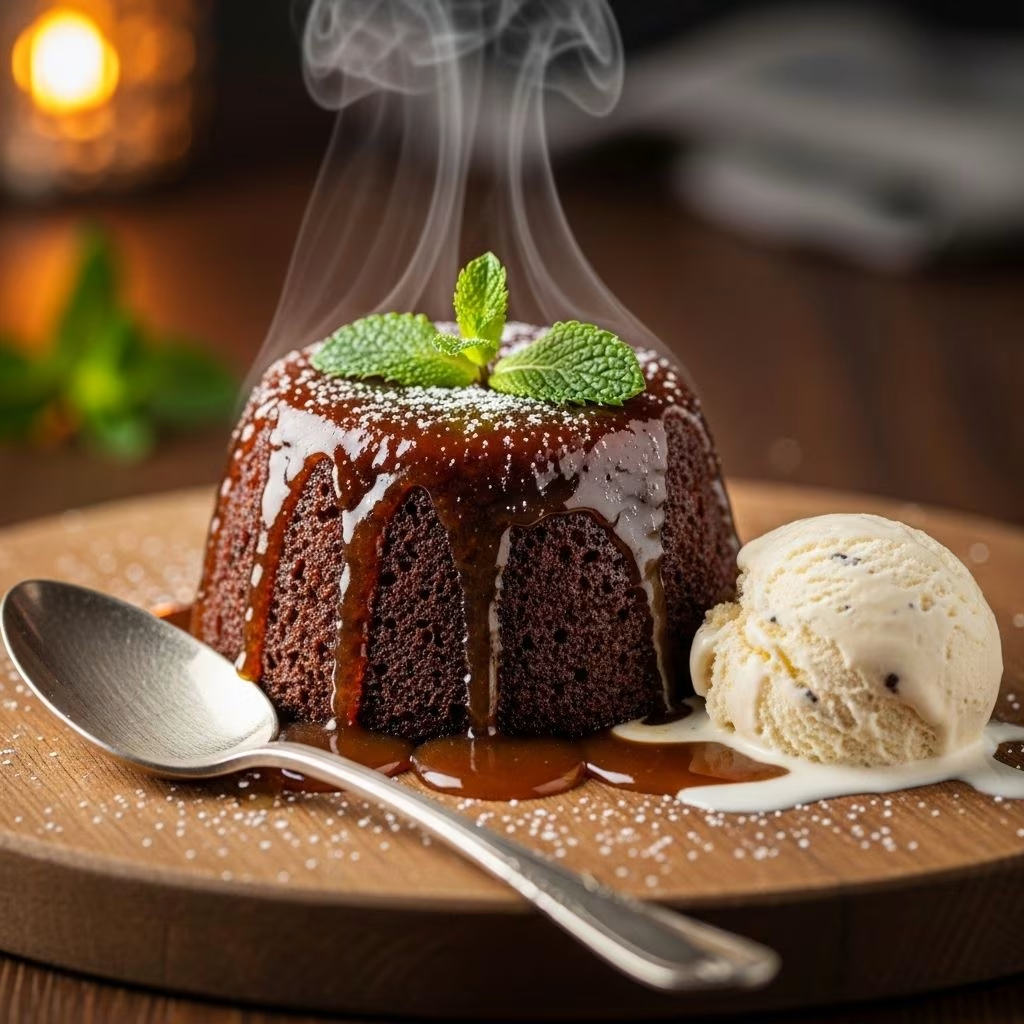
Sticky Toffee Pudding: A Classic Dessert Worthy of Celebration
Sticky toffee pudding stands among the most beloved British puddings, boasting rich flavors and a luxurious texture that never fails to impress. Whether enjoyed during the Christmas season or served as the finale for a memorable dinner, its combination of soft date cake and luscious warm toffee sauce makes it a showstopper on any table.
What is Sticky Toffee Pudding?
Sticky toffee pudding is a moist, spongy cake typically made with pureed dates, warm baking spices, and soaked—sometimes generously—in a glossy, homemade toffee sauce. Traditionally baked in single-serving ramekins or a large baking dish, it’s best served piping hot, drenched in toffee sauce, and often topped with vanilla ice cream or whipped cream for a decadent finish.
The Origins and Popularity of Sticky Toffee Pudding
This cherished dessert hails from the United Kingdom, where it has become synonymous with comfort food and festive gatherings, especially Christmas. Over time, sticky toffee pudding has gained worldwide acclaim, beloved for its irresistible balance of sweetness, richness, and nostalgia.
Sticky Toffee Pudding Recipe
Mastering sticky toffee pudding involves a two-part process: preparing a moist date-based cake and crafting a creamy, caramel-like toffee sauce. Here’s a comprehensive breakdown of ingredients and steps, ensuring success for both novice and experienced bakers.
Ingredients
| For the Pudding | For the Toffee Sauce |
|---|---|
|
|
Step-by-Step Instructions
- Prep the Dates: In a medium bowl, combine the pitted dates, baking soda, and 1 cup boiling water. Cover and let stand for about 15 minutes to soften. Transfer to a blender and process until smooth (about 30 seconds to 1 minute). Scrape down the sides to ensure a uniform puree.
- Prepare the Baking Vessel: Butter 8 (6-ounce) ramekins or a 2-quart baking dish. Place on a baking sheet for easy handling.
- Mix Dry Ingredients: In a separate bowl, whisk together flour, baking powder, cinnamon, salt, and cloves.
- Cream Butter and Sugar: Using a stand mixer with paddle attachment, beat the softened butter and brown sugar on medium speed until the mixture turns fluffy (3 to 4 minutes). Scrape the bowl as needed.
- Incorporate Egg and Vanilla: Beat in the egg and vanilla extract, scraping the bowl to combine fully.
- Alternate Additions: With the mixer on low, add the dry ingredients, alternating with the pureed date mixture. Mix until just combined—do not overbeat.
- Fill the Ramekins/Dish: Spoon the batter into prepared ramekins, filling them about two-thirds full. Smooth the tops for even baking.
- Bake: Bake at 350°F for 25-30 minutes (ramekins) or 55-60 minutes (baking dish), until a wooden pick inserted in the center comes out clean.
- Poke Holes: Remove from oven and, while hot, use a fork or a wooden pick to poke holes throughout the pudding. This step helps the toffee sauce seep in.
How to Make the Toffee Sauce
- In a medium saucepan over medium heat, melt the butter. Add brown sugar and salt, bringing the mixture to a gentle boil. Whisk constantly until the sugar is dissolved and the mixture becomes glossy and cohesive (about 2 to 3 minutes).
- Slowly pour in the heavy whipping cream, still whisking, and cook until the sauce is smooth and slightly thickened. Remove from heat and stir in vanilla extract.
Finishing and Serving
- Spoon about 1 tablespoon of toffee sauce over each pudding (or pour 1 cup evenly over a large pudding). Return puddings to the oven for 5 minutes (ramekins) or 10 minutes (baking dish), allowing the sauce to bubble and soak in.
- Let cool for 10 minutes (ramekins) or 30 minutes (baking dish) before unmolding or serving.
- Serve warm, accompanied by extra toffee sauce and a scoop of vanilla ice cream or whipped cream. For an added touch, sprinkle toasted nuts—such as pecans, walnuts, or almonds—over the top.
Sticky Toffee Pudding: Baking Tips and Variations
- Pan Options: While ramekins are traditional and yield individual servings, a muffin tin or an 8×8-inch square pan are excellent alternatives. Adjust baking times accordingly – smaller portions bake faster.
- Date Preparation: Pureeing the dates ensures the pudding is ultra-soft; however, you may mash by hand for a chunkier texture if preferred.
- Make-Ahead: Sticky toffee pudding can be baked in advance. Store covered at room temperature for up to one day, or refrigerate for longer. Warm before serving and add sauce just before enjoying.
- Freezing: Both the cake and the sauce freeze well. Thaw and reheat gently before assembling and serving.
- Flavor Add-Ins: Enhance with spices like nutmeg or cardamom, or fold in chopped toasted pecans for added depth and crunch.
Pan Sizes and Baking Vessels
| Baking Vessel | Servings | Bake Time |
|---|---|---|
| 6-ounce ramekins | 8 individual servings | 25–30 minutes |
| 2-quart baking dish | 8–10 (scooped) | 55–60 minutes |
| Standard muffin tin | 10–12 | 18–22 minutes |
| 8×8-inch square pan | 12 | 30–34 minutes |
Experiment with vessel size and shape for different presentations, from restaurant-style domed cakes to rustic, family-style scoops.
How to Serve Sticky Toffee Pudding
- Always Serve Warm: The pudding is at its peak when hot from the oven, as warmth allows the sauce to meld with the cake for perfect texture and flavor.
- With Ice Cream or Cream: A dollop of whipped cream, a scoop of vanilla ice cream, or a drizzle of heavy cream adds cool contrast to the warm pudding.
- Toasted Nuts: Not traditional, but a sprinkle of toasted pecans, walnuts, or almonds offers texture and a lovely nutty finish.
- Sea Salt: A touch of flaky sea salt enhances the caramel notes and provides a balanced, modern twist.
Expert Tips for Perfect Sticky Toffee Pudding
- Use High-Quality Dates: Medjool dates are prized for their natural sweetness and moisture. Chop and puree well for a seamless batter.
- Don’t Overmix: Once combining wet and dry ingredients, mix until just combined to avoid a dense cake.
- Poke Holes Immediately: Do this while the cake is still hot for maximum sauce absorption.
- Generous Sauce: Don’t skimp on sauce; its warmth and richness are essential to the pudding’s character.
Frequently Asked Questions (FAQs)
What makes sticky toffee pudding so moist?
The combination of pureed dates and moist brown sugar in the batter keeps the cake beautifully soft, while warm toffee sauce poured over after baking locks in moisture.
Can sticky toffee pudding be made ahead?
Absolutely. Bake and cool the cake, then wrap and refrigerate for up to 2 days or freeze for up to 1 month. Warm gently and add fresh toffee sauce just before serving.
Is it possible to make sticky toffee pudding without dates?
While dates are classic for both texture and flavor, you may substitute with prunes or figs. The result will differ in flavor but still yield a moist cake.
Can I make sticky toffee pudding gluten-free?
Yes. Substitute a high-quality gluten-free all-purpose flour blend for the regular flour, taking care not to overmix to prevent gumminess.
How should I store leftovers?
Cover tightly and refrigerate for up to 3 days. Reheat pudding and toffee sauce separately, then combine and serve warm.
Sticky Toffee Pudding: A Dessert for Every Occasion
The enduring appeal of sticky toffee pudding lies in its comforting flavor and versatility. Indulgent enough for holiday celebrations, yet simple enough for weeknight cravings, it bridges the gap between cherished tradition and contemporary comfort food. Invite this pudding into your kitchen—but be warned, you may never want to serve another dessert again!


