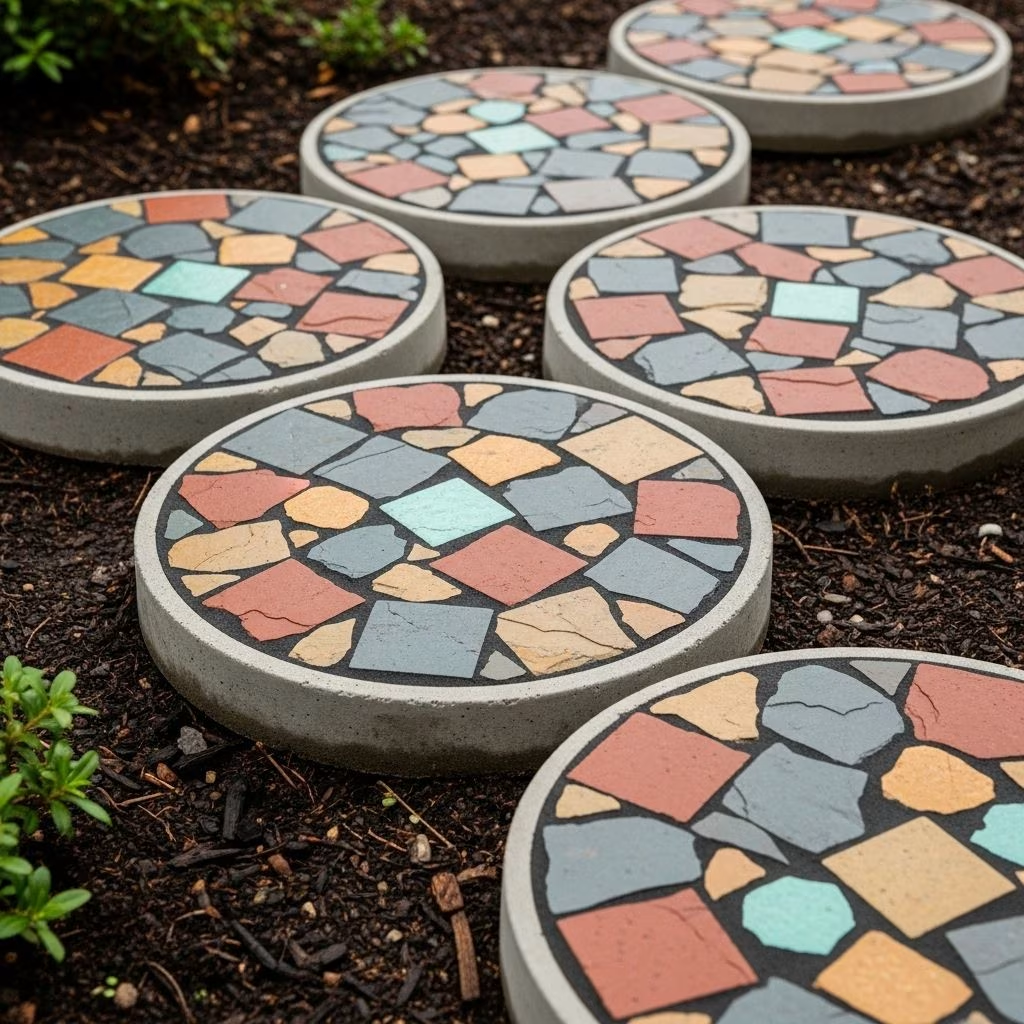
DIY Tile-Topped Stepping Stones: Colorful Pathways for Your Garden
Bringing art and utility together, tile-topped stepping stones are a fantastic way to add visual interest and function to your outdoor spaces. Whether you’re aiming to create a winding garden path or simply want a few decorative accents for flowerbeds, this guide will provide step-by-step guidance to crafting striking and sturdy stepping stones from concrete and tile. With a blend of creativity and practical advice, you’ll discover how to build lasting, mosaic-inspired stones that can weather the elements and enrich your landscape.
Why Make Tile-Topped Stepping Stones?
Tile-topped stepping stones offer a unique blend of personalized design and garden function. Here’s why they’re popular among DIY enthusiasts and gardeners alike:
- Custom Design: Choose tiles, glass pieces, or mosaics that reflect your personal style or coordinate with existing outdoor decor.
- Functional Durability: Properly made concrete stones withstand weather and foot traffic for years.
- Cost-Effective: Materials are affordable, especially when using leftover or recycled tile.
- Creative Outlet: The process allows for endless artistic variation, making each stone a unique piece of outdoor art.
Materials and Tools You Will Need
Having the right supplies will ensure success and enjoyment throughout your project. Here’s what you’ll need:
- Stepping Stone Mold: Commercial plastic molds, upcycled cake pans, or even sturdy cardboard forms lined with plastic.
- Cement or Concrete Mix: Look for a sand or topping mix for a smooth finish and a gravel or all-purpose mix for added strength.
- Pre-cut Tile Pieces or Mosaic Materials: Ceramic, glass, or porcelain tiles, either whole or broken for a mosaic effect.
- Tile Nippers: For shaping and trimming tile pieces to fit your design.
- Adhesive: Thin-set mortar for securing tiles.
- Grout: Outdoor-ready, fortified grout—dark colors hide stains, while lighter shades create a softer appearance.
- Sealer: To protect porous tile and grout from weather damage.
- Basic Tools: Rubber gloves, mixing bucket, trowel or spatula, safety goggles, sponge, and paper towels.
Project Planning: Design and Preparation
Before jumping in, take some time to brainstorm your design. Will you use a repeating pattern, freeform mosaic, or geometric layout? Planning helps avoid mid-project changes and makes the process smoother.
- Sketch your design: Draw your layout on paper or use a digital tool. Consider tile color, shape, and the negative space between tiles.
- Select tiles: Gather pieces in a harmonious range of colors, or opt for vibrant contrasts for a bolder look. Break larger tiles into usable shapes with tile nippers.
- Test-fit: Arrange your tiles inside the mold before adhering, ensuring everything fits as planned.
Step-by-Step: Making Your Tile-Topped Stepping Stones
1. Prepare Your Mold
Line your mold with heavy-duty plastic wrap or sandwich bags if it is not flexible or meant for repeated use—this makes demolding easier and keeps the edges clean. Lightly grease the surface with petroleum jelly or cooking spray if desired.
2. Set Your Tile Design
Place your tile pieces face-down into the bottom of the mold, following your chosen pattern. For intricate mosaics, apply a small dab of thin-set mortar to the back of each tile to help keep them in place. Leave small gaps between pieces for grout.
- For more complex or vertical-sided designs, consider adhering mesh-mounted mosaic sheets along the mold’s edges first.
- Press uneven or thick pieces slightly deeper so the finished surface is relatively flat.
3. Mix and Pour the Concrete
Mix your sand or topping concrete with water in a bucket, aiming for a smooth, peanut butter-like consistency. Pour or trowel the concrete into the mold over your tile arrangement, filling halfway. Gently tap the mold’s sides or shake it to remove air pockets.
Next, make a batch of gravel-included concrete for added strength and fill the rest of the mold. Add reinforcing fibers (if available) for extra durability. Again, tap the sides to release bubbles and settle the mixture around the tiles.
4. Cure and Demold the Stepping Stone
Allow the stone to set undisturbed for at least 24 hours. Once hardened, gently turn the mold over and carefully remove the stone. If you used plastic lining, it should peel away easily.
- Pro Tip: For best results, let the stones cure in a cool, shaded area to prevent cracking and maximize strength.
- Peel off any contact paper and clean excess concrete from tiles with a damp rag. Let cure for another 24–48 hours before handling extensively.
- If small holes or air bubbles appear, apply a small amount of prepared sand mix to fill and smooth the surface.
5. Grouting and Finishing
Once cured and dry, it’s time to grout your stepping stone. Mix fortified grout according to package directions. Apply over the tile surface, working the grout into gaps with a rubber float or spatula.
- Start in the center and work outward, applying steady pressure to push grout into all crevices.
- Wait 10–15 minutes for the grout to firm up, then wipe away excess with a dry paper towel or soft rag in circular motions.
- Avoid over-wetting, as excess water can weaken the grout and cloud the tiles.
Allow the grout to dry thoroughly before cleaning the tiles again with a damp sponge. Hardened grout residue can be scraped away gently if needed.
6. Seal for Lasting Durability
Finish your stone by applying a penetrating sealer to the grout lines and tile surfaces. This step is especially important if using unglazed ceramic or porous natural stone. The sealer repels moisture, prevents stains, and prolongs the life of both tile and grout.
Let the sealer dry completely before placing the stone outdoors. Full curing can take up to a month; wait at least a week before exposing your new stepping stones to heavy foot traffic.
Creative Inspirations: Design Ideas for Your Garden
- Nature-Inspired Mosaics: Craft floral patterns, leaf motifs, or sunbursts using colored glass and tile shards.
- Geometric Paths: Use pre-cut square and triangular tiles for a modern, organized look.
- Custom Monograms: Spell out initials, family names, or favorite phrases with lettered tiles.
- Memory Stones: Incorporate souvenir tiles from travels, broken dishes, or heirloom china for sentimental value.
Installation Tips: Laying Out Your Stepping Stones
- Spacing: Install stones so each step is comfortable—typically 18–24 inches apart for natural stride.
- Stability: Bed each stepping stone in a shallow depression with compacted soil or a sand/gravel base. This keeps stones from rocking or shifting underfoot.
- Integration: Nestle stones into grass, mulch, or gravel. Blend edges with adjacent plantings for a natural transition.
- Long-Term Care: Reseal grout yearly and check for cracks or loose tiles after harsh winters. Wipe away leaves or debris to keep your pathway inviting.
Expert Tips: Ensuring Success and Safety
- Weight Considerations: Finished stepping stones can be very heavy. Work on a sturdy table and use a lazy Susan to rotate the mold as you work (especially when grouting the sides).
- Weather Warning: Always use outdoor-rated materials. In freeze-thaw climates, ceramic tiles may crack if unprotected—use a sealer to prevent moisture infiltration.
- Portability: If you’re making stones in winter, allow for indoor curing and keep stones outside only during favorable conditions.
- Eco-Friendly Crafting: Upcycle old tiles, broken pottery, or stained glass offcuts for distinctive and sustainable designs.
Common Mistakes and How to Avoid Them
| Problem | Prevention or Solution |
|---|---|
| Tiles shifting during pouring | Adhere tiles with dabs of mortar; work slowly when adding concrete. |
| Grout hazing or stuck residue | Wipe grout off quickly, use dry towels, and buff with a soft cloth. |
| Cracked stones after winter | Seal all grout and tile, provide proper curing time before outdoor exposure. |
| Air bubbles on surface | Tap mold on sides to release bubbles, fill small voids after demolding if needed. |
| Stone edges crumbling | Grease mold or use plastic lining for clean demolding, handle carefully during curing. |
Frequently Asked Questions (FAQs)
Q: Can I use broken dishes or recycled materials for my stepping stones?
A: Yes, many crafters use broken china, pottery, or old tile. Just ensure all edges are embedded well to avoid sharp surfaces and use a strong sealer to protect porous materials.
Q: How thick should my stepping stones be?
A: For durability, aim for stones that are at least 2 inches thick. Thinner stones are prone to cracking with use.
Q: Will my tiles last through winter?
A: Proper sealing and the use of high-fired or porcelain tiles bolster freeze resistance. Bring stones inside during severe winters if you have concerns about longevity.
Q: What should I do if a tile comes loose?
A: Reattach with outdoor thin-set mortar and reseal. Check your stones yearly and make repairs as needed.
Q: Can kids help with mosaic stepping stones?
A: Yes—with adult supervision. Kids can help with planning designs and setting tiles, but mixing and pouring concrete should be handled by adults for safety.
Final Thoughts: Show Off Your Garden Path
Tile-topped stepping stones are more than just functional; they’re a showcase of your creativity and an enduring addition to your outdoor space. Experiment with new patterns, color combinations, or themes to refresh your garden path year after year. Not only do they provide a safe way to traverse lawns and flowerbeds, but these handcrafted pieces also invite admiration and conversation from every visitor.