How to Install an Over-the-Range Microwave: A Complete DIY Guide
Installing an over-the-range microwave is one of the most effective ways to maximize your kitchen space while adding functionality and a modern touch. If you’re replacing an old unit or installing a new one from scratch, this guide will walk you through everything from planning and choosing the right model, to prepping your workspace, handling electrical and ventilation requirements, and mounting the microwave securely. You’ll also find answers to popular questions and safety tips for a successful installation.
Why Choose an Over-the-Range Microwave?
Over-the-range microwaves are specially designed to save space by combining microwave cooking with integrated ventilation for your stovetop. Key benefits include:
- Space efficiency: Frees up valuable countertop space for other kitchen essentials.
- Integrated ventilation: Most models feature built-in fans or exhaust systems that help remove smoke, odors, and steam.
- Modern appearance: Creates a sleek look by seamlessly fitting into cabinetry above the range.
- Optimal workflow: By centralizing your cooking area, meal preparation becomes more efficient.
Tools and Materials You’ll Need
Gathering the right tools and supplies before you begin will streamline the installation process and help you avoid unnecessary trips to the hardware store. For most standard over-the-range microwave installations, you’ll need:
- Measuring tape
- Masking tape
- Pencil/marker
- Level
- Stud finder
- Drill and drill bits (various sizes)
- Screwdrivers (Phillips and flathead)
- Socket wrench set
- Scissors
- Drop cloth or towel (to protect your stove and floor)
- Partner/helper (for lifting and positioning)
- Step ladder
- Cardboard mounting templates (typically provided with new microwaves)
- Mounting bracket (included with new units)
- Lag screws or anchors (as recommended by manufacturer)
Preparation and Safety Considerations
Before you start, review these safety guidelines and ensure your kitchen is ready for the installation:
- Unplug your existing microwave and, if possible, move the range away from the wall to allow more workspace.
- Place a drop cloth or towel on your stovetop and the floor to catch any debris or prevent scratches.
- Clear all contents from the upper cabinet, as you will need access for drilling and securing the unit.
- Locate the nearest electrical outlet—over-the-range microwaves typically plug in inside the overhead cabinet. If one is not available, consult a licensed electrician to install a dedicated 120V grounded outlet.
- Ventilation: Decide whether your microwave will vent externally or recirculate air back into the kitchen. Refer to your microwave’s manual for venting requirements.
Tip: Always review your microwave’s included installation manual for specific requirements. If your project involves electrical work or modifying ducts or cabinetry, consider consulting a professional.
Removing an Old Microwave
If you are replacing an old unit, start with these steps:
- Unplug the microwave from the cabinet outlet.
- Remove the screws in the cabinet above the microwave that secure the unit in place.
- With a helper, support the weight of the microwave as you loosen the mounting screws. Carefully tilt the microwave forward, lift the back off the mounting bracket, and guide the power cord out through the cabinet hole.
- Set the old microwave aside on a stable surface.
- Remove the existing mounting bracket from the wall. If it’s attached with toggle bolts, gently pull them free (the toggles will fall into the wall cavity).
Safety Note: Older microwaves can be heavy and may have sharp edges; always wear work gloves and use two people for removal and installation.
Measuring and Planning the Installation
Accurate measurements are crucial for a safe and visually pleasing installation. Focus on these key areas:
- Microwave width: Standard over-the-range microwaves are typically 30″ wide, but always verify your model’s dimensions.
- Height and clearance: Check the manufacturer’s instructions and local codes for minimum required clearance above the range (usually 13.5″ to 18″ from the cooktop to the bottom of the microwave).
- Depth: Mark whether the microwave will stick out past your upper cabinets, especially if your cabinets are shallower than the microwave.
- Stud location: Use a stud finder to identify at least one (preferably two) wall studs for secure bracket mounting.
- Outlet location: Confirm that the power cord will easily reach the outlet in your upper cabinet.
- Vent alignment: If venting outside, check ductwork alignment so it matches the new microwave’s vent outlets.
Record all these measurements for reference during installation. If any required dimensions are not met, address modifications such as trimming cabinets or installing an additional vent or outlet before proceeding.
Step-by-Step Installation Guide
Follow these detailed steps to install your over-the-range microwave:
Step 1: Prepare the Workspace
- Ensure the range is unplugged and, if possible, moved out to provide access.
- Lay down a drop cloth or towel to protect surfaces.
Step 2: Mark the Centerline
- Find the center of the space above your range. Mark a vertical line up the wall and cabinet bottom using a level. This will help align the mounting bracket and templates.
Step 3: Attach or Align the Mounting Plate
- If a cardboard template is provided, tape it in place according to manufacturer instructions. Otherwise, use the metal mounting bracket as the template.
- Align the bottom of the template or bracket with the line you drew, centered horizontally. Ensure it is level.
Step 4: Mark and Drill Holes
- Use a pencil to mark mounting holes through the bracket—at least one must go into a wall stud for proper support.
- Drill the marked holes. For stud locations, use a wood drill bit; for other locations, drill a larger hole for toggle bolts or anchors as needed.
Step 5: Secure the Mounting Plate
- Fasten the mounting plate to the wall with lag screws into studs and toggle bolts or wall anchors elsewhere. Double-check with a level.
Step 6: Prepare the Cabinet Above
- Clear out the upper cabinet.
- Affix the upper cabinet template (usually provided) centered along the rear wall. This ensures holes are correctly positioned for support bolts and power cord.
- Mark the holes for the mounting bolts and for the power cord to pass through the cabinet bottom.
- Drill out these holes carefully, using the correct-size bits for both bolt holes and cord access (usually about 1.5″ diameter for cord clearance).
Step 7: Prepare the Microwave
- Remove the turntable, rotating plate, and any loose components from inside the microwave.
- Shut the microwave door and tape it closed to prevent swinging during installation.
Step 8: Mount the Microwave
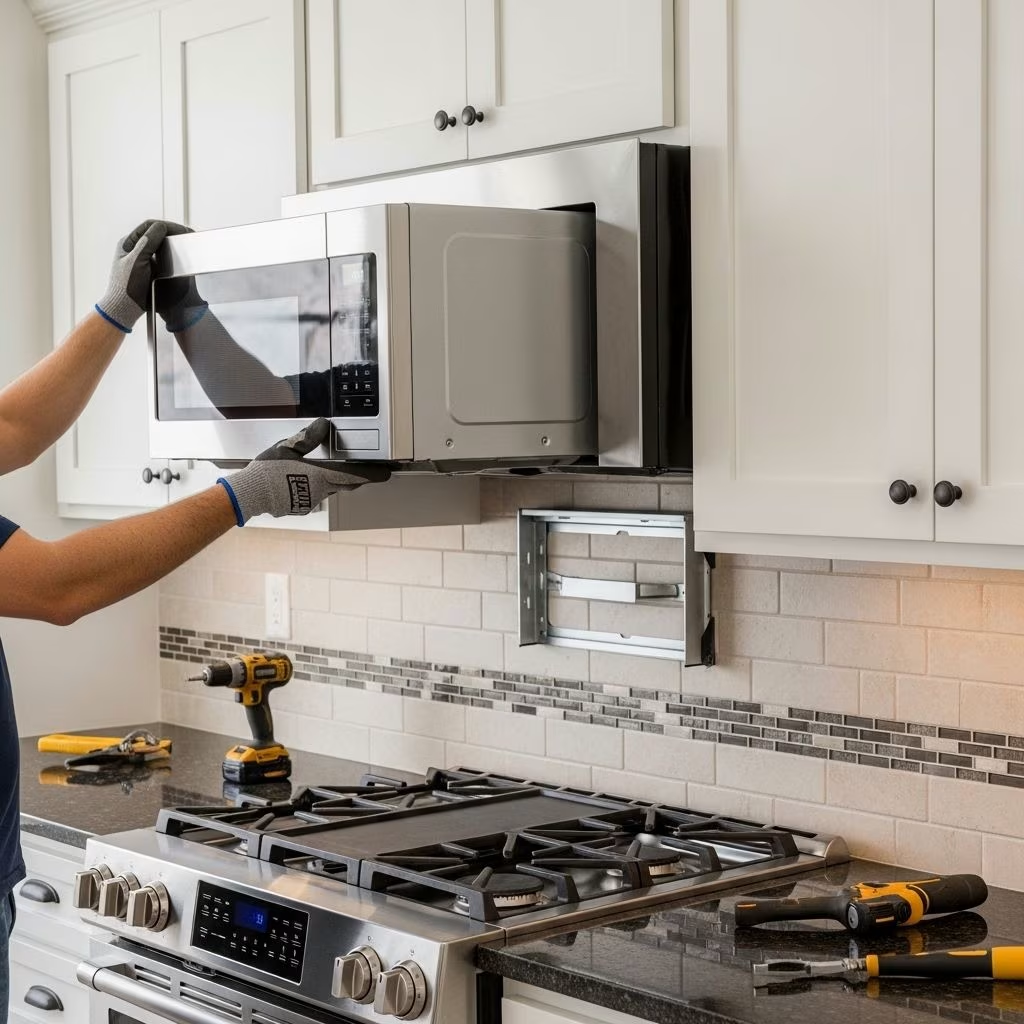
- With your helper, carefully lift the microwave. Angle the bottom edge into the wall mounting bracket so it hooks securely into place.
- While one person supports the microwave, the other threads the power cord through the access hole into the upper cabinet.
- Rotate the microwave up flush against the cabinet bottom.
Step 9: Secure the Microwave
- Insert the provided screws or bolts through the upper cabinet and into the top of the microwave. Tighten securely. Do not overtighten as this can damage the microwave housing or your cabinet.
Step 10: Connect Electrical
- Plug the microwave into the dedicated outlet inside the upper cabinet.
Step 11: Test the Microwave
- Restore power and test that the unit powers on, heats properly, and that the vent fan works (if applicable).
- Inspect that all mounting points are secure and the microwave sits flush against both the wall and the cabinet.
Note: Always reference the manufacturer’s installation guide for your specific model and adhere to local electrical codes.
Ventilation and Electrical Tips
Proper ventilation is essential for air quality and fire prevention. Over-the-range microwaves generally support three types of ventilation:
- External Venting: Vents steam and odors through ductwork to the outside. Most effective but may require duct routing.
- Recirculating (Non-Vented): Uses charcoal filters to clean and return air to the kitchen. Easiest if ducting is not possible.
- Wall/Vented Into Attic: Less common, but some homes are set up to vent microwave exhaust through the wall or into ceiling ducts.
Electrical: OTR microwaves require a standard 120V, grounded outlet (often in the upper cabinet).
Never use an extension cord or plug more than one appliance into the outlet. If no outlet exists, hire a licensed electrician to install one to code. Additionally, check that your microwave does not share a circuit with other heavy-load appliances to avoid tripping breakers or electrical hazards.
Cleaning and Maintenance Tips
- Wipe down the microwave’s exterior and touchpad with a nonabrasive, damp cloth to prevent build-up.
- Clean the interior regularly with mild, non-corrosive cleaners. For tough stains, microwave a bowl of water with lemon slices to loosen residues, then wipe clean.
- Replace charcoal or grease filters as suggested by the manufacturer—generally every 6 to 12 months.
- Inspect and clean vent screens or filters to ensure efficient airflow.
- Consult your owner’s manual for detailed cleaning and maintenance instructions for your model.
Frequently Asked Questions (FAQs)
Q: Is installing an over-the-range microwave a DIY-friendly project?
A: Yes, many homeowners can install an over-the-range microwave with basic tools and a helper, but electrical and ventilation modifications may require a professional.
Q: How much clearance is needed between the range and the microwave?
A: Typically, manufacturers require 13.5″ to 18″ from the stovetop to the bottom of the microwave for safe operation and ventilation. Always check your manual and local codes.
Q: Can I vent an over-the-range microwave into my attic?
A: Most codes prohibit venting directly into the attic. External venting should discharge outside, not into interior spaces or attics; recirculating vent options are available for non-ducted installations.
Q: What if my upper cabinet doesn’t have a power outlet?
A: You must install a dedicated 120V grounded outlet inside the cabinet; use a certified electrician to ensure safety and compliance with local codes.
Q: How heavy is an over-the-range microwave?
A: Most units weigh between 50 and 70 pounds. Always use two people for lifting and positioning.
Q: How often should I replace the charcoal or grease filters?
A: Grease filters should be cleaned regularly (at least monthly), and charcoal filters replaced every 6 to 12 months, or as indicated in your appliance manual.
Q: What if I can’t find a wall stud for mounting?
A: Use heavy-duty wall anchors or toggle bolts, but at least one mounting point should be attached to a stud for proper support.
Final Thoughts
With the right tools, careful preparation, and attention to safety, installing an over-the-range microwave can be a manageable and highly rewarding DIY project. Always consult your appliance’s installation guide and local building codes, and don’t hesitate to contact a professional for complex wiring or venting needs. Enjoy your new kitchen upgrade!
References
- https://www.whirlpool.com/blog/kitchen/how-to-install-over-the-range-microwave.html
- https://www.lowes.com/n/how-to/replace-an-over-the-range-microwave
- http://pdf.lowes.com/installationguides/012505563539_install.pdf
- https://www.youtube.com/watch?v=Lte97wMmbk8
- https://www.youtube.com/watch?v=wD2OAWHRVZc
- https://producthelp.jennair.com/Cooking/Microwaves/Product_Info_new/Microwave_Videos/VIDEO:_How_to_Install_an_Over_the_Range_Microwave
- https://images.thdstatic.com/catalog/pdfImages/1d/1deef83e-9a85-4061-94e2-b55316e17424.pdf
- http://files.sharpusa.com/Downloads/ForHome/HomeAppliances/MicrowaveOvens/InstallationGuides/R-1881LSY_IG_EN_061217.pdf