How to Install Corner Beads for Drywall: A Complete Step-by-Step Guide
Drywall corner beads are essential for protecting and finishing outside corners in homes and buildings. They provide a crisp, straight edge and reinforce vulnerable corners against damage. Installing corner beads correctly is one of the key steps to achieving smooth, professional-looking walls. This guide covers every detail you need to know about the types of corner beads, essential tools, and step-by-step installation for metal, vinyl, and paper-faced beads, plus expert tips, common mistakes to avoid, and frequently asked questions.
What Are Drywall Corner Beads?
Drywall corner bead is a specialized trim that covers and strengthens exterior drywall corners. Once installed and finished, it protects vulnerable edges from dings and scrapes and gives your wall a visually clean line. Corner bead usually comes in metal, vinyl, or paper-faced varieties. Each type has specific applications and installation methods, but the ultimate goal is always the same: to provide a durable, seamless corner that blends perfectly into the adjoining walls.
- Metal Corner Bead: Traditional, sturdy, and ideal for high-traffic areas.
- Vinyl Corner Bead: Flexible and rust-resistant, perfect for moist or curved surfaces.
- Paper-Faced Metal Corner Bead: Combines the strength of metal with easy feathering and finishing.
Tools & Materials Needed
| Tool/Material | Purpose |
|---|---|
| Corner bead (metal, vinyl, or paper-faced) | Protects drywall corners |
| Measuring tape | Measures corners for precise cutting |
| Tin snips/utility knife | Cuts metal or vinyl bead to size |
| Staple gun, drywall screws, or nails | Attaches the bead to drywall |
| Taping knife (6″ and 12″) | Applies and feathers joint compound |
| Joint compound (mud) | Covers bead and blends wall surfaces |
| Sandpaper/sanding sponge | Smooths compound for painting |
| Primer & paint | Finishes the surface |
Step-by-Step: How to Install Drywall Corner Bead
Step 1: Measure and Cut Your Corner Bead
Begin by measuring the height of the drywall corner where you plan to install the bead. Use tin snips for metal bead and scissors or a utility knife for vinyl or paper-faced bead. Be sure to cut at a 45° angle if adjoining pieces meet at a three-way outside corner, as this prevents overlap and lumps, especially on ceilings or wall intersections.
Step 2: Dry-Fit the Bead
Before attaching, place the bead on the corner to confirm fit and alignment. Minor gaps near the floor or ceiling are acceptable since baseboards or crown molding will cover these areas, but the bead must sit flush to the drywall. Adjust as needed for a smooth, level line, stepping back to inspect by eye any subtle imperfections.
Step 3: Attaching the Corner Bead
The attachment method depends on bead type. Here’s how to do each:
- Metal Corner Bead:
- Hold the bead in position and secure with drywall screws, nails, or a staple gun every 8 inches along the legs.
- Vinyl Corner Bead:
- Spray adhesive on the back or use drywall screws (as above), spacing fasteners 8 inches apart. Vinyl flexes to fit curved or arched corners easily.
- Paper-Faced Metal Corner Bead:
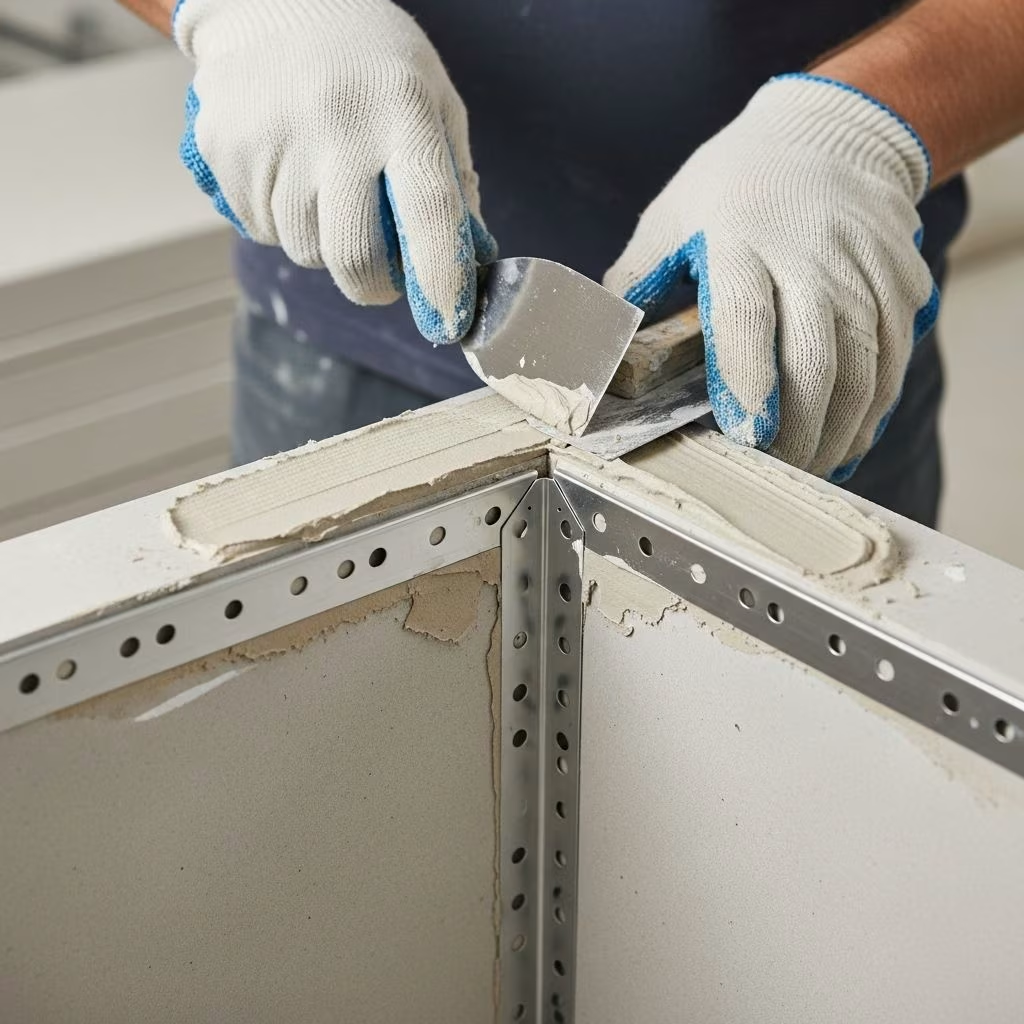
- Apply a thin layer of joint compound along the corner, press paper-faced bead firmly into the compound, then embed using a taping knife or specialty roller for tight adhesion.
- You may optionally tack in a staple at the ends for extra hold until the compound dries.
Step 4: Apply the Joint Compound (Mud)
- Use a 6-inch taping knife to apply an initial coat of joint compound over both edges of the corner bead, feathering out from the edge.
- Ensure the compound covers but does not flood the raised edge (for beaded designs), allowing you to build up a perfectly smooth surface.
- Let the first coat dry for 24 hours.
- Lightly sand to smooth out ridges and imperfections, being careful not to sand through drywall paper.
- Apply a second, broader coat with a 12-inch knife, feathering even further for a flawless finish.
- Let dry for another 24 hours, then repeat sanding. A third coat is optional for professional perfection.
Step 5: Sand, Prime, and Paint
- Sand: After the last coat dries, sand smoothly with a fine-grit sponge. Remove all dust before finishing.
- Prime: Use drywall primer on the joint compound. This seals the mud and prepares for even paint application; unprimed mud can cause uneven sheen or color.
- Paint: Apply two coats of your desired wall paint for a sharp, professional finish.
Types of Drywall Corner Bead – Pros and Cons
| Type | Advantages | Best Uses |
|---|---|---|
| Metal | Very sturdy, resists impacts | High-traffic or commercial areas |
| Vinyl | Rust free, flexible for curves | Bathrooms, curved walls, damp environments |
| Paper-faced Metal | Easy to embed and feather, faster installation | Professional drywall finishing, living spaces |
Common Mistakes to Avoid When Installing Corner Bead
- Misaligned bead: Leads to uneven corners and visible defects, especially after painting.
- Overdriving fasteners: Flattening bead legs or damaging the wall. Use gentle pressure; overtightening can cause waves along the edge.
- Insufficient mud coverage: Leaving gaps or ridges; always feather edges for seamless finishing.
- Skipping sanding between coats: Creates a bumpy finish that is difficult to correct after painting.
- Not priming the mud: Results in uneven paint finish or color differences along corners.
- Using the wrong bead: Metal bead on a curved wall or vinyl in high-traffic areas can cause long-term problems. Match your material to the application.
Pro Tips for a Professional Finish
- Always dry-fit and visually check corners for straightness before final attachment.
- For three-way outside intersections (corners meeting ceilings or other walls), miter the bead ends at 45° for a smoother, seamless joint.
- Feather mud generously with each coat and resist the temptation to over-sand between coats.
- Use a roller to embed paper-faced beads; they ensure even pressure and quicker installation.
- If in doubt, step back and inspect—minor imperfections are most visible under strong light and after painting.
Frequently Asked Questions (FAQs)
Q: What is the best type of corner bead for a DIY drywall project?
A: Paper-faced metal beads are highly recommended for DIYers thanks to their ease of embedding and forgiving installation. They feather out easily and offer excellent durability, while vinyl beads are best for curved corners or moist environments.
Q: Can corner bead be installed after drywall seams are taped?
A: Yes. Many professionals prefer to tape and mud seams first, then apply tape-on corner bead to avoid interference during finishing, resulting in fewer bumps and easier feathering.
Q: Do I need to use primer before painting over joint compound?
A: Absolutely! Joint compound is very porous; without primer, paint absorbs unevenly and leaves variations in color and sheen. Always prime after final sanding and dust removal.
Q: Why does my corner bead show through paint?
A: This usually occurs if the mud is not feathered smooth enough or if primer was skipped before painting. Additional sanding and priming typically fix the issue, but severe ridges may require remudding.
Q: What’s the easiest way to avoid bumps or gaps when installing corner beads?
A: Ensure the bead is snug against the drywall without excessive fastener pressure. Feather all coats out at least 8″ from the corner, letting each coat thoroughly dry and sanding gently between layers.
Conclusion
Properly installing drywall corner beads ensures lasting protection and a flawless appearance for corners throughout your home. By choosing the right type, following expert installation practices, and avoiding common mistakes, you can create sharp, durable corners that stand up to everyday wear. Whether you’re finishing a basement remodel or repairing damage, use this guide for professional results every time.
References
- https://www.finehomebuilding.com/project-guides/drywall/episode-2-installing-corner-bead
- https://jmkcontractor.com/how-to-install-drywall-corner-bead/
- https://www.youtube.com/watch?v=lTBKVDaBPg8
- https://www.youtube.com/watch?v=Kl6uPml3zG0
- https://www.youtube.com/watch?v=suiiGVhyK1g
- https://www.youtube.com/watch?v=2ZiQEYP4gIU
- https://biggerthanthethreeofus.com/how-to-install-a-corner-bead-on-a-drywall-corner/
- https://www.trim-tex.com/blog/drywall-corner-bead-types