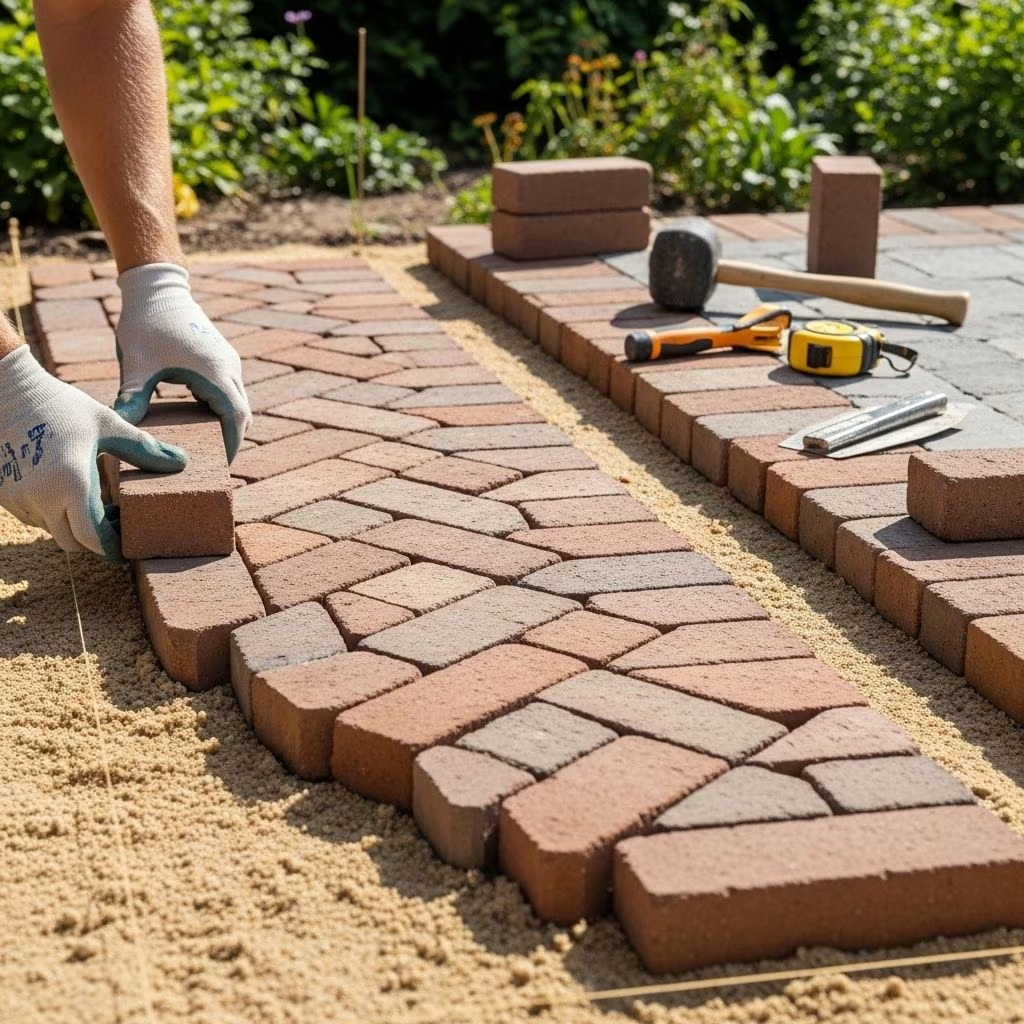
How to Lay a Diagonal Herringbone Brick Patio
Transform your outdoor space with a classic touch by installing a diagonal herringbone brick patio. This timeless pattern not only adds visual interest but also enhances structural stability. The following guide walks you through each step, from planning and site preparation to the precise laying of bricks in a beautiful diagonal herringbone pattern. Whether you’re an experienced DIYer or tackling your first outdoor project, these detailed instructions will set you up for success.
Why Choose a Diagonal Herringbone Pattern?
The herringbone pattern is favored for its strength, interlocking geometry, and unmistakable aesthetic appeal. When laid on the diagonal relative to your patio’s boundaries, the pattern maximizes movement resistance, minimizing brick shifting over time. This geometric layout is ideal for areas with heavy foot traffic or furniture use, offering durability and refined style.
- Enhanced durability: Interlocking bricks resist shifting.
- Timeless appearance: The pattern never goes out of fashion.
- Versatility: Works with various brick types and colors.
- Structural stability: Ideal for patios, walkways, and courtyards.
Materials & Tools Checklist
Before beginning your patio installation, gather all necessary materials and tools. Proper preparation will streamline the process and help avoid delays.
- Bricks: Enough to cover the patio area (factor in 5-10% extra for cuts and waste).
- Paver base (Crushed Stone): For foundational support.
- Sand: Bedding and joint filling.
- Landscape fabric: To prevent weed growth.
- Edging: Metal, plastic, or brick for perimeter containment.
- String and stakes: For layout and alignment.
- Measuring tape: Essential for planning.
- Level: Ensures a flat, even surface.
- Rubber mallet: For gentle brick positioning.
- Notched trowel: For spreading bedding sand.
- Brick cutter or angle grinder: For clean, precise cuts.
- Wheelbarrow, shovel, rake: For moving and leveling materials.
- Plate compactor: Ensures solid brick and base compaction.
- Protective gear: Gloves, eyeglasses, knee pads.
Step 1: Plan Your Patio Layout
Successful patio installation starts with careful planning and layout. Review the size and orientation of the site and decide the diagonal direction for the herringbone pattern. This sets the aesthetic tone and practical usability of your space.
- Measure the area: Mark the boundaries with string and stakes.
- Sketch your design: Consider adding a border or edging to frame the pattern.
- Calculate brick quantity: Use patio area measurements and pattern layout to estimate.
- Map the diagonal pattern: Plan lines at 45 degrees to the edges; this guides brick placement.
Step 2: Prepare the Site
Site preparation lays the foundation for a long-lasting patio. Clearing, leveling, and stabilizing the ground prevents issues like settling or weed intrusion.
- Remove Existing Turf:
Clear grass, weeds, and debris. Excavate to a depth that allows for adequate base (usually 6–8 inches; add extra if soil is loose).
- Install Landscape Fabric:
Lay fabric over the excavated area to inhibit weed growth without blocking drainage.
- Add Paver Base:
Spread a 4–6 inch layer of crushed stone, level it with a rake, and compact until solid. A plate compactor is ideal for uniform compaction.
- Bedding Sand Layer:
Top the base with a 1-inch layer of sand, screed smooth and level.
Step 3: Edge Restraints & Border Bricks
Edge restraints keep your pattern intact over time and help create a polished look. Borders can be laid in a running bond or soldier course pattern.
- Install edging material flush with the planned perimeter.
- Set border bricks if using a frame to outline your herringbone field. Dry-fit first to ensure the layout complements your pattern.
- Check all alignments before proceeding to brick laying.
Step 4: Layout and Dry-Fit the Herringbone Pattern
Accurate initial dry fitting ensures smooth progress and minimal error. Lay out bricks without mortar or adhesive to confirm pattern alignment and cutting needs.
- Mark 45-degree guide lines across the patio area using string or chalk.
- Start from the center or a key edge (whichever matches your design) and work outward.
- Position the first brick so its long edge aligns with the 45-degree mark. The tip should touch the guide line, creating the herringbone’s characteristic V.
- Leave uniform gaps (usually 1/8–3/16 inches) to accommodate joint sand.
- Use spacers for consistent, precise joints.
- Dry-fit the entire field, making all necessary brick cuts and adjustments before actual installation.
Step 5: Cutting Bricks for Fit
Achieving a professional herringbone effect requires careful cutting where the pattern meets edges, curves, or borders. Mark bricks for cutting prior to installation using a straightedge, pencil, or chalk.
- Angle grinder or wet saw: Use to trim bricks cleanly for perimeter fit.
- Safety first: Wear goggles, gloves, and a dust mask.
- Cut as needed: Both during dry fit and as pattern progresses around obstacles.
Step 6: Laying the Bricks
Begin actual installation by placing bricks in the dry-fitted sequence. Lay bricks onto the prepared sand bed using the marked guides and spacers.
- Work in sections (about 2 feet at a time):
- Avoid disturbing previously laid bricks.
- Spread bricks evenly, following the diagonal herringbone layout.
- Check alignment regularly:
- Continue using the 45-degree marks for reference.
- Tap bricks into place gently with a mallet.
- Maintain consistent joint spacing.
- Set edge bricks last; cut to fit as needed.
Step 7: Final Compaction and Joint Sand
Seating the bricks firmly and locking joints ensures longevity and minimizes weed growth or shifting.
- Sweep polymeric sand or joint sand into all gaps. This locks bricks together and stabilizes the pattern.
- Compact the patio with a plate compactor, making two passes at right angles. This settles sand and bricks; add further sand as needed and sweep again.
- Water the joints (if using polymeric sand) to activate binding agents and solidify joints.
Step 8: Clean Up and Maintenance
Remove excess sand and debris from the surface, and inspect for loose bricks or uneven joints. Well-installed diagonal herringbone patios require little ongoing maintenance but benefit from periodic fresh sand and occasional cleaning.
- Inspect the finished patio for any raised or misaligned bricks.
- Apply a paver sealant for additional color retention and stain resistance (optional).
- Plan regular cleaning and joint sand replacement as needed.
Pro Tips for Success
- Always dry fit: This previews the final look and helps catch layout problems early.
- Double-check measurements: Even a small misalignment can disrupt pattern symmetry.
- Use a level: Monitor surface evenness as you work.
- Work efficiently: Some adhesives or mortars set quickly. Plan workflow before mixing.
- Alternate brick colors or textures: For added visual interest, consider intentional pattern variation.
Common Mistakes and How to Avoid Them
- Skipping site prep: Poor base leads to uneven settling and shifting.
- Improper compaction: Failing to compact base or bricks lets bricks come loose over time.
- Inconsistent alignment: Without marked guides, the diagonal herringbone pattern can quickly drift.
- Neglecting joint sand: Leaves bricks vulnerable to weeds, movement, and water damage.
Benefits of a Diagonal Herringbone Brick Patio
| Benefit | Description |
|---|---|
| Durability | Interlocking pattern resists movement and settling. |
| Visual Appeal | Dynamic angles and texture provide timeless charm. |
| Design Flexibility | Works with contrasting borders, curves, and various brick colors. |
| Low Maintenance | Easy to clean and repair individual bricks if necessary. |
Frequently Asked Questions (FAQs)
Q: What is the minimum recommended depth for the paver base?
A: Excavate at least 6 inches below the final patio height, allowing for a 4-inch paver base and a 1-inch sand layer.
Q: Can herringbone patios be installed without cutting bricks?
A: Some layouts allow for full bricks only, but diagonal patterns usually require cuts for a precise edge fit, particularly around curves or the border.
Q: How do I keep the herringbone pattern aligned?
A: Use marked 45-degree guide lines. Work in small sections and regularly check with a level and straightedge.
Q: Which sand is best for paving joints?
A: Polymeric sand is preferred for its binding properties, which prevent weed growth and joint washout, though regular paving sand is also effective.
Q: How long does it take to install a typical patio?
A: Time varies by size, but a small patio (100–150 sq ft) typically requires a full weekend—including prep, laying, and clean-up.
Final Thoughts: Enjoy Your Diagonal Herringbone Patio
With proper planning, careful preparation, and stepwise installation, laying a diagonal herringbone brick patio is a rewarding project that brings lasting value and beauty to your outdoor living space. The effort invested in getting every detail right—from site prep to final compaction—will yield a patio that stands up to weather, wear, and time, while delighting with its timeless design.
References
- https://www.jennasuedesign.com/how-to-install-herringbone-brick-floor-tile/
- https://www.youtube.com/watch?v=P5p1FBH77X4
- https://www.youtube.com/watch?v=vuPXKFWBW4Y
- https://pdmsview.shawinc.com/viewer/doc/5573
- https://georgeceramic.com/blog/how-to-lay-herringbone-tile-paving-patterns/
- https://www.youtube.com/shorts/OufbLxgbg8k
- https://www.jswoodcraftflooring.co.uk/post/a-guide-to-installing-herringbone-flooring-in-different-stunning-patterns