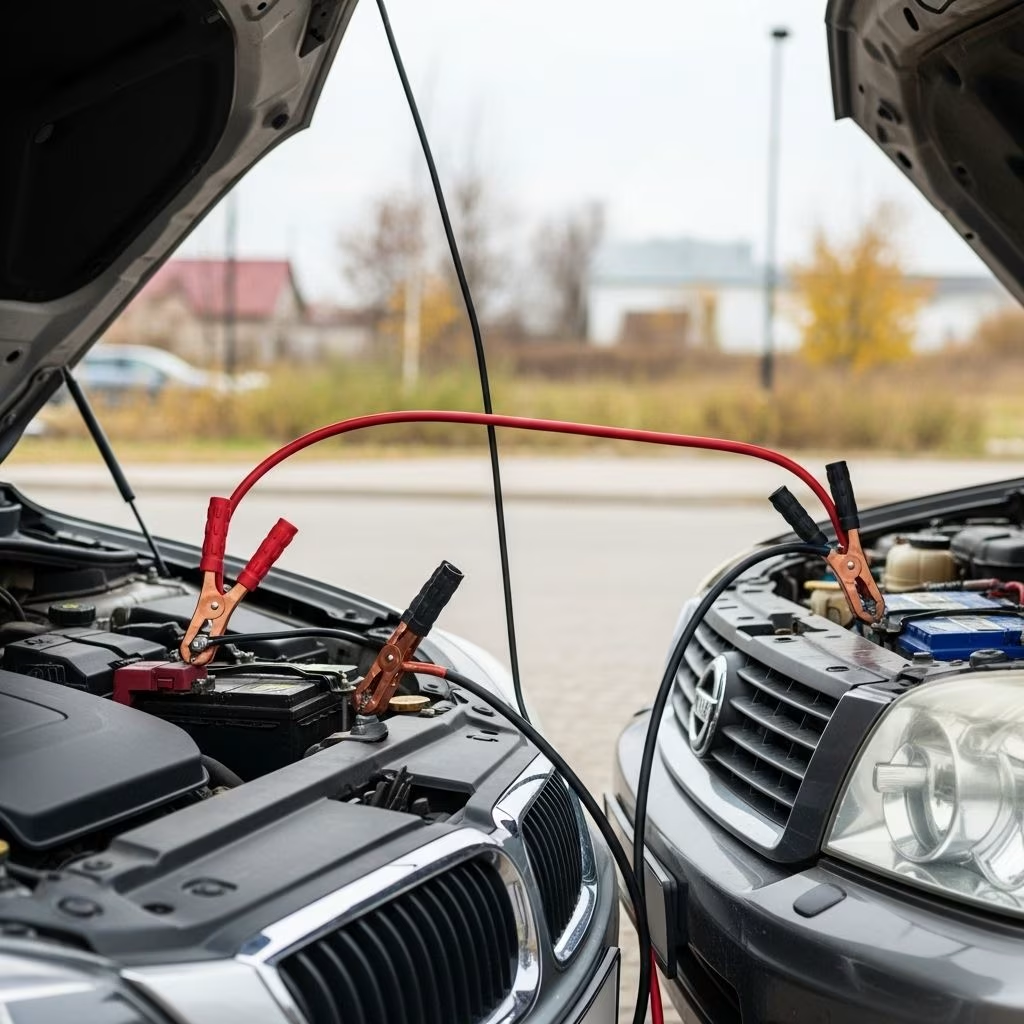
How to Use Jumper Cables and Jump-Start a Car the Right Way
Few scenarios are more frustrating than discovering your car battery is dead just as you’re heading out. Fortunately, jumper cables are a simple and essential tool every driver should know how to use. Proper technique not only protects you but also prevents damage to your vehicle’s electrical system. This comprehensive guide walks you through every crucial step, from preparing your cars and cables to safely executing a jump-start and troubleshooting common issues.
Preparation: What You Need Before Jump-Starting
- Jumper cables—preferably at least 10-20 feet long to ensure reach between vehicles.
- A functioning vehicle with a fully charged battery.
- Gloves and protective eyewear (recommended for safety).
- Flashlight—if working in low visibility.
- Owner’s manuals for each car (some vehicles have unique instructions).
Before beginning, ensure both vehicles are parked safely off the road, in park or neutral, with parking brakes engaged and ignitions turned off.
Step-By-Step Guide: Jump-Starting a Car with Jumper Cables
- Step 1: Position the Vehicles
Park the car with good battery close enough to the dead car so that the cables reach both batteries, ideally with engines about two feet apart. Do not allow vehicles to touch. - Step 2: Turn Off Both Vehicles
Turn off both ignitions. Remove the keys, apply parking brakes, and switch off all accessories such as radios, lights, and climate controls for safety. - Step 3: Open the Hoods and Locate Battery Terminals
Open both hoods, secure them, and identify each battery’s terminals. Most have clearly marked positive (+) (typically red cover) and negative (–) posts. - Step 4: Connect the Jumper Cables Correctly
Attach the clamps in this precise order for maximum safety:- Connect one red clamp to the positive (+) terminal of the dead battery.
- Connect the other red clamp to the positive (+) terminal of the good battery.
- Connect one black clamp to the negative (–) terminal of the good battery.
- Connect the remaining black clamp to an unpainted metal surface of the dead car’s engine block or chassis—never to the dead battery’s negative terminal, which risks dangerous sparks.
Important: Keep clamps from touching each other during this process to avoid electrical shorts.
- Step 5: Start the Good Vehicle and Charge
Start the vehicle with the charged battery and let it idle for 2–3 minutes. This allows energy to move into the dead battery, creating a safer environment to start the disabled car. - Step 6: Attempt to Start the Dead Vehicle
Try to start the disabled car. If it doesn’t start immediately, wait a few more minutes, then try again. If still unsuccessful, check connections and consider whether the battery or starter may be at fault. - Step 7: Removing the Jumper Cables in Reverse Order
Once the dead car starts successfully, remove the cables in precise reverse order:- Remove the black clamp from the grounded metal surface on the dead car.
- Remove the black clamp from the good battery’s negative terminal.
- Remove the red clamp from the good battery’s positive terminal.
- Remove the red clamp from the dead battery’s positive terminal.
Keep cables clear of engine parts and moving components.
- Step 8: Let the Revived Car Run
Allow the newly started car to run for at least 15–30 minutes, so its alternator can charge the battery and reduce chance of recurrence.
Safety Tips When Using Jumper Cables
- Read your vehicle’s owner’s manual before jump-starting—some vehicles (especially hybrids, EVs) may have special instructions or prohibit jump-starts.
- Never allow jumper cable clamps to touch each other during use.
- Do not smoke or use an open flame near either battery; car batteries emit explosive gases.
- Always connect the black (negative) clamp to unpainted metal on the dead car, not the battery terminal.
- Wear gloves and eye protection; batteries can leak corrosive acid and generate sparks.
- If cables or terminals are dirty or corroded, clean with a rag (or wire brush) before attaching clamps.
- Check both batteries for leaks, cracks, or damage—do not attempt a jump-start if they appear compromised.
- If the dead car does not start after multiple attempts, seek professional help to avoid damaging the electrical system.
Choosing the Right Jumper Cables
Not all jumper cables are created equal. To ensure reliability and safety, consider the following features:
| Feature | Recommendation |
|---|---|
| Length | 10 feet for front-to-front; 20 feet preferred for flexibility. |
| Gauge | Lower gauge (thicker cables, e.g. 4 or 6) handles higher current, suitable for larger vehicles. |
| Clamp Quality | Alligator-style clamps with strong spring and rubber insulation for firm grip and safety. |
| Storage | Keep in a dedicated case or bag to prevent tangling and damage. |
Common Mistakes and How to Avoid Them
- Connecting negative clamp to dead battery: Always use an unpainted metal surface for the ground clamp.
- Incorrect cable order: Attaching or removing clamps out of sequence can cause sparks or damage.
- Poor contact: Make sure clamps are securely fastened to clean, corrosion-free surfaces for proper current flow.
- Leaving accessories on: Extra drains can hinder battery recharge and risk damaging sensitive electronics.
- Using cables not rated for your vehicle: Check gauge before purchase—smaller cars require lighter cables; trucks/SUVs need heavier ones.
- Jump-starting damaged batteries: Inspect for cracks or bulges; never jump-start a leaking battery.
What to Do After a Successful Jump-Start
- Keep the engine running for at least 15–30 minutes—preferably by driving, not idling, so the alternator fully recharges the battery.
- Check the battery and charging system as soon as possible. Recurring battery failure may require replacement or a visit to a mechanic.
- Review other electrical components (alternator, starter, cables) to preempt further issues.
- If your car stalls again soon after the jump, do not attempt multiple jump-starts in a row; this can damage both batteries and electrical systems.
When to Call for Professional Help
- If your battery continues to die after repeated jump-starts, it likely needs replacement.
- If there’s any sign of battery fluid leakage, swelling, or physical damage, do not attempt to jump-start—call a professional.
- If you’re unsure about proper procedure, roadside assistance can safely and quickly resolve a dead battery.
Jumper Cable Maintenance
- Store cables in a clean, dry environment—preferably in a pouch to prevent tangling.
- Periodically inspect cables and clamps for corrosion, damage, or exposed wires.
- Replace jumper cables if insulation is cracked or clamps are loose.
Frequently Asked Questions (FAQs)
Q: How long should I leave my car running after a jump-start?
A: Let your car run for at least 15–30 minutes to allow its alternator to fully recharge the battery.
Q: Is it safe to jump-start all vehicles with jumper cables?
A: Most gasoline vehicles can be safely jumped; however, certain hybrids, electric vehicles, and luxury cars may require special procedures. Always check the owner’s manual first.
Q: What is the correct order to attach and remove jumper cable clamps?
A: Attach: Red to dead positive, red to good positive, black to good negative, black to unpainted metal on dead car. Remove in reverse order.
Q: My battery terminals are corroded—what should I do?
A: Clean terminals with a wire brush and baking soda solution before attaching clamps, ensuring good conductivity. Always wear gloves and eye protection.
Q: Can I jump-start a car alone?
A: You need another running vehicle’s battery to jump-start a dead car, so assistance is required.
Q: How do I know if my cables are safe and effective?
A: Verify cables have thick, insulated wires, strong alligator-style clamps, and are rated for your vehicle’s engine size/gauge.
Key Takeaways and Expert Tips
- Jump-starting a car is straightforward when you follow the correct sequence and use the proper safety precautions.
- Invest in a quality set of jumper cables and keep them in your trunk or glove box.
- Know your own vehicle’s battery and charging specifications, as some models may have unique requirements.
- If in doubt, always consult your vehicle’s owner’s manual or call for professional roadside assistance.
Summary Table: Jumper Cable Essentials
| Do | Don’t |
|---|---|
| Connect red clamp to dead battery positive terminal first. | Attach negative cable to dead battery terminal. |
| Ground black clamp on dead car’s unpainted metal. | Let clamps touch each other during use. |
| Let revived car run for 15–30 minutes after jump-start. | Attempt repeated jump-starts on severely damaged battery. |
| Wear gloves/eye protection; keep away from open flames. | Jump a battery that’s leaking, swollen, or physically damaged. |
Final Tips: Staying Prepared for Battery Emergencies
- Regularly inspect your battery for signs of age or corrosion.
- Keep jumper cables or a portable jump starter in your vehicle at all times.
- Familiarize yourself with jump-start procedure even if you have roadside assistance.
- Help others safely—always lead by example with cautious, correct technique.
With the right equipment and careful step-by-step technique, jump-starting a battery is an essential skill for every driver. Stay safe, stay prepared, and be ready to help yourself or a fellow motorist when the need arises.
References
- https://www.madmanmotors.com.au/blog/how-to-jump-start-a-car/
- https://www.youtube.com/watch?v=Ec5P9pISGPk
- https://tt-blogs.dealerfire.com/autosimple/proper-way-jump-start-vehicle/
- https://www.carparts.com/blog/jumper-cables-faqs-on-gauge-length-and-clamps/
- https://www.goodhousekeeping.com/life/travel/a22833/how-to-use-jumper-cables/
- https://www.consumerreports.org/cars/jump-starters/buying-guide/
- https://www.kbb.com/car-advice/how-to-jump-start-battery/