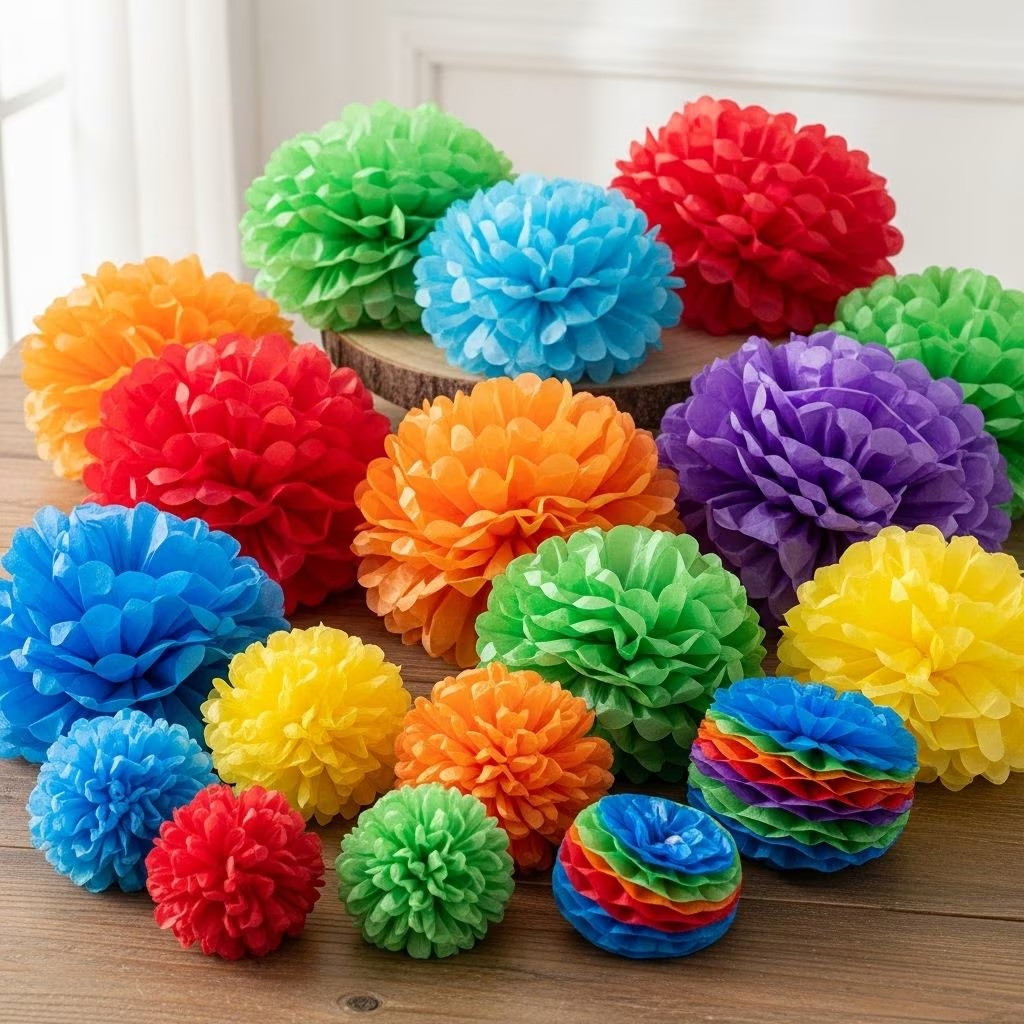
DIY Tissue Paper Pom-Poms: Festive, Affordable, and Fun
Tissue paper pom-poms are a bright, whimsical decoration perfect for any celebration. Their vibrant fluff adds instant charm to parties, holidays, weddings, showers, and everyday spaces, all on a budget. This guide will walk you through the entire process: from choosing supplies and basic technique to creative variations, decorating ideas, troubleshooting, and frequently asked questions.
Why Make Tissue Paper Pom-Poms?
- Inexpensive: Supplies are minimal and widely available.
- Simple: Suitable for crafters of all ages and skill levels.
- Customizable: Endless ways to tailor size, color, and style.
- Versatile: Perfect for parties, holidays, classroom decorations, and even home décor.
Supplies You’ll Need
| Item | Purpose |
|---|---|
| Tissue paper sheets (8–10 per pom-pom) | Creates the fluffy layers |
| Floral wire, string, or curling ribbon | Secures the center and creates a hanger |
| Scissors | Cuts paper ends for shape and trims ribbon |
| (Optional) Masking tape | For attaching pom-poms to ceilings/walls |
Tip: Rectangle-shaped tissue paper yields rounder, fuller pom-poms, but square works too. Choose colors to match your theme!
Step-by-Step Instructions
1. Prep Tissue Paper
- Stack 8–10 tissue paper sheets neatly. More sheets = fluffier.
- Smooth out wrinkles; align corners.
- If you want smaller pom-poms, cut sheets in half and stack.
2. Accordion Fold
- Begin at the narrow end. Make a 1–1.5 inch fold, creasing sharply.
- Flip the stack and fold back in the opposite direction, zig-zagging until all paper is folded.
- Try to keep folds even for a neat finish.
3. Secure the Center
- Find and pinch the center of your folded stack.
- Wrap floral wire, string, or ribbon tightly around the middle. Twist to secure.
- If using ribbon or string, leave a long enough tail for hanging.
If you’re short on wire, a staple will work in a pinch.
4. Shape the Ends
- Cut each end of the folded stack:
- Rounded for soft, petal-like pom-poms
- Tapered/spiked for a dahlia-like look
- Keep ends straight for a classic geometric style
- Precision isn’t critical. Small differences add character!
5. Fan Out the Folds
- Gently spread each side, opening the folded paper into a fan shape.
6. Fluff and Shape
- Carefully separate each layer of tissue paper, pulling toward the center.
- For a full pom-pom, pull half the sheets up and half down.
- Be gentle—tissue is delicate, but small tears are usually invisible once fluffed.
- Rotate and fluff to create a rounded pom-pom.
7. Hang and Decorate
- Tie a string or ribbon to the wire center.
- For ceiling display, attach to the ceiling or wall using masking tape for a temporary grip.
- Group pom-poms in clusters of multiple sizes and colors for dramatic effect.
Tips, Tricks & Creative Variations
- Layer multiple colors for a striped or ombre effect.
- Vary the number of sheets: more sheets mean a fluffier pom-pom; fewer create a lighter, airier look.
- Use metallic or patterned tissue for extra flair.
- Make mini pom-poms for cupcake toppers or garlands by cutting smaller rectangles.
- Try different shapes when cutting ends: experiment with points, waves, or scallops.
- For outdoor use, hang pom-poms from tree branches with fishing line.
Decorating Ideas with Tissue Paper Pom-Poms
Pom-poms’ cheerful volume makes them ideal for countless decorating scenarios. Try these festive arrangements:
- Party Backdrops: Hang a grouping against a blank wall for instant wow-factor.
- Table Centerpieces: Place atop vases, jars, or bowls for dimensional table decor.
- Garlands: String together mini pom-poms for playful banner decorations.
- Ceiling Clouds: Suspend clusters from varying heights for a floating effect.
- Gift Toppers: Swap out traditional bows for a pom-pom on wrapped presents.
- Classroom Decor: Energize windows, bulletin boards, or reading corners.
Troubleshooting Common Issues
| Issue | Suggested Solution |
|---|---|
| Paper tears during fluffing | Go slow; use two fingers to gently support the center and pull lightly. Minor tears blend in. |
| Pom-pom not fluffy enough | Add more tissue sheets; separate layers thoroughly; re-fluff as needed. |
| Difficulty folding | Press each crease with a ruler or fingernail for sharp edges. |
| Pom-poms won’t hang straight | Find the true center when tying wire/ribbon; adjust string length as needed. |
| Ends look uneven or messy | Trim with scissors after fluffing. Embrace slight irregularity—pom-poms aren’t meant to be perfect! |
Customization by Occasion
- Valentine’s Day: Use red, pink, and white tissue for romantic table decor or displays.
- Birthday Parties: Mix bright, bold colors; consider themed arrangements.
- Weddings & Showers: Pastel or metallic tissue for elegant flair; arrange in clusters above dessert tables or dance floors.
- Seasonal/Holiday Themes: Choose hues that match the celebration, such as oranges and blacks for Halloween, greens and reds for Christmas, or blues and silvers for Hanukkah.
- Personalized Touch: Add initials or small paper cutouts to the center for custom messages.
Frequently Asked Questions (FAQs)
Q: How many sheets of tissue paper do I need per pom-pom?
A: Typically, 8–10 sheets per pom-pom give a nice fluffy result. More sheets create larger, denser pom-poms; fewer will make smaller, lighter ones.
Q: What size tissue paper works best?
A: Standard sizes (about 10 x 20 inches) are ideal for medium pom-poms. Cut sheets for smaller decorations, or join sheets for oversized displays.
Q: Can I use materials besides tissue paper?
A: Tissue paper is easiest, but lightweight crepe paper or thin wrapping paper will work. Heavier paper won’t fluff as well.
Q: How do I hang my pom-poms?
A: Use the ribbon, string, or wire tied to the center. Attach to walls or ceilings with masking tape, thumbtacks, or tie onto fixtures.
Q: Is this craft safe for kids?
A: Absolutely—just supervise with scissors and wire. Kids love fluffing and hanging their creations!
Q: Can pom-poms be reused?
A: Yes! Carefully store pom-poms in boxes or bags. Refluff as needed before reuse.
Q: What’s the best way to display pom-poms?
A: Suspend from ceilings, group in clusters, create garlands, or use singly as festive accents on tabletops, presents, or walls.
Final Tips and Inspiration
Getting creative with tissue paper pom-poms opens up endless possibilities for memorable decorations. Even small tweaks—like combining colors, switching end shapes, or arranging pom-poms at varying heights—can transform a plain room or event space. Their cheerful charm suits not only holidays and parties, but also brings brightness to classrooms, bedrooms, and workspaces year-round. Whether it’s a big celebration or a simple touch of color, tissue paper pom-poms are a quick, customizable, and budget-friendly solution.
- Try blending color families or seasonal themes for coordinated displays.
- Experiment with oversized pom-poms for dramatic effect.
- Layer pom-poms and combine with paper fans, lanterns, or streamers.
Ready to Create?
Gather your supplies, invite friends and family, and let your imagination lead! Tissue paper pom-poms turn simple materials into unforgettable décor and creative moments.