Introduction
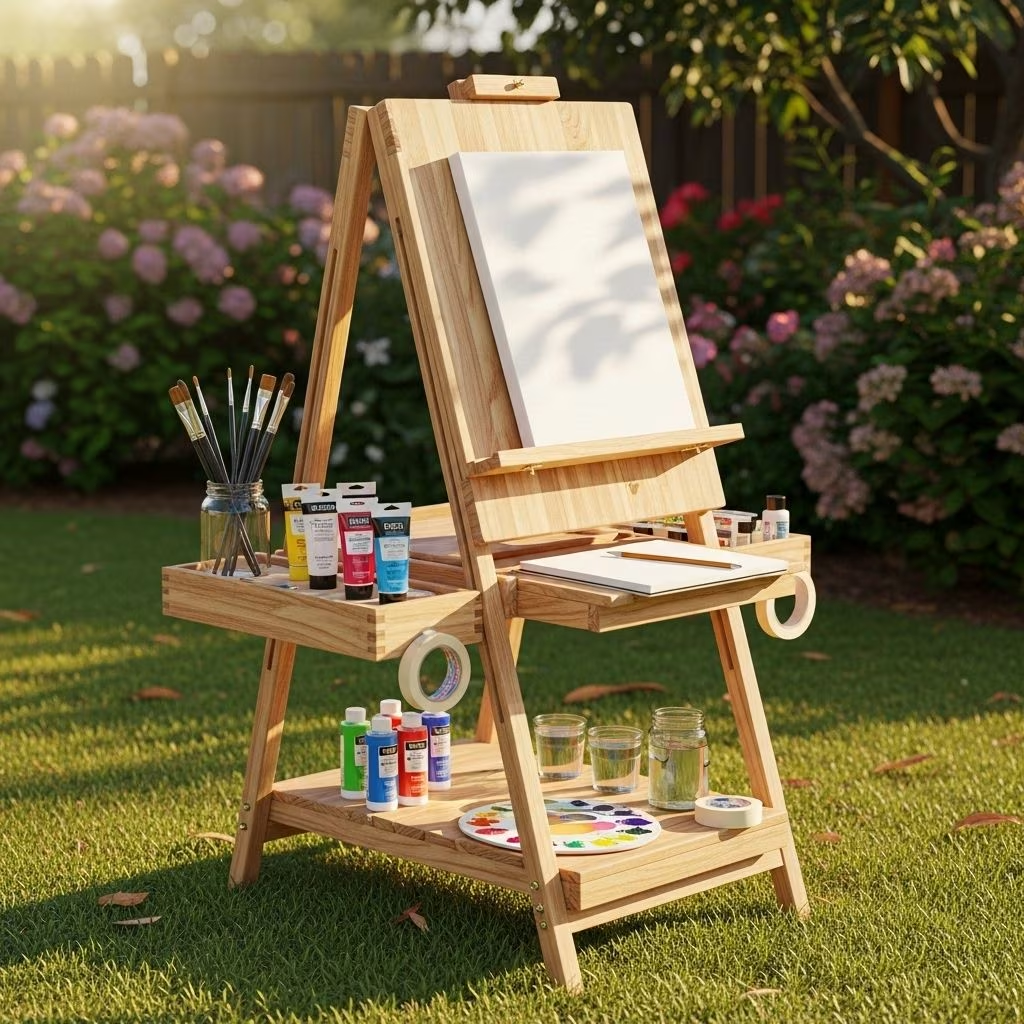
Art encourages creativity, self-expression, and problem-solving skills—qualities that flourish even more in the vibrant setting of the outdoors. A DIY outdoor art easel & supply station offers an affordable, versatile, and inspiring solution for artists of all ages to enjoy creative activities outside, making use of sunlight, natural scenery, and fresh air.
With the right planning and tools, you can construct a durable easel and organized supply station that transform any backyard, patio, or garden into a personal open-air studio. This guide walks you through the entire process, from design basics to practical considerations, drawing from leading DIY resources and expert advice.
Why Choose a DIY Outdoor Art Easel?
- Cost-effective: Creating your own easel is typically much cheaper than buying a commercial version, and you can tailor it to your space and needs.
- Customizable: Select dimensions, finishes, and special features like magnetic boards, chalkboard paint, or adjustable shelves.
- Fun family project: Involving children or friends in building and decorating the easel fosters teamwork and pride in the final result.
- Outdoor inspiration: Natural settings can inspire imaginative art, whether it’s painting landscapes or creating nature collages.
- Dual-use: The easel and station can double as a classroom, science experiment hub, or craft table.
Planning Your Setup
Before cutting wood or buying supplies, consider these key factors:
- Location: Choose a flat, sunny spot that’s easy to clean and safe from wind. Consider shade if working with watercolors or delicate papers.
- Users: Will it be sized for children, teens, adults, or accessible to all? Plan height, work surface size, and seating accordingly.
- Capacity: Decide if your easel will be single or double-sided to accommodate more artists.
- Weather resistance: Use materials that hold up to rain, sun, and outdoor wear. Consider easy storage or foldable designs.
- Safety: Rounded edges, stable supports, and waterproofing minimize hazards.
Sketch out your ideas, measure the proposed space, and check local hardware or scrap material availability for further savings.
Materials and Tools
The following materials and tools are recommended for a durable, easy-to-assemble outdoor art easel and station:
| Material | Purpose | Suggested Quantity |
|---|---|---|
| Pine boards or hardwood (e.g., 1×3 or 2×4) | Frame, feet, shelves | Approx. 15-20 ft |
| Plexiglass or acrylic sheet | Drawing/painting surface | 30 x 36 inches |
| Quarter round/moulding | Edge support inside frame | 11 ft |
| Wood screws | Fastening frame & feet | Assorted sizes |
| Sheet metal screws | Attaching acrylic/plexiglass | 3/8 inch |
| Finishing nails | Securing moulding | Nail pack |
| Paint, stain or waterproof sealant | Finishing & weather protection | As needed |
| Accessories: magnets, hinges, hooks, buckets | Supply station customization | Varied |
Common tools:
- Tape measure
- Electric drill & bits
- Screwdriver
- Miter saw or handsaw
- Nail gun or hammer
- Sandpaper
Step-by-Step Easel Construction
1. Build the Main Frame
Cut four wood boards to create a sturdy rectangular frame. Recommended dimensions: 37.75” x 30.25”. Use construction screws to fasten corners securely.
2. Add Edge Support (Moulding)
Cut quarter round or moulding to fit inside the frame perimeter (resting approximately 1/4 inch from the outer edge). Nail or glue in place; this supports the plexiglass or acrylic sheet.
3. Mount Plexiglass or Acrylic Sheet
Pre-drill four or six small holes in the plexiglass. Attach it to the back of the moulding with sheet metal screws, tightening gently to avoid cracks.
4. Build and Attach Feet
Cut two or four boards, each 18 inches long, to serve as feet or legs. Attach securely to the bottom corners with screws, ensuring a stable, upright position. For added portability, attach feet with a single screw to allow them to twist for easy storage.
5. Bonus: Hinges or Foldable Design
Add torque hinges, magnets, or quick-release mounts for foldability, portability, or field-trip use. Double-sided easels or collapsible designs allow storage in small spaces.
6. Final Touches
- Sand edges smooth for safety
- Paint or stain frame for weather resistance
- Attach hooks, clips, or ledges for paper and supplies
Alternative: Nature-Inspired Easel
Use three sturdy tree branches or bamboo poles bound with rope or twine as a simple, eco-friendly easel. Knot smaller sticks horizontally to serve as ledges for paper, boards, or display surfaces.
Creating the Supply Station
Organization is key for a seamless creative experience. Build or arrange a supply station adjacent to your easel using ramps, shelves, hangers, or portable bins.
- Supply trays/shelves: Attach wooden or plastic trays to the easel frame or to a freestanding cart. Ensure easy wipe-down and waterproofing.
- Buckets/hooks: Hang metal or plastic buckets for brushes, water cups, and sponges. Label for easy sorting.
- Magnetic strips/chalkboard: Add extras like a magnetic strip for tools or chalkboard paint for versatile creativity.
- Portable carts: Rolling supply carts allow moving materials inside for cleaning or storage.
- Garden tool hangers: Upcycle garden racks or hooks for hanging aprons, paint palettes, or even nature items for collages.
Recommended Art Supplies
- Tempera and acrylic paints (washable for kids)
- Brushes (variety of sizes)
- Paper rolls, cardboard, or canvases
- Sponges, stamps, and rollers
- Nature items: leaves, twigs, flowers for collages
- Markers, crayons, and sidewalk chalk
- Aprons, rags, and water tubs
Modify the supply station according to weather, age group, and art style—easy to replenish and swap out as interests evolve.
Setup Ideas and Inspirations
- Double-sided easel: Build back-to-back easel faces for collaborative painting.
- Adjustable height: Use screw-in legs or blocks for different artist heights.
- Plexiglass drawing: Kids can paint directly on clear surfaces for quick cleaning and reuse.
- Nature collage: Press leaves, petals, or sticks onto contact paper for interactive, eco-friendly art.
- Mini station for toddlers: Lower work surfaces and lockable supply bins for small children.
- Incorporate seating: Add benches or garden chairs nearby for longer sessions.
- Portable field easel: Use tripod-mounted boards for sketching or painting on hikes and picnics.
| Setup Style | Best For | Bonus Features |
|---|---|---|
| Classic Standing Easel | Families, small groups | Large plexiglass, double-sided |
| Nature Branch Easel | Eco-art, nature collage | Stick frame, simple supplies |
| Field Easel | Teens & adults | Tripod, portability |
| Integrated Supply Station | Daily sessions | Shelves, hooks, bins |
Maintenance and Durability
- Cleaning: Wipe down plexiglass/acrylic surfaces with water and a soft cloth after each use. Avoid harsh chemicals that cloud the finish.
- Weatherproofing: Use outdoor-grade paint or sealant to protect wood. Store easel indoors or in a shed during heavy rain or winter.
- Repairs: Plexiglass sheets are easy to replace if cracked. Loose screws/feet can be tightened as needed.
- Mould prevention: Ensure supply buckets and stations drain properly; empty and dry out after use.
Safety Considerations
- Stability: Ensure legs/feet are wide enough for support. Avoid uneven surfaces that might cause tipping.
- Edge smoothness: Sand all edges thoroughly to prevent splinters.
- Non-toxic materials: Choose paints/sealants certified for child safety.
- Allergy awareness: If using nature items, verify child allergies before gathering supplies.
- Supervision: Adult supervision required during both construction and art activities with young children.
Frequently Asked Questions (FAQ)
Q: What is the best material for the easel surface?
A: Plexiglass or acrylic sheets offer a smooth, reusable, weather-resistant surface for multiple art techniques. They are easy to clean and relatively affordable.
Q: How can I make my easel easy to store?
A: Use foldable designs, detachable legs, or hinged frames. Twistable feet secured with a single screw make folding simple for compact storage.
Q: Is it possible to build without woodworking tools?
A: Many home stores will cut wood to specified lengths. For nature-branch easels, sturdy sticks, twine, and basic knots suffice without advanced tools.
Q: What art supplies work best outdoors?
A: Washable paints, markers, nature materials, and acrylics are recommended. Always use non-toxic and weather-proof options for children’s art stations.
Q: How can I make the supply station accessible for kids?
A: Lower shelves, labeled buckets, and clear acrylic bins ensure young artists can access and organize materials easily.
Conclusion
Building your own DIY outdoor art easel & supply station is a rewarding project that brings affordable creativity into your backyard, combining easy construction, flexible customization, and endless artistic potential. With thoughtful planning, durable materials, and practical organization, you’ll foster a lifelong love of art and outdoor exploration—right at home.
Whether for family fun, classroom extensions, or aspiring artists, the outdoor easel setup transforms any outdoor space into a place where imagination thrives, memories are made, and masterpieces are created. Explore the possibilities, plan your project, and let creativity bloom!
References
- https://busytoddler.com/outdoor-easel/
- https://alvalyn.com/how-to-make-a-field-easel-quickly-and-cheaply/
- https://www.triedandtrueblog.com/outdoor-easel-tutorial-plans/
- https://www.instructables.com/Kids-Outdoor-Acrylic-Easel/
- https://www.howweelearn.com/how-to-build-an-easel/
- https://www.youtube.com/watch?v=3iM1STryabU
- https://www.fantasticfunandlearning.com/outdoor-easel.html
- https://empressofdirt.net/garden-art-easels/