Introduction
Clean water is essential for life, but not all water sources are safe to drink. Teaching children about water purification is both a valuable survival skill and an engaging science lesson. A DIY simple solar still—a device that uses sunlight to purify water—is an excellent hands-on project for kids, blending fun, education, and practical knowledge.
This guide will walk you through building a solar still at home, explaining each step in detail, the science behind the process, safety considerations, and how this project connects to broader scientific and environmental concepts.
What is a Solar Still?
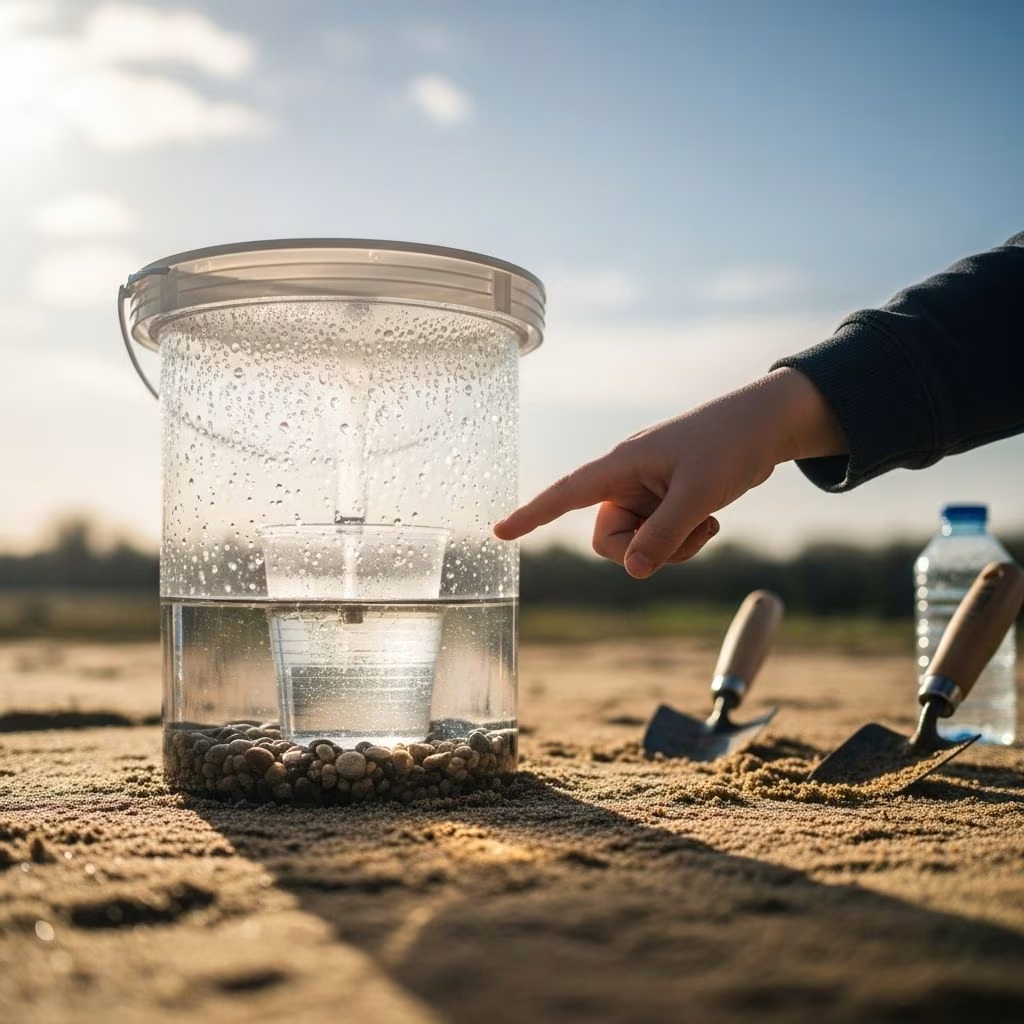
A solar still is a device that uses the sun’s energy to evaporate water, leaving behind contaminants, and then collects the condensed, purified water in a separate container. It’s an ancient method still used today for desalination and emergency water purification, especially in survival situations or regions with limited clean water resources.
The Science Behind Solar Stills
The solar still demonstrates several key scientific principles:
- Evaporation: Sunlight heats water, turning it into vapor and separating it from salts, dirt, and other impurities.
- Condensation: The vapor rises, cools, and condenses on a surface (usually plastic or glass), forming droplets of pure water.
- Collection: The droplets trickle down into a clean container, leaving contaminants behind.
This process mimics the Earth’s natural water cycle, making it an excellent teaching tool for kids.
Materials Needed
Gathering materials is easy—most can be found at home:
| Indoor Version | Outdoor (Survival) Version |
|---|---|
| Large glass or ceramic bowl | Shovel or digging tool (or your hands) |
| Small glass or jar | Clear plastic sheet or large plastic bag |
| Salt | Small container to catch water |
| Water (can be salty or dirty for demonstration) | Optional: Green vegetation (grass or leaves) |
| Clear plastic wrap | Rocks or soil to secure plastic |
| Small rock or marble | Small rock |
| Sunny spot | Sunny spot |
Step-by-Step Instructions
Indoor Mini Solar Still (Kitchen Science)
- Prepare Salty Water: Fill the large bowl about halfway with water and add a few tablespoons of salt. Stir until dissolved. This simulates seawater or contaminated water.
- Place Collection Jar: Place the small glass or jar in the center of the bowl. Make sure no salty water spills into it.
- Cover with Plastic Wrap: Stretch clear plastic wrap tightly over the top of the bowl. Seal the edges to make it airtight.
- Add Weight: Place a small rock or marble in the center of the plastic wrap, directly above the collection jar. This creates a dip so water droplets will drip into the jar.
- Place in Sunlight: Put your solar still in direct sunlight. Wait several hours or even overnight.
- Collect and Taste: Carefully lift the plastic wrap and collect the water from the jar. Taste it—it should be fresh and not salty, showing that the salt and contaminants were left behind.
Outdoor (Survival) Solar Still
- Dig a Shallow Pit: Choose a sunny spot and dig a shallow pit about 1–2 feet deep and wide.
- Place Collection Vessel: Put a small cup or container in the center of the pit.
- Add Moist Materials (Optional): If you don’t have access to open water, place damp soil, wet leaves, or green vegetation around the container. This adds moisture to evaporate.
- Cover with Plastic Sheet: Stretch a clear plastic sheet over the hole, making sure it’s tightly sealed around the edges—use rocks or soil to hold it in place.
- Add Weight: Place a small rock in the center of the plastic sheet, right above the container. This creates a low point for water droplets to collect.
- Wait: As the sun heats the ground, water evaporates, condenses on the underside of the plastic, and drips into the container. It may take several hours to overnight to collect enough water.
- Collect and Drink (If Safe): Carefully remove the container and drink the purified water, or use it for demonstrations and discussions.
Variations and Advanced Projects
Once kids master the basic solar still, you can experiment with variations:
- Solar Still vs. Water Filter: Compare a solar still to a simple water filter (using sand, gravel, and charcoal). Discuss differences in purification methods and outcomes.
- Increase Efficiency: Paint the inside of your outdoor collection container black to absorb more heat and speed up evaporation.
- Larger Scale Stills: Build a larger solar distiller using glass pans, a wooden box, and a runoff tube for continuous distillation.
- Saltwater Challenge: Use different salt concentrations and measure how much water is purified over time.
- Nighttime Collection: Test whether the still works as well over night or only during the day.
Safety Tips
- Adult Supervision: Always supervise children, especially when using cutting tools, boiling water, or handling hot objects.
- Drinking Water: Only drink water from indoor stills that use clean containers and are used for educational purposes. Outdoor stills can collect trace contaminants—explain this to kids.
- Clean Materials: Use food-grade materials for any water intended for consumption.
- Sun Safety: Teach kids about staying hydrated and protecting against sunburn during outdoor projects.
Educational Benefits
This project provides a rich learning experience:
- Critical Thinking: Students observe, predict, experiment, and analyze results.
- Environmental Awareness: Kids learn about water scarcity and sustainable solutions.
- Hands-On Science: The still makes abstract concepts (evaporation, condensation) tangible.
- Survival Skills: Children gain practical knowledge about water purification in emergencies.
- STEM Integration: The project touches on science, technology, engineering, and math.
Science Concepts Explored
- Evaporation: Conversion of water from a liquid to a gas (vapor) due to heat.
- Condensation: Change of water vapor back into liquid form as it cools.
- Distillation: Separation of water from dissolved substances like salt.
- Solar Energy: Use of sunlight as a renewable energy source.
- Water Cycle: Miniature demonstration of how water moves through the environment.
Real-World Applications
Solar stills are more than classroom curiosities:
- Emergency Preparedness: Used in survival situations when access to clean water is limited.
- Desalination: Large-scale solar stills can convert seawater into drinking water in arid regions.
- Environmental Science: Demonstrates sustainable, low-energy water purification methods.
- Space Exploration: Similar principles are used to recycle water on spacecraft and future Mars missions.
Frequently Asked Questions (FAQs)
What is the best time of day for a solar still to work?
S
References
- https://www.usgs.gov/media/images/how-build-your-own-solar-still
- https://www.instructables.com/How-to-make-a-solar-still/
- https://teachbesideme.com/simple-science-making-solar-still/
- https://www.motherearthnews.com/diy/how-to-make-a-solar-still-ze0z1209zsch/
- https://www.survivorlibrary.com/library/how-to-make-a-plastic-covered-solar-still.pdf
- https://www.instructables.com/Build-a-simple-solar-still/
- https://faculty.lsu.edu/hayes/files/solar_distallation_corrected.pdf
- https://www.youtube.com/watch?v=_SvuI9T_kg4
- https://terraforums.com/forums/threads/diy-solar-still.134602/