


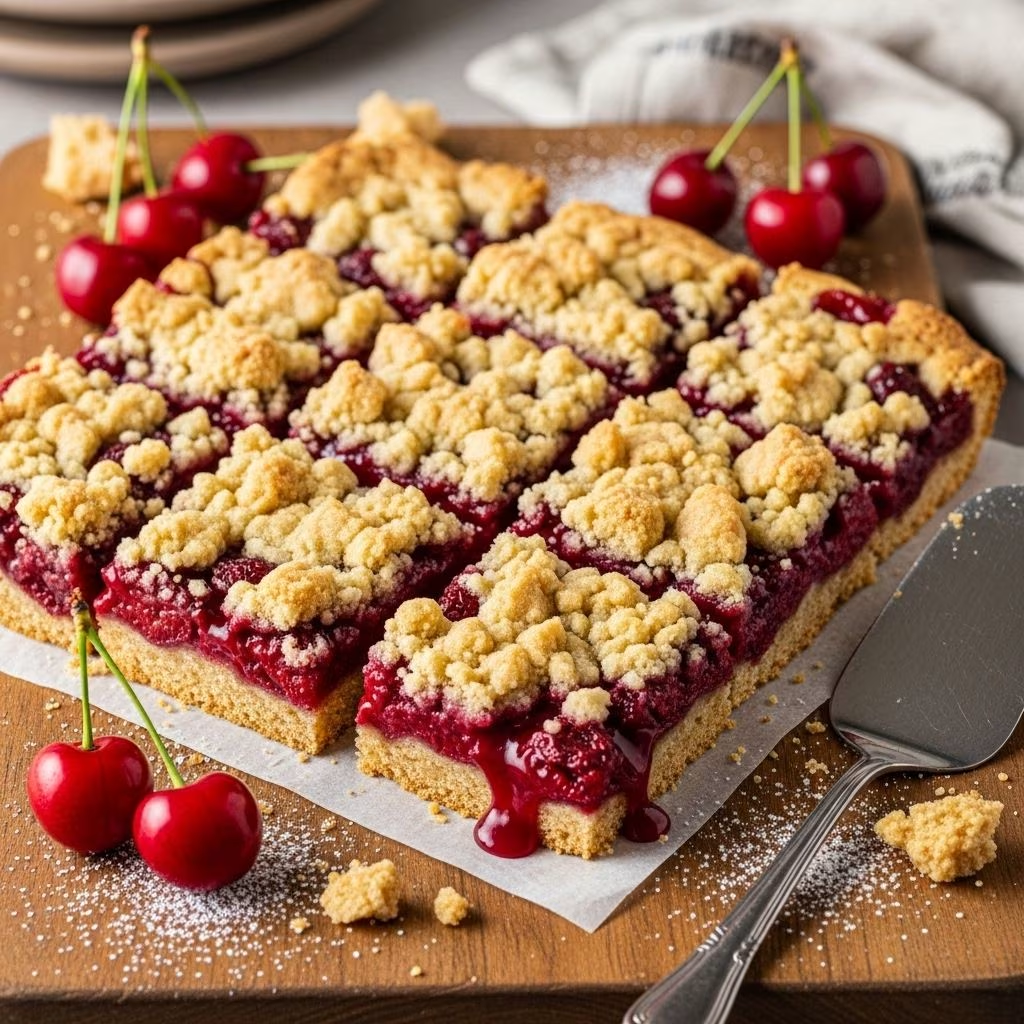
Chewy Cherry Cookie Bars: The Ultimate Crowd-Pleaser
There’s something universally delightful about the combination of tender cookie dough, tart-sweet cherry filling, and a drizzle of zesty glaze. Cherry cookie bars are a comforting, nostalgic treat—equally perfect for school bake sales, family gatherings, or simply enjoying with a cup of coffee on a slow afternoon. In this article, discover everything you need to know to make the best cherry cookie bars, from the essential ingredients and step-by-step directions to expert tips, serving suggestions, and answers to your most common questions.
Why You’ll Love Cherry Cookie Bars
- Simple & Straightforward: No complicated steps or fancy equipment—just classic baking goodness.
- Incredible Flavor: Bursting with juicy, real cherries balanced by a rich, buttery cookie base and punchy citrus glaze.
- Perfect for Any Occasion: Easily cut into bars for serving a crowd, packing in lunches, or storing for snacks.
- Adaptable: Swap in different fruits, try alternative glazes, or make ahead for convenience.
Ingredients
Gather these key ingredients to bake classic cherry cookie bars from scratch. The recipe is divided into three elements: the cherry filling, the cookie dough, and the citrus glaze.
For the Cherry Filling
- 4 cups fresh sweet cherries (such as Bing), pitted and halved (about 1 1/2 pounds)
- 1/3 cup granulated sugar
- 2 teaspoons cornstarch
- 1/8 teaspoon almond extract
For the Cookie Dough
- 2 1/2 cups all-purpose flour
- 1 1/2 teaspoons baking powder
- 1/4 teaspoon salt
- 2 sticks salted butter, softened
- 1 cup granulated sugar
- Grated zest of 1 orange
- 1 large egg plus 1 egg yolk
- 1/2 teaspoon vanilla extract
- 2 tablespoons whole milk
For the Citrus Glaze
- 1 cup powdered sugar
- Grated zest of 1 lemon
- 1 tablespoon whole milk (plus more as needed)
Step-by-Step Instructions
- Prepare the Cherry Filling
In a medium bowl, combine the cherries, granulated sugar, cornstarch, and almond extract. Stir well and let the mixture stand while you make the dough. This allows the cherries to macerate and the cornstarch to start thickening the juices.
- Make the Cookie Dough
- Preheat your oven to 350°F (175°C). Grease a 9×13-inch baking dish or line it with parchment paper for easy removal.
- In a medium bowl, sift together the flour, baking powder, and salt. Set aside.
- In the bowl of a stand mixer or large mixing bowl, cream the softened butter, granulated sugar, and orange zest on medium-high speed until combined and fluffy (approximately 2 minutes).
- Add the egg, egg yolk, and vanilla extract. Mix until fully incorporated, about 1 minute.
- With the mixer on low, alternate adding the dry ingredients in three batches with the milk, mixing until the dough comes together. The dough will be soft, not stiff.
- Assemble the Bars
- Press two-thirds of the prepared dough evenly into the bottom of your baking dish to form the cookie base.
- Evenly pour the cherry filling and its juices over the base, ensuring cherries are distributed across the surface.
- Crumble and scatter the remaining dough over the cherry layer; it won’t fully cover the fruit, which is ideal for a rustic appearance.
- Bake
- Bake in preheated oven for about 35 minutes, until the cherries are bubbling and the cookie pieces are golden brown.
- Transfer to a wire rack and allow the bars to cool completely in the pan, about 1 hour, before glazing and slicing. This step helps the bars hold together when cut.
- Make and Apply the Glaze
- In a small bowl, whisk together the powdered sugar, lemon zest, and 1 tablespoon of milk until smooth. Add extra milk, a few drops at a time, if the glaze is too thick.
- Drizzle the glaze over the cooled bars. Allow it to set briefly, then cut into squares or rectangles for serving.
Tips for the Best Cherry Cookie Bars
- Use Fresh Cherries When Possible: The natural sweetness and tartness of fresh cherries make these bars exceptional. You can substitute thawed, well-drained frozen cherries if fresh are out of season.
- Don’t Skip the Citrus Zest: The orange and lemon zest in the dough and glaze respectively add bright, fragrant notes that enhance the cherry flavor.
- Chill for Clean Slices: For the neatest bars, chill cooled bars in the refrigerator before glazing and cutting.
- Try a Flavor Twist: Swap out almond extract for vanilla in the filling, or use lime zest in the glaze for a different citrus accent.
Serving Suggestions
- Pair with Ice Cream: Serve warm bars with a scoop of vanilla or almond ice cream for an elevated dessert.
- Coffee Break Treat: These bars are perfect with coffee or tea for an afternoon snack.
- Gift or Potluck: Pack in pretty boxes or arrange on a platter for parties, picnics, or holiday exchanges.
Ingredient Swaps and Variations
- Fruit: Substitute sour cherries for a tart flavor, or try blueberries, raspberries, or a mix for a different twist.
- Dairy: Use plant-based butter and milk for a dairy-free version (texture may vary).
- Gluten-Free Option: Use a 1:1 gluten-free flour blend in place of all-purpose flour for gluten-free bars.
- Glaze Flavors: Customize the glaze with vanilla, almond, or additional citrus extracts.
How to Store Cherry Cookie Bars
- Room Temperature: Store tightly covered at room temperature for up to 2 days.
- Refrigerator: For longer storage, refrigerate for up to one week, but bring to room temperature before serving for best texture.
- Freezing: Bars can be frozen (unglazed) for up to 2 months. Wrap tightly and thaw in the refrigerator before glazing and serving.
Common Mistakes and Troubleshooting
- Bars are too runny or soggy: Ensure cherries are not overly juicy and be sure to use the right amount of cornstarch. Allow bars to cool completely before slicing.
- Dough is too dry or crumbly: Add an extra tablespoon of milk if needed during mixing. The dough should be soft but hold together.
- Glaze is too thin or thick: Adjust the milk in small increments. Add more powdered sugar for thicker glaze or a few drops of milk for a thinner pour.
Nutrition Information (Estimated Per Serving)
| Nutrient | Amount (approx.) |
|---|---|
| Calories | 230 |
| Fat | 9g |
| Saturated Fat | 5g |
| Carbohydrates | 34g |
| Sugar | 20g |
| Protein | 3g |
Note: Nutrition values will vary based on exact ingredients and bar size.
Frequently Asked Questions (FAQs)
Q: Can I use canned cherry pie filling instead of fresh cherries?
A: Yes, you can use canned cherry pie filling if fresh cherries are unavailable. Reduce the sugar in the filling and skip the cornstarch, as pie filling is already thickened and sweetened.
Q: How do I pit cherries quickly for this recipe?
A: Use a cherry pitter for speedy pitting, or carefully split cherries in half and remove the pits with the tip of a paring knife.
Q: Can I prepare cherry cookie bars ahead of time?
A: Absolutely. Bake the bars a day ahead; cool and glaze before serving. Glazed bars keep well in an airtight container for up to 3 days.
Q: What’s the best way to cut clean squares?
A: Chill the baked bars before slicing and use a sharp knife, wiping it clean between cuts for the neatest squares.
Q: Are cherry cookie bars freezer-friendly?
A: Yes. Freeze unglazed bars in a single layer, then stack with parchment between layers. Thaw in the fridge and add glaze before serving.
Related Recipes & Variations
- Blueberry Cookie Bars: Substitute fresh blueberries for cherries; use lemon zest in both dough and glaze for a tart finish.
- Mixed Berry Bars: Combine raspberries, cherries, and blueberries for a colorful twist.
- Cherry Almond Crunch: Top with toasted sliced almonds before baking for extra crunch.
- Lemon Cookie Bars: Eliminate cherries, increase lemon zest in the dough and glaze for a citrus-forward dessert.
More Baking Inspiration
Love these cherry cookie bars? Try classic lemon bars, raspberry crumb bars, or old-fashioned apple squares for your next baking adventure.


