


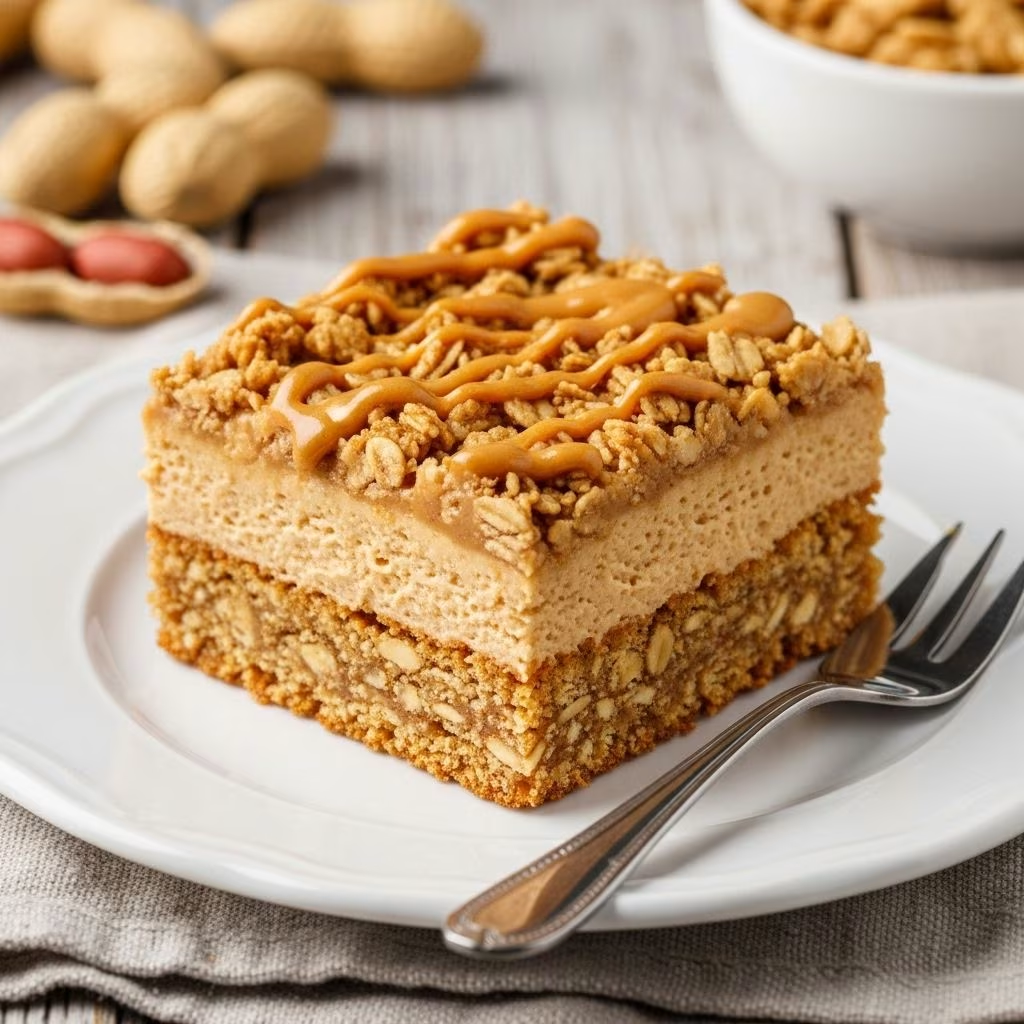
Snack cakes have always represented comfort and convenience—easy to whip up, slice, and enjoy without fuss. Of all the homey treats you might crave, few strike a balance like the Peanut Butter Granola Snack Cake: a moist, tender crumb laced with the nutty, salty sweetness of peanut butter, enriched with hearty granola for crunch, and topped with a whisper of sugar for that bakery-style finish. Perfect for school lunches, breakfast with coffee, or midnight kitchen raids, this snack cake ticks all the boxes for flavor, simplicity, and a hint of nostalgic joy.
Why Make a Peanut Butter Granola Snack Cake?
What distinguishes a snack cake from regular cakes is its sheer approachability. You don’t need a stand mixer or specialized pans; you don’t frost it or fill it. Instead, it offers the pure, simple pleasure of cake in a crowd-friendly, sturdy slice. When you add peanut butter—long revered for its creamy texture and satisfying richness—you create a foundation any flavor can build upon. Stir in a handful of crunchy granola, and you have a treat that’s as wholesome as it is decadent. Here are a few reasons this cake stands out:
- Easy Preparation: Combines pantry staples into a one-bowl batter for minimal cleanup.
- Versatile Serving: Enjoy as breakfast, snack, or casual dessert—no special topping necessary.
- Textural Duo: Soft, moist crumb balanced with the crunch of granola in every bite.
- Flavor Nostalgia: Peanut butter evokes memories of classic lunchboxes and after-school snacks.
- Customizable: Adapt with different granolas, nut butters, add-ins, or toppings.
The Heart of This Snack Cake
This cake leans on the combination of creamy peanut butter and hearty granola to yield a moist, dense, and deeply flavorful crumb. Brown sugar enhances the caramel-y, toasty flavor while tangy sour cream ensures tender texture that lasts days, even at room temperature. A flick of cinnamon perfumes the batter, and a vinegary addition of buttermilk offers subtle brightness.
Choosing Your Peanut Butter
You can use either creamy or chunky peanut butter; both produce a luscious result. Avoid natural peanut butters—those requiring stirring—as they tend to separate and lead to oily pockets or a greasy, flat cake. Look for standard, emulsified brands like Jif or Skippy for reliable texture and rise. If chunky is your preference, the bits of nut add even more crunch—even better when paired with a granola containing nuts or seeds.
The Role of Granola
Granola doesn’t just add crunch—it brings oats, toasted coconut, nuts, dried fruit, and even spices into the cake, adding hidden layers of flavor and texture. Choose a crispy, toasty granola you enjoy eating out of hand; avoid overly sugary clusters, which can make the cake too sweet. Feel free to mix your own for a custom touch. If your granola contains lots of large chunks, give it a brief crush or chop so it incorporates more evenly.
Ingredients: Building Blocks of Flavor
| Ingredient | Details |
|---|---|
| Peanut Butter | Standard creamy or chunky, not natural/stir-type |
| Brown Sugar | Light or dark; imparts depth and moisture |
| Eggs | Bind and give structure |
| Sour Cream | Keeps cake tender and moist |
| Buttermilk | Provides tang, helps the crumb set |
| All-Purpose Flour | Structure for the batter |
| Baking Powder & Soda | Ensure rise and balanced crumb |
| Granola | For crunch, flavor, and visual appeal |
| Cinnamon, Vanilla, Salt | Spice and roundness of flavor |
| Turbinado or Demerara Sugar | Sprinkled on top for golden crackle (optional but lovely) |
Step-by-Step: Making the Best Peanut Butter Granola Snack Cake
1. Prepare Your Pan
Preheat your oven to 350°F (175°C). Grease a square 8×8 or 9×9-inch baking pan with butter or nonstick spray and line with a parchment sling for easy removal later. This step is key to a clean slice!
2. Mix the Wet Ingredients
- In a large bowl, cream your peanut butter and brown sugar until smooth with a spatula or electric mixer.
- Beat in eggs one at a time, mixing until thick, glossy, and lighter in color.
- Whisk in sour cream, buttermilk, and vanilla until fully blended.
3. Add the Dry Ingredients
- Sift or whisk together flour, baking powder, baking soda, salt, and cinnamon in a separate bowl.
- Gently stir the dry mix into the wet ingredients. Don’t over-mix—stop when you still see a few dry streaks.
4. Fold In Granola
- Reserve a small handful of granola for topping.
- Fold the remainder into the batter, ensuring an even, but gentle incorporation.
- Pour batter into the prepared pan, smoothing the top.
- Scatter reserved granola and a sprinkling of coarse sugar across the surface for crunch and sparkle.
5. Bake
Bake for about 35–40 minutes, or until a tester inserted in the center comes out clean with just a few moist crumbs. Avoid overbaking for maximum moistness. The cake’s edges should brown slightly, and the top will have a golden, craggy crust.
6. Cool and Slice
- Let the cake cool in the pan for at least 20 minutes.
- Transfer to a wire rack to finish cooling completely before slicing, using the parchment to lift it out.
Serving Suggestions and Variations
The joy of snack cake resides in its adaptability. Enjoy a square as-is, perhaps with a cup of coffee or a tall glass of milk. Looking to take it further? Here are simple serving variations:
- Breakfast Boost: Top with Greek yogurt and a spoonful of honey.
- Afternoon Indulgence: Pair with fresh berries or slather with a thin swipe of extra peanut butter.
- Dessert Transformation: Serve warm with a scoop of vanilla ice cream or a drizzle of warm chocolate sauce.
- Add-Ins: Stir in chocolate chips, chopped dried fruit, or shredded coconut for extra flair.
- Other Nut Butters: Almond or cashew butters yield a similar crumb, while sunflower seed butter keeps it nut-free.
Storage and Make-Ahead Tips
This snack cake keeps beautifully at room temperature for up to three days when tightly wrapped or kept in an airtight container. For longer storage, wrap tightly in foil and freeze slices for up to two months. Thaw at room temperature or briefly warm in a low oven or microwave for that just-baked taste.
Recipe At-A-Glance
- Skill Level: Beginner-friendly
- Prep Time: 15 minutes
- Cook Time: 35–40 minutes
- Yield: 9 to 12 generous pieces
Expert Tips for Best Results
- Weigh Ingredients: For greatest accuracy, use a kitchen scale, especially for flour and peanut butter.
- Avoid Over-Mixing: Gentle folding keeps the crumb tender and light; too much mixing = dense cake.
- Watch Oven Time: Ovens can run hot or cold, so start checking a few minutes early. Cake is done when a tester shows moist crumbs, not wet batter.
- Crispy Granola: Add granola to the batter just before baking to keep texture crunchy and fresh.
Common Questions (FAQs)
Q: Can I use natural peanut butter for this cake?
A: Natural peanut butter’s separated oil can cause the cake to turn out greasy or flat. Standard emulsified peanut butter works best for consistent results.
Q: What kind of granola should I choose?
A: Use a granola that’s not overly sweet or heavily clustered. Crisp, toasted styles with nuts or seeds add the best contrast and flavor.
Q: How should I store leftover snack cake?
A: Store airtight at room temperature up to three days, or freeze for up to two months. Allow frozen cake to come to room temperature before serving.
Q: Can I double the recipe for a larger crowd?
A: Yes. Double the ingredients and bake in a 9×13-inch pan, adding a few extra minutes to baking time. Check often for doneness.
Q: Are there other flavors I can try?
A: Swap in almond butter, cashew butter, or try swirling in jam before baking for a layered, PB&J-inspired treat.
Final Thoughts: The Joy of Snack Cake
The peanut butter granola snack cake is more than just a humble treat—it’s a testament to the beauty of uncomplicated baking. Each slice channels nostalgia and comfort, whether eaten in a rush or savored slowly with loved ones. The combination of a plush crumb, nutty richness, and toasty granola crunch will have you returning to this recipe again and again. Whether you’re baking for your family, packing lunchboxes, or simply treating yourself, this cake is the perfect companion to any moment of the day.
Frequently Asked Questions (FAQs)
Q: Can I make this snack cake gluten-free?
A: Easily. Substitute an all-purpose gluten-free flour blend and ensure your granola is gluten-free. The cake will still be moist and flavorful, though the crumb may be slightly more tender.
Q: My cake turned out dry. What happened?
A: Overbaking is usually the culprit. Check your oven accuracy with a thermometer and pull the cake as soon as a tester comes back with moist crumbs. Measuring flour by weight rather than volume can also help.
Q: Can I add chocolate chips to the batter?
A: Absolutely! Fold in 1/2 to 2/3 cup chocolate chips with the granola for a peanut butter cup variation.
Summary
This peanut butter granola snack cake is a celebration of classic flavors with a modern twist. By blending pantry staples and crunchy granola, you get a cake that’s hearty, quick, and uniquely satisfying. Try it today for a delicious slice of comfort any time you crave it.


