Herb-infused oils have been cherished for centuries as foundational remedies and natural skincare ingredients. Utilizing the medicinal properties of plants, these oils are simple to make, deeply nourishing for the skin, and versatile enough for countless wellness applications. In this guide, we’ll explore what herb-infused oils are, why you might want to make your own, how to choose the right oils and herbs, and walk you through several tried-and-true infusion methods. We’ll also cover important safety tips, common mistakes to avoid, and creative ways to use your finished oils at home.
What is Herb-Infused Oil?
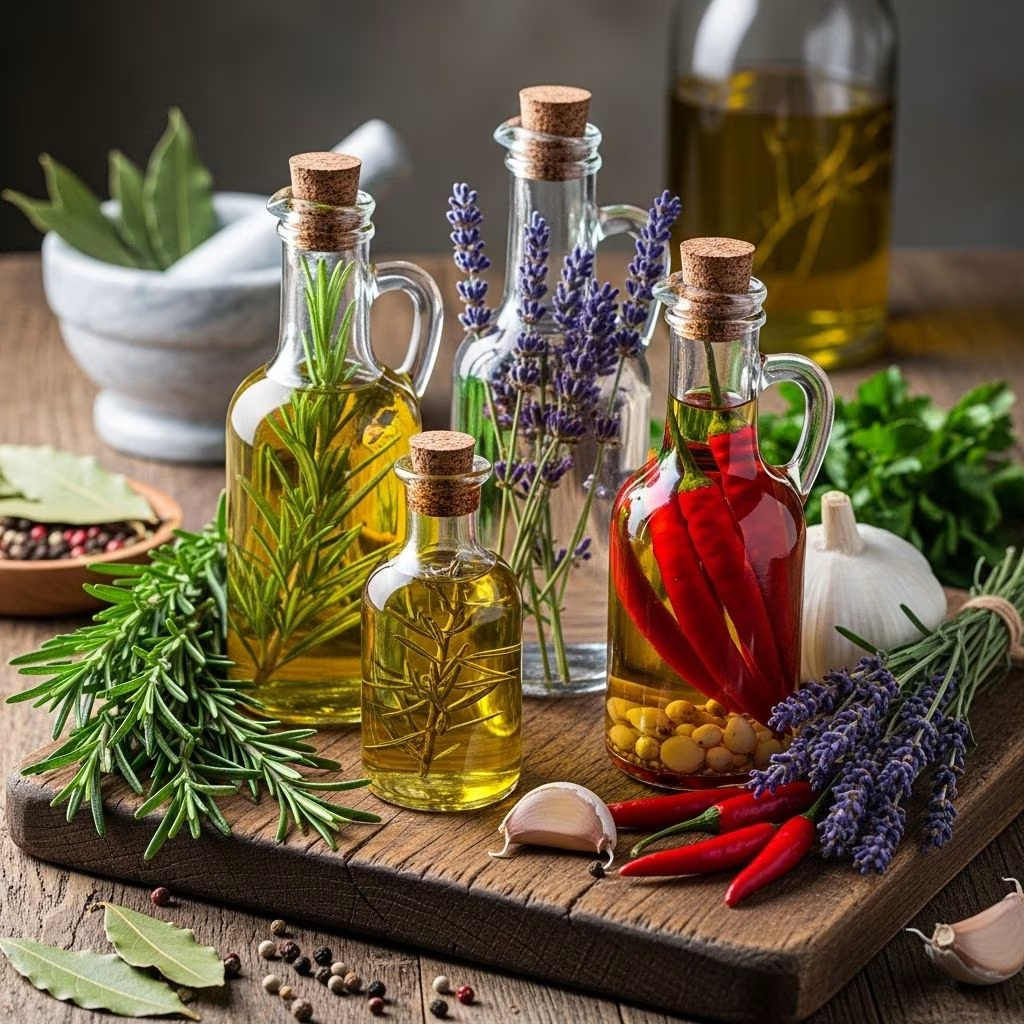
Herb-infused oil is created by soaking (or infusing) medicinal or aromatic herbs in a carrier oil for a period of time, allowing the oil to draw out the beneficial plant compounds. Unlike essential oils, which are distilled concentrates, infused oils are gentle, safe for topical application, and suitable for many homemade remedies.
- Carrier oils (such as olive, coconut, or sunflower oil) act as the base, extracting both fat-soluble nutrients and aroma from the herbs.
- Herbs can be fresh or dried, and are chosen for specific qualities (e.g., calendula for calming, lavender for soothing, rosemary for invigorating).
Infused oils can be used as moisturizers, massage oils, remedies for minor skin issues, or as the base for salves, balms, and creams. They offer a gentle, accessible way to benefit from the healing power of plants in daily care routines.
Why Make Herbal Infused Oils?
Herb-infused oils provide nature’s wellness through a hands-on approach. Here are several compelling reasons to make your own:
- Cost-effective: Making your own infusions at home is less expensive than buying specialty herbal oils or balms.
- Customization: Choose oils and herbs tailored to your unique wellness needs and preferences.
- Control over ingredients: Avoid additives, synthetic preservatives, and allergens present in many commercial products.
- Ritual and connection: Growing, harvesting, and infusing your own herbs creates a meaningful relationship with the plants and their healing traditions.
Benefits of Herbal Oil Infusions
Herbal oil infusions are valued for their multitude of skin and wellness benefits. Here are key advantages:
- Stimulate cell regeneration at the dermal layer, encouraging healthy skin renewal and healing wounds, burns, or wrinkles.
- Reduce skin irritations and help address bacterial, fungal infections, and acne.
- Soothe sensitive or inflamed skin, balance oil production, and aid delicate complexions.
- Support lymphatic flow, promoting detoxification by aiding waste release.
- Address hormone-related skin issues through plant-based hormone content.
- Alleviate stress-related skin conditions through their calming sensory effects.
- Antioxidant properties help slow signs of aging, reduce the appearance of scars, and improve tone and texture.
Best Herbs and Oils for Infusing
Choosing the right oil and herbs ensures the efficacy and shelf-life of your infusion. Below are popular options:
| Carrier Oil | Benefits | Ideal For |
|---|---|---|
| Olive Oil | Rich in antioxidants and skin-nourishing fat; stable, affordable | General skincare, healing balms |
| Sunflower Oil | Light, absorbs easily, high in vitamin E | Massage oils, sensitive skin |
| Jojoba Oil | Non-comedogenic, closely resembles skin’s own oil | Facial oils, acne-prone skin |
| Coconut Oil | Moisturizing, antimicrobial | Body balms, salves |
| Sesame Oil | Anti-inflammatory, traditionally used in Ayurvedic medicine | Massage, joint care |
Recommended Herbs for Oil Infusions
- Calendula: Calming, anti-inflammatory, relieves eczema and diaper rash; promotes skin healing.
- Lavender: Soothes burns, cuts, irritations, and helps relaxation.
- Arnica: Relieves muscle aches, bruises, sprains, and reduces swelling.
- Chamomile: Gentle for sensitive or baby skin, soothes redness and eczema.
- Rosemary: Revitalizes scalp, improves circulation, and clarifies skin.
- St. John’s Wort: Heals minor cuts, bruises, and soothes nerves.
Fresh vs. Dried Herbs: Which Should You Use?
Dried herbs are generally preferred for oil infusions, as they have lower moisture content, reducing the risk of spoilage or mold. Fresh herbs can introduce water into the oil, which greatly increases the chance of bacterial growth. However, if using fresh herbs, be sure they are very dry and consider a short drying period before infusing.
- Dried herbs: Safer, longer shelf life, less risk of mold.
- Fresh herbs: More vibrant aroma, but must be used carefully to avoid contamination.
How to Make Herb-Infused Oil: Methods
There are several ways to prepare herbal oil infusions, each with its pros and cons. Two common approaches are the folk method and measured method. Additionally, you can use solar, stovetop, or oven techniques to speed up or enhance extraction.
The Folk Method
- Fill a clean, dry glass jar halfway with dried herbs.
- Pour in your chosen carrier oil, covering the herbs by at least one inch.
- Stir well to release any air bubbles.
- Cap the jar and place it in a warm, sunny spot (such as a windowsill) for 2–4 weeks. Shake gently every day to keep the herbs well-submerged.
- After infusing, strain the oil through a cheesecloth or fine mesh into a clean bottle, squeezing out every drop.
- Label your oil with the date and ingredients used. Store in a cool, dark place.
The Measured Method
- Use a specific ratio (e.g., 1 part dried herbs to 4–5 parts oil).
- Combine herbs and oil in a sterilized jar or heat-safe container.
- Cover and infuse using the preferred time and heat (solar or gentle stovetop/oven technique).
Warm Infusion (Stovetop or Oven)
- Add herbs and oil to a heatproof jar or double boiler.
- Heat gently (do not boil) at 95–110°F (35–43°C) for 2–6 hours.
- Stir occasionally, then strain as above and store.
Solar (Sun) Infusion
- Prepare the infusion as in the folk method.
- Leave jar in sunlit location for several weeks, shaking daily.
- Strain, bottle, and label.
Note: For heat methods, aim for gentle warmth; overheating can degrade both the oil and herbal actives.
Always use clean, sterilized containers and utensils to prevent spoilage.
Choosing a Container and Straining the Oil
- Glass jars are best, as plastic may leach into your infusion. Wide-mouth jars make for easier filling and straining.
- Cheesecloth, nut milk bags, or fine mesh strainers are ideal for separating plant material from finished oil. Always squeeze out remaining oil for maximum yield.
- Bottles: Once strained, transfer oil into amber or cobalt glass bottles to minimize light exposure and extend shelf life.
Safety Tips: Preventing Spoilage and Rancidity
- Use thoroughly dried herbs when possible.
- Ensure all equipment and jars are sterilized and bone-dry before use.
- Label infusions with date and ingredients; discard at any sign of mold, cloudiness, or off-odors.
- Store finished oils in a cool, dark location and use within 6–12 months for best quality.
Common Mistakes and Troubleshooting
- Mold or cloudy oil: Usually due to using fresh herbs or wet utensils. Always use dry herbs for longer shelf stability.
- Weak aroma or lack of potency: Not using enough plant material, or infusing too briefly. Stick to recommended ratios and timelines.
- Oil smells “off” or rancid: Caused by heat exposure or poor-quality carrier oil. Use high-quality, fresh oils and avoid excessive heat.
Creative Ways to Use Herb-Infused Oils
- Facial and body moisturizer: Apply as a nourishing oil after bathing.
- Massage oil: Use for self-massage or with a partner, particularly with arnica or lavender-infused oils for sore muscles.
- Base for salves, balms, and creams: Combine with beeswax and essential oils for healing ointments.
- Baby care: Calendula or chamomile-infused oils are gentle for diaper area or soothing cradle cap.
- Hair and scalp treatments: Rosemary or nettle-infused oils promote shine and scalp health.
- Bath oil: Add a tablespoon to bathwater for a luxurious soak.
Frequently Asked Questions (FAQs)
Which herbs are best for beginners making infused oils?
Calendula, lavender, chamomile, and rosemary are excellent beginner choices due to their safety, availability, and versatility in skin care and first-aid.
How long does homemade herb-infused oil last?
Properly made and stored herbal oils typically last 6–12 months. Keep out of heat and direct sunlight for maximum shelf-life.
Can I use fresh herbs instead of dried?
You can, but with caution. Fresh herbs introduce moisture, increasing spoilage risk. If using, allow herbs to wilt slightly or dry for a day before infusing, and use finished oil quickly.
Why did my herb-infused oil develop mold?
Likely, the herbs or containers contained moisture. Always use thoroughly dried herbs and ensure equipment is moisture-free before infusion.
Are herbal oils safe for babies and sensitive skin?
Yes, especially when prepared with gentle herbs (such as calendula or chamomile) and pure carrier oils. Always patch test before regular use.
Can I ingest herb-infused oil?
Most homemade herbal oils are meant for external use. Consultation with a healthcare or herbal professional is advised before ingesting any homemade oil.
What is the difference between essential oils and infused herbal oils?
Essential oils are highly concentrated and produced by steam distillation; infused herbal oils are diluted, made by soaking herbs in carrier oil, and are generally safer for direct use on the skin.
Conclusion
Herb-infused oils offer a rewarding way to incorporate plant medicine into everyday wellness and beauty routines. They are accessible, cost-effective, and rich in ancient tradition. By understanding the principles of selecting herbs and oils, mastering infusion techniques, and observing safety protocols, anyone can craft customized, restorative oils for personal or family use. With a little care and curiosity, the possibilities for herbal infusions are endless—connect with nature, soothe your skin, and discover the joy of DIY herbal remedies.
References
- https://lipglossandaftershave.com/herbal-oil-infusions/
- https://insideandoutupstateny.com/herbal-infused-oils-by-sasha-botanica/
- https://www.newdirectionsaromatics.com/blog/herbal-oils-nourish-your-hair-and-skin-with-these-gentle-infusions/
- https://pmc.ncbi.nlm.nih.gov/articles/PMC5439385/
- https://www.chagrinvalleysoapandsalve.com/blogs/idas-soap-box-blog/herbal-infusions-for-skin-care
- https://timesofindia.indiatimes.com/life-style/food-news/from-rosemary-to-garlic-6-herb-infused-oils-their-benefits-and-how-to-make-them/photostory/122975903.cms
- https://rawspicebar.com/blogs/spices-101/infusing-oils-with-herbs-and-spices-at-home
- https://parisianspure.com/blogs/news/infused-oils-benefits-and-warnings
- https://joshrosebrook.com/blogs/articles/infusion-confusion