Introduction
Modern families juggle busy schedules, school events, meal planning, mail, and more—often leading to confusion and missed appointments. A DIY Family Command Center with Whiteboard provides a central, organized station for all crucial family activities and information while serving as a visual hub where everyone can stay in sync.
This guide walks you through the process of planning, building, customizing, and maintaining your own command center, with a whiteboard at its heart for endless flexibility.
Why Build a DIY Family Command Center?
- Boosts Family Communication: Ensures everyone has access to important updates, appointments, and reminders.
- Minimizes Clutter: Provides an organized spot for mail, school papers, and to-dos, reducing countertop mess.
- Increases Accountability: Visual chore charts and trackers help both kids and adults stay on track with daily tasks.
- Supports Routine: Centralizes meal plans, grocery lists, and event planning, making weekly transitions smooth.
- Personalization: Tailor the command center to your family’s unique schedule, priorities, and style preferences.
A dedicated home command center improves any busy family’s lifestyle, regardless of size, space, or the ages of those using it.
Planning Your Family Command Center
Step 1: Identify Your Family’s Needs
- Calendar: Tracking school, work, sports, and social events.
- Chore Charts: Assigning and monitoring daily or weekly household responsibilities.
- Meal Planning: Planning dinners and keeping a running grocery list.
- Mail & Paper Storage: Easily sort bills, letters, and permission slips.
- Notes & Reminders: Leave messages, encouragement, or priority tasks for family members.
- Emergency Info: Clearly display vital phone numbers and addresses.
Step 2: Select Your Location
- Choose a high-traffic, easily visible area (kitchen, hallway, entryway).
- Measure available wall/surface space to accommodate all planned elements.
A command center can be compact or expansive depending on your home’s layout and your family’s requirements.
Key Components and Materials
| Component | Suggested Materials | Purpose |
|---|---|---|
| Whiteboard | Dry-erase board, framed glass, pre-printed templates | Writing and erasing calendars, reminders, grocery lists, chore charts |
| Calendar | Dry-erase monthly/yearly calendar, downloadable printables, magnetic calendar | Schedules and upcoming events |
| Chore Chart | Laminated printable charts, magnetic boards, dry-erase templates | Assign responsibilities and track chores for all family members |
| Mail/Paper Organizer | Wire baskets, wall-mounted pockets, labeled containers | Store bills, permission slips, school forms |
| Meal Planner | Dry-erase meal planning board, magnetic pad, printable templates | Weekly meal schedule and shopping list |
| Storage Containers | Small bins, jars, ledge shelves | Hold pens, markers, erasers, keys, coupons |
| Hooks & Hangers | 3M hooks, command strips, wall pegs | Hang keys, backpacks, lanyards, clipboards |
| Labels/Tags | Vinyl decals (Cricut Joy), permanent marker, label maker | Personalization and clarity for each container/section |
Command Center Design Options
Whiteboard-Focused Command Center
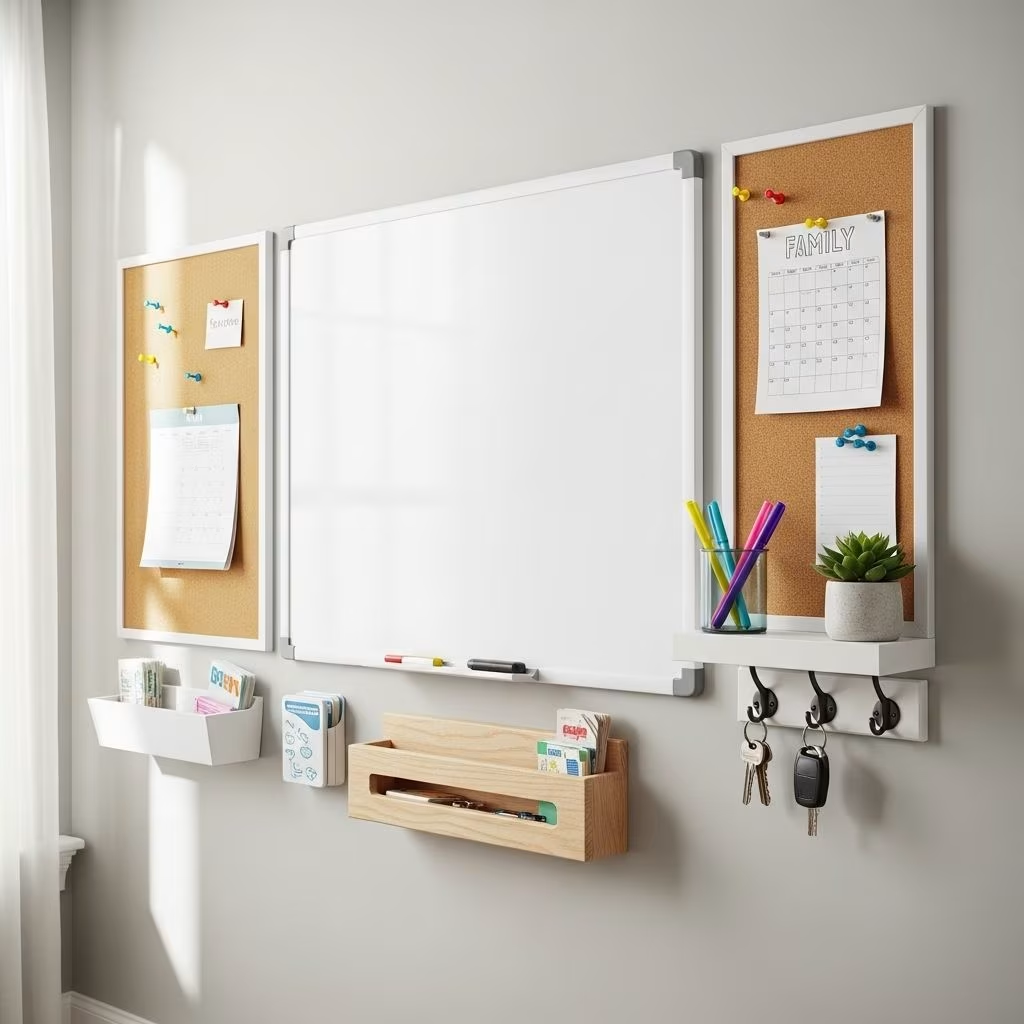
A whiteboard is the most versatile centerpiece, allowing for infinite updates and easy-to-clean tracking. Various layouts can be tailored exactly for your family’s priorities:
- Full Wall Whiteboard: Dedicate an entire wall for maximum space.
- Sectioned Whiteboard: Divide the board into calendar, meal, notes, and chore chart segments using washi tape, vinyl, or permanent marker.
- Mini Whiteboards: Smaller, individual whiteboards for chores, schedules, or subject-specific planning for homeschooling.
Alternative Surfaces
- Chalkboard: Offers a fun, classic look and is easy to repurpose weekly.
- Clipboards: Mount laminated sheets or printables for easy mobility and updating—ideal for rotating tasks or calendars.
- Cork or Magnetic Boards: Pin receipts, coupons, or artwork for quick visibility.
Personalization and Decoration
- Custom labels with a Cricut Joy or other cutting machines for clarity and aesthetic unity.
- Family photos, motivational quotes, or seasonal decorations can provide a warm touch.
Step-By-Step Guide: Building Your Whiteboard Command Center
Step 1: Gather Materials
- Whiteboard (or chalkboard, if preferred)
- Frames (optional for aesthetics and organization)
- Wire baskets, containers, ledge shelf
- Dry-erase markers, erasers
- Labels, decals, or vinyl (for personalization)
- Command strips, hooks, hangers
- Clipboards (for portable printables)
- Cricut Joy or label maker
Step 2: Design Your Layout
Arrange all elements on a flat surface or use cut-out paper shapes to trial your layout on the wall (low-tech). Alternatively, use a photo and image editor for high-tech virtual mock-ups. Make sure high-use items are at eye level and easily accessible for children.
- Organize sections by function: calendar, chores, meal planner, mail and keys.
- Allocate enough writing space for each whiteboard section, plus room for supplies and containers.
- Keep emergency info and contact lists easily visible and up-to-date.
Step 3: Mount the Components
- Use strong adhesives (command strips, 3M hooks) for easy, damage-free installation.
- Install whiteboard or chalkboard securely, ensuring it’s at a comfortable writing height.
- Mount containers, mail organizers, and hangers as per your layout; check stability for heavy items.
- Hang clipboards for chore charts and checklists so they can be taken down as needed.
Step 4: Personalize with Labels and Decals
- Label each section/container using vinyl decals or permanent marker for clarity.
- Add header titles (e.g., “Meal Plan”, “Chores”, “Events”) in decorative script or fonts.
- Use a Cricut Joy to create custom tags and matching styling decals for a cohesive look.
Step 5: Populate Your Command Center
- Fill in the whiteboard calendar, noting all family events, appointments, and deadlines.
- Add weekly grocery list, meal plans, and chore rotations.
- Store frequently used items (pens, markers, coupons) within easy reach.
- Pin school papers, permission slips, and urgent mail.
Your command center is now live—functional, family-friendly, and ready to support organization!
Tips and Personalization Ideas
- Create Individual Chore Boards: Assign each child (or adult) a mini clipboard or whiteboard for personal tasks—they can update it themselves.
- Emergency Reference Sheet: Laminate a sheet with phone numbers, home address, and neighborhood contacts for babysitters and emergencies.
- Meal Planning: Incorporate a detachable shopping list and weekly meal menu to facilitate grocery trips.
- Encouragement Corner: Dedicate a notes section for positive messages, quotes, or celebrations.
- Rotate Decor: Update the command center for seasons, holidays, or family milestones.
- Organize Supplies: Use small magnetic containers or baskets for markers, coupons, and notes, keeping writing implements always at hand.
- School Paper Zone: Allocate a bin for completed schoolwork, mail, or bills, with weekly review to prevent buildup.
Maintaining and Optimizing Your Command Center
- Weekly Reviews: Erase completed tasks, update the calendar, refresh chore charts, and recycle old papers.
- Involve the Family: Assign responsibility for maintaining sections (one person for calendar updates, another for meal planning).
- Regular Cleaning: Wipe whiteboards/chalkboards, declutter bins, and check supply levels for markers and hooks.
- Evaluate and Adjust: As routines evolve or kids grow, review what works and reconfigure the layout or sections as needed.
Troubleshooting Common Problems
- Limited Space: Go vertical—use stacked organizers, small dry-erase clipboards, and slim containers. Consolidate rarely used items into other storage spaces.
- Poor Marker Performance: Invest in quality dry-erase markers; keep spares in a labeled container. For persistent stains, use dedicated whiteboard cleaner.
- Overwhelm or Visual Clutter: Color-code sections, keep labels simple, and use visually soothing design. Pare down to essentials for a minimalist look.
- Lack of Family Use: Host a weekly kickoff meeting in front of the center; assign tasks; let kids personalize their sections.
- Outdated Information: Schedule weekly reset times; post reminders for updates; empower one member as the command center captain.
Frequently Asked Questions (FAQs)
Q: Where is the best place to install a family command center?
The most effective spots are high-traffic areas such as the kitchen wall, mudroom, or entryway—anywhere every family member passes daily.
Q: What is the best size for a whiteboard?
It depends on your available wall space and how much you want to track. For large families, a whiteboard at least 2×3 feet is recommended; smaller households may prefer compact boards or split boards.
Q: How do I keep kids engaged with chore charts?
Let children update charts themselves using dry-erase markers or stickers, and reward them for completed tasks. Attach markers to charts to make access simple.
Q: Can I change the layout as my family’s needs evolve?
Absolutely. The beauty of a DIY command center is adaptability; swap out containers, remake labels, and redesign sections with minimal cost and effort.
Q: What if I don’t have a wall space for a full command center?
Use the inside of cabinet doors, hang clipboards on the pantry door, or repurpose a large corkboard or fridge as your central hub.
Q: Is digital organization better than a physical command center?
Both have their merits. Digital calendars are great for syncing mobile devices, but a physical center keeps everyone visually engaged at home and is easier for children to use independently.
Final Thoughts
A thoughtfully planned and well-executed DIY Family Command Center with Whiteboard can radically improve home organization, minimize chaos, and strengthen family communication. By combining strategic planning, creative design, and ongoing maintenance, families of every size and schedule can create a visually appealing, functional hub to keep life on track.
Ready to take your family organization to the next level? Start small, personalize your approach, and watch your household flow improve with every week.
References
- https://jennifermaker.com/diy-family-command-center-ideas/
- https://www.busybudgeter.com/diy-family-command-center/
- https://www.hooplaletters.com/blog/tutorial-family-command-center-chalkboard
- https://www.largefamilyarrows.com/post/the-best-way-to-create-a-functional-command-center-for-your-family
- https://jessicawellinginteriors.com/family-command-center/
- https://thesimpleparent.com/diy-family-command-center/
- https://hautehouselove.com/diy-family-command-center-guide/
- https://theladydiy.com/family_command_center/
- https://www.youtube.com/watch?v=qs3gmEvcsdw
- https://www.youtube.com/watch?v=B2y-sFLgMpw