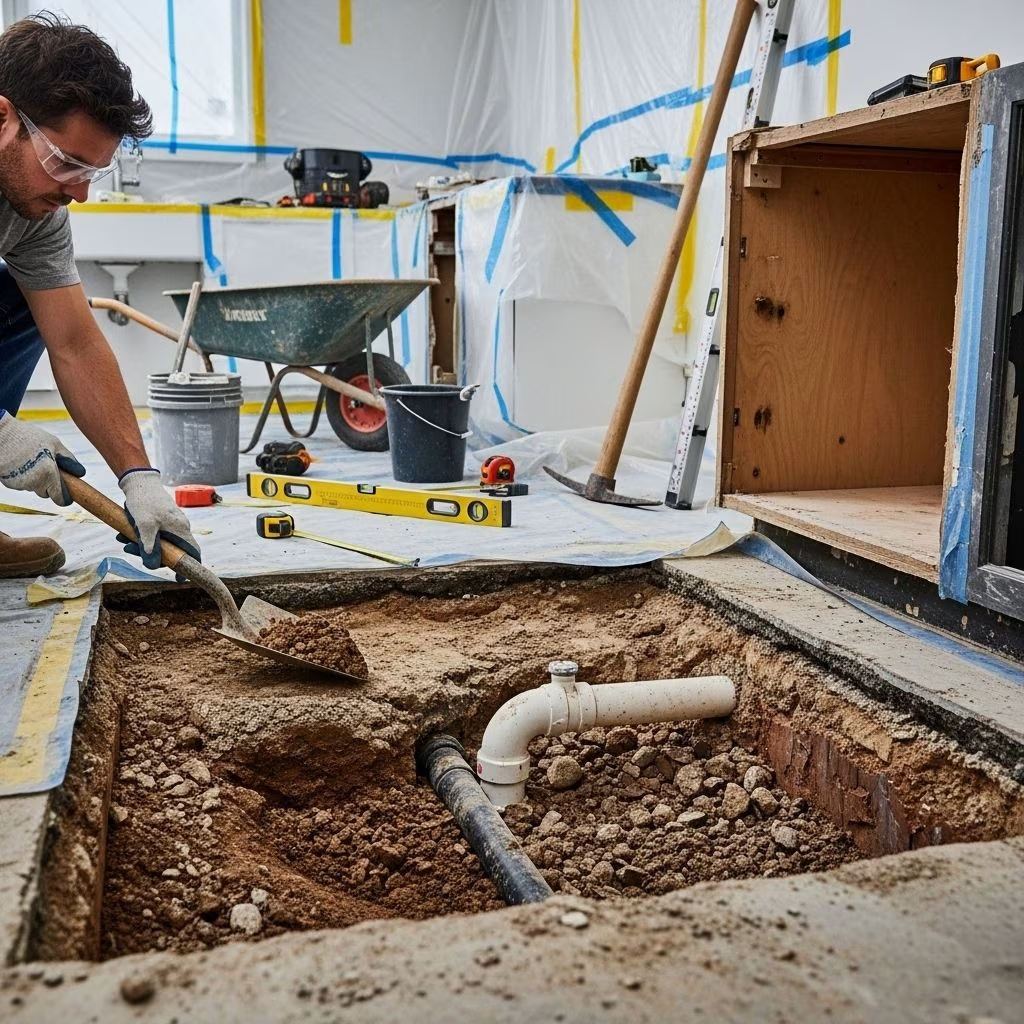
How to Excavate for a Kitchen Remodel: A Comprehensive DIY Guide
If you’re preparing for a major kitchen renovation—whether you’re tackling an expansion, altering the kitchen footprint, or updating the subfloor—it often begins with excavation. Proper excavation ensures a sturdy foundation, resolves moisture problems, and guarantees lasting results for flooring, cabinetry, and appliances. This guide offers a detailed, step-by-step process for excavating a kitchen area, outlines the materials and tools you’ll need, and includes essential safety advice. Whether you are an enthusiastic DIYer or planning to supervise contractors, understanding these fundamentals is crucial for a successful, stress-free remodel.
Why Excavate Before a Kitchen Remodel?
Excavation is more than just digging; it involves the strategic removal of soil or existing floor to prepare for structural changes, utility installations, or leveling the ground for new flooring systems. Understanding when and why excavation is needed can save you from future issues and costly repairs.
- Foundation repairs or upgrades: Necessary if existing support is insufficient or compromised.
- Plumbing or electrical rerouting: Involves trenching or digging to lay new pipes or conduits securely.
- Floor elevation changes: Required when altering the kitchen’s elevation or converting a slab to a crawl space.
- Waterproofing and moisture protection: Essential for below-grade kitchens or areas with moisture issues to prevent dampness and mold.
- Slab removal: If the old slab is damaged or incompatible with new plans.
Planning Your Kitchen Excavation
Detailed planning ensures a smooth excavation process and minimizes risks. Begin by identifying exactly which sections need excavation and clarifying the project’s scope:
- Determine Project Scope: Are you digging the entire kitchen, a section, or just trenches?
- Assess Existing Systems: Map out current plumbing, electrical, and HVAC locations before any work begins.
- Check Local Building Codes: Codes will inform the minimum depth for footings, slab requirements, and setback regulations.
- Arrange for Waste Disposal: Excavated material and debris pile up quickly; plan ahead for dumpsters or hauling services.
Sample Planning Table
| Task | Details |
|---|---|
| Define Excavation Area | Mark out affected kitchen sections using chalk or tape |
| Review Utility Maps | Identify water, gas, and electrical lines with professional records |
| Gather Permits | Submit plans and obtain city/county approvals |
| Prepare Safety Gear | Hard hats, gloves, steel-toed boots, and dust masks |
| Book Equipment | Reserve rental tools in advance; check delivery options |
Obtaining Permits and Locating Utilities
Before any soil is disturbed, confirm all necessary permits are acquired and underground utilities are properly located.
- Building Permits: Most municipalities require permits for excavation to ensure work meets structural and safety standards. Check turnaround times, as processing may take several days or weeks.
- Calling Utility Companies: Use local “Call Before You Dig” services to mark underground power, gas, water, and cable. Failure to do so can result in dangerous and expensive accidents.
If you’re unsure about any buried utility, consult a licensed professional.
Essential Tools and Materials
Having the right tools makes excavation faster, safer, and less physically taxing. While small projects may need just hand tools, deeper or larger-scale digging often demands power-assisted equipment.
- Shovels: Round-point and flat shovels for breaking and moving soil.
- Mattocks and Pickaxes: For breaking through compacted ground or clay.
- Wheelbarrows: To transport excavated dirt out of the work area.
- Tape Measures and Marking Chalk: Ensure accuracy and straight lines in your digging.
- Level: Check that the excavated base is flat and within required tolerances.
- Safety Gear: Dust mask, gloves, steel-toe boots, goggles, and a hard hat.
- Jackhammer or Rotary Hammer: If removing old slab or thick concrete pads.
- Tarps or Drop Cloths: Protect adjacent areas and minimize dust tracking.
- Trash Bins or Dumpsters: Arrange for debris disposal to maintain a clean, safe site.
Safety Tips and Best Practices
Excavation comes with risks—especially in tight, indoor spaces like kitchen remodels. These tips ensure your safety and help avoid costly mistakes:
- Ventilate: Open windows or use fans to dissipate dust and fumes from tools or soil.
- Maintain a Clean Site: Regularly remove debris and unused tools to prevent trips and falls.
- Structural Support: If removing subflooring or load-bearing sections, use temporary supports and consult a structural engineer where required.
- Limit Exposure: Take breaks frequently, especially in hot weather or while using power tools.
- Work with a Buddy: Excavation is easier and safer with at least two people, even if one is just assisting or spotting for hazards.
- Use Personal Protective Equipment (PPE): Wear gloves, boots, dust masks, goggles, and hard hats at all times.
Step-by-Step Excavation Process
Follow these steps for a thorough and effective kitchen excavation, ensuring each stage is completed before moving to the next:
1. Clear the Area
- Remove all furniture, appliances, and accessories from the kitchen.
- Protect adjacent rooms with plastic sheeting or tarps to control dust.
- If needed, uninstall cabinets, flooring, and baseboards to expose the area to be excavated.
2. Mark the Excavation Site
- Use chalk or tape to outline the perimeter of the area to be dug.
- Double-check locations with tape measure and level for square, true lines.
3. Remove Existing Floor and Subfloor (If Present)
- Pry up flooring with crowbars or flat shovels.
- Cut and remove subfloor panels using a circular saw, checking for hidden wires or pipes.
4. Begin Digging
- Start with hand tools to gently remove surface soil or shallow debris, watching for electrical or plumbing.
- For large areas or deeper soil, use electric jackhammers or rotary tools.
- Maintain straight, uniform edges for easier later work.
5. Achieve Required Depth and Level
- Consult construction plans for target depth—usually determined by building code or structural engineer.
- Use a laser level or simple bubble level to keep the base flat.
- Minimize dips and high spots for a solid base for new flooring or footings.
6. Remove All Debris
- Shovel loose soil into wheelbarrows and haul outside the house.
- Dispose of waste per local regulations; avoid blocking sidewalks or driveways.
7. Inspect and Address Moisture Concerns
- Check for standing water, leaks, or evidence of dampness.
- Apply a vapor barrier or drainage system if required.
8. Confirm Readiness for Next Construction Steps
- Have the area inspected if mandated by your local codes.
- Proceed with new slab pouring, installing utilities, or framing as needed.
Common Problems & Troubleshooting
Excavation rarely goes off without a hitch. Stay prepared with these troubleshooting tips for common issues:
- Unexpected Utilities: If you encounter unmarked pipes or wires, stop immediately and consult a professional.
- Water Intrusion: Patch minor leaks with hydraulic cement. For major drainage problems, consider a sump pit or French drain.
- Soil Collapse: Shore up walls with temporary bracing and don’t undermine existing footings.
- Hitting Bedrock: Use heavier power tools like rotary hammers, or consult a contractor for alternatives if rock cannot be broken easily.
- Physical Strain: Don’t hesitate to rent powered equipment for large jobs or if you experience fatigue.
Frequently Asked Questions (FAQs)
Do I always need a permit for kitchen excavation?
Permits are commonly required, especially if excavation affects structural elements, utilities, or involves significant soil removal. Always check with your local permitting authority prior to starting the project.
What is the easiest way to locate underground utilities?
Utilize your local “Call Before You Dig” line or online service; utility companies will mark the location of underground pipes, wires, and cables before you start.
Can I excavate underneath a load-bearing wall?
Excavating near or beneath a load-bearing wall is complex and risky. Temporary shoring and professional engineering advice are typically necessary to avoid structural failure.
How deep should my kitchen excavation be?
Depth is determined by building plans, existing soil conditions, and local building codes. Discuss specific needs with your contractor or structural engineer, especially for new foundations or plumbing installations.
What do I do with all the excavated dirt?
Soil and debris can be hauled away using rented dumpsters, hauling services, or for smaller amounts, distributed in your yard for landscaping or filling low spots (when clean and safe).
Final Thoughts
Excavating for a kitchen remodel involves careful planning, safety, and hard work, but the outcome is a rock-solid foundation for the beautiful renovation ahead. By understanding every step—from obtaining permits to safely removing soil—you’ll avoid common pitfalls and ensure lasting success. Ready your tools, study your plans, follow safety protocols, and let your kitchen transformation begin on the right foot!
References
- https://www.youtube.com/watch?v=9HhigxwRChw
- https://www.youtube.com/watch?v=YDKOJ_0_b_E
- https://www.walmart.com/ip/Better-Homes-and-Gardens-Home-Better-Homes-and-Gardens-Kitchen-and-Bath-Renovation-Guide-Paperback-9780544286375/34162788
- https://search.library.ohio.gov/discovery/fulldisplay/alma991015404889508520/01OHIOLINK_SLO:SLO
- https://www.inquiringbooks.com/product/2819/Kitchen-Design-Guide-Better-Homes-Gardens-Decorating
- https://www.thriftbooks.com/w/kitchen-design-guide-better-homes–gardens_better-homes-and-gardens/324834/