Cleaning Hydration Reservoirs & Bladders: The Complete Outdoor Guide
Hydration reservoirs and bladders are essential for keeping you refreshed during hikes, rides, runs, and outdoor adventures. To guarantee fresh-tasting water and prevent dangerous microbial growth, regular cleaning and maintenance of these systems is critical. This guide delivers research-backed methods and professional advice so your hydration bladder remains safe, hygienic, and fully functional run after run.
Why Cleaning Your Hydration Reservoir Matters
Hydration bladders make it easy to carry water hands-free, but their moist, enclosed environment is ideal for the growth of bacteria, mold, algae, and odor-causing microbes. Failure to clean regularly can result in:
- Unpleasant tastes and odors
- Bacterial or mold exposure, potentially leading to illness
- Reduced lifespan and performance of your hydration system
- Accumulation of biofilm, making cleaning harder over time
Developing regular cleaning habits ensures safer water, extends equipment life, and supports better health on every adventure.
Common Contaminants & Risks
- Bacteria: Rapidly multiply in water left standing.
- Mold & Mildew: Thrive in dark, damp bladders.
- Algae: Can grow if not dried and cleaned fully.
- Biofilm: Sticky residue from drink mixes and saliva.
- Plastic Taste: Manufacturing residues or stagnant storage.
Contaminants are most likely after long periods between uses, when storing with residual water, or using non-water liquids (sports drinks, juices).
Pre-Cleaning: Preparation & Inspection
- Read manufacturer instructions for your specific hydration system.
- Gather all components: reservoir/bladder, tube, bite valve, cap or slide seal.
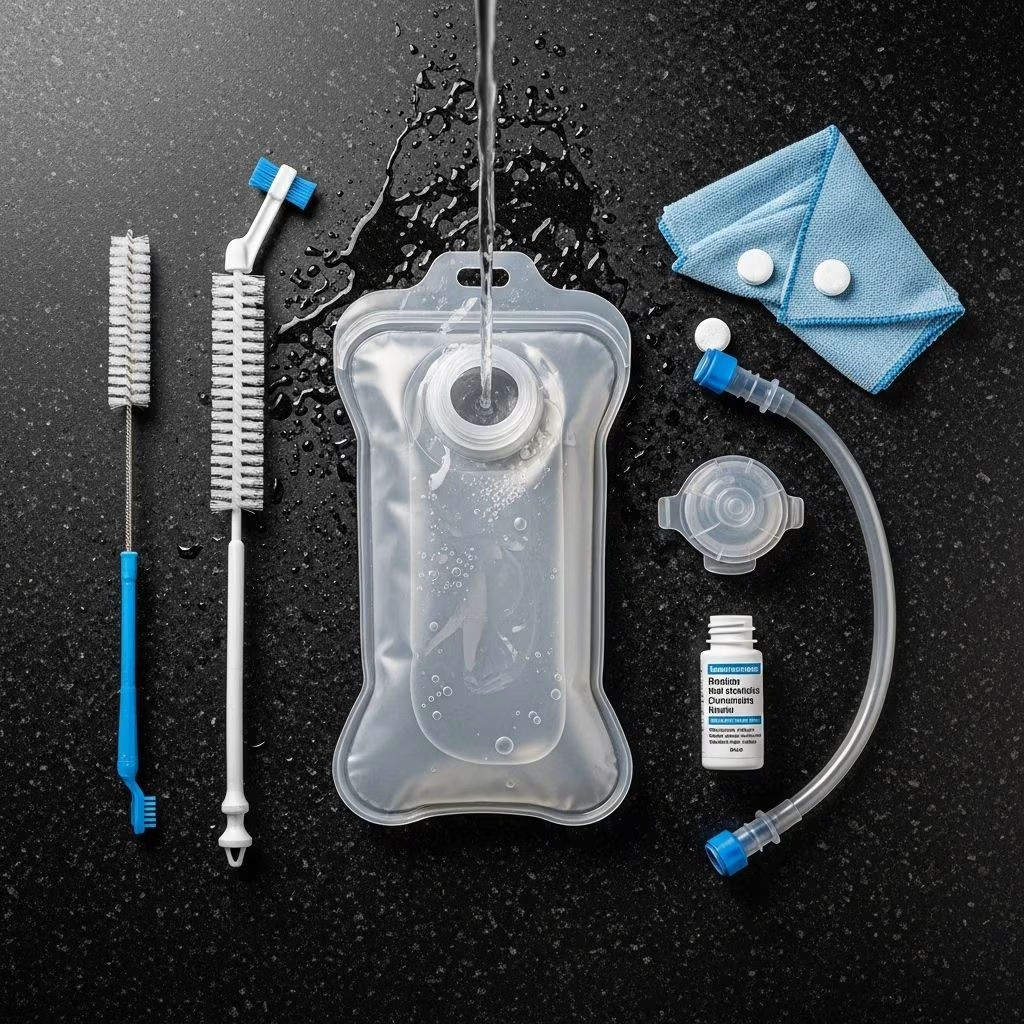
- Prepare cleaning tools: long-handled brush, tube brush, mild soap, drying stand, clean water.
- Disassemble the entire system: Remove tube, valve, and any removable closures.
Step-by-Step Cleaning Instructions
For Top-Fill (Slide Seal) Bladders
- Open the bladder using the slide at the top. Flip the flap if present and pull handles apart.
- Turn the bladder inside out for easier scrubbing.
- Wash with warm water and mild dish soap. Use hands or reservoir brush to reach all surfaces.
- For dishwasher-safe bladders, place in the top rack only.
- Rinse thoroughly to remove all soap and debris.
For Cap-Style (Front-Fill) Bladders
- Remove the cap and use a long-handled brush inside.
- Scrub with warm, soapy water, paying special attention to edges, corners, and creases.
- Rinse until water runs clear and all soap is gone.
Repeat cleaning process after each use, especially when using electrolytes, sugars, or flavored drinks.
Deep Cleaning & Odor Removal Techniques
- First Use: Always rinse new bladders before first use with mild soap or lemon juice.
- Periodic Deep Cleans: Use cleaning tablets designed for hydration systems, or household solutions:
- Baking Soda & Vinegar: Dissolve 1 tablespoon baking soda in warm water; add 1 tablespoon vinegar. Pour into bladder, shake gently, let sit 30 minutes, then rinse thoroughly.
- Lemon Juice: Mix with water for odor removal and to cut plastic taste.
- Specialty Tablets: Dissolve as directed, soak components, then rinse well.
- Disinfecting: For suspected mold, mix a diluted bleach solution (1 teaspoon bleach per liter of water), let sit for a few minutes, and rinse extremely well. Only use bleach as a last resort, and rinse repeatedly to avoid residue.
These methods remove persistent odors, plastic taste, and microbial contamination.
Tube and Bite Valve Cleaning
- Disconnect tube from reservoir (press quick-disconnect or pull free as applicable).
- Remove bite valve from tube; detach silicone sheath if possible.
- Clean tube interior with a dedicated tube brush and warm soapy water.
- Run water through tube, periodically pressing the bite valve to clear it fully.
- Soak bite valve in warm water and mild soap, rinse well.
- Air-dry tube and valve thoroughly before reassembling.
- Use gravity to dry tube: hang vertically, water will drain out.
Proper Drying & Storage
- Propping bladder open is essential: use kitchen tongs, chopsticks, or specialty drying racks to hold the bladder open for airflow.
- Hang tube so moisture drains out (vertical orientation recommended).
- Allow all components to air dry completely before storage to prevent mold.
- Never leave water in the bladder between uses.
- Store bladder and components in a clean, dry, out-of-sunlight environment.
Proper drying is the most effective mold prevention step.
Long-Term Maintenance & Hygiene Habits
- Rinse bladder after every outdoor day to remove residue and prevent contamination.
- Perform a deep clean monthly, or after every use of non-water liquids.
- Always dry thoroughly before storage.
- Occasionally lubricate slider rails and O-rings with food-grade lubricant for optimal function.
- Inspect system for wear, residue, or mold prior to each use.
Routine maintenance extends equipment life and ensures clean water every time.
Troubleshooting Taste, Odor, and Mold
- Plastic Taste: Use lemon juice and water to soak, and rinse repeatedly. Baking soda solution also works.
- Mold Odor or Stains: Disinfect with bleach solution (as described), then rinse thoroughly. Repeat if needed.
- Persistent Odors: See deep cleaning tablets or vinegar/baking soda soak.
- Clogged Tube or Valve: Use specialized brush, soak in soap or cleaning tablet solution, and rinse with high-pressure water.
- White Residue: Often from minerals or cleaners; repeated rinsing and soaking removes it.
If problems persist, replace heavily contaminated or damaged components.
Recommended Equipment and Cleaning Kits
- Reservoir cleaning brush: For scrubbing interior effectively.
- Tube cleaning brush: Long, flexible, for cleaning interior of tube fully.
- Drying rack or tongs: Propping bladder open.
- Cleaning tablets: Safe, formulated for hydration systems.
- Food-grade lubricant: For slider rails and O-rings (small amount only).
- Mild dish soap: Non-toxic, fragrance-free preferred.
Purpose-designed cleaning kits simplify the process and access hard-to-reach spots.
Safe Water Source Considerations
- Always fill hydration system with potable water; untreated water poses health risks.
- Boil suspect water: 1 minute at low elevations, 3 minutes above 6,500 ft.
- Observe park signage at refilling stations—some prohibit cleaning or personal hygiene (bladders only for drinking refills).
- Many park spigots are seasonal; verify water source safety online or with rangers if uncertain.
Comparison Table: Hydration Bladder Cleaning Methods
| Method | Use Case | Pros | Cons |
|---|---|---|---|
| Warm Soapy Water | Routine, after every use | Simple, effective, safe | Requires thorough rinsing |
| Baking Soda & Vinegar | Odor/plastic taste removal | Household ingredients, deodorizes | Need multiple rinses |
| Specialized Tablets | Deep cleaning, heavy use | Convenient, removes stubborn residue | Initial cost, may need repeat |
| Dishwasher (Top Rack) | Easy cleaning for some brands | Quick, minimal effort | Not all bladders dishwasher-safe |
| Bleach Solution | Disinfection, mold removal | Kills nearly all germs | Must rinse thoroughly, corrosion risk |
| Lemon Juice | Freshen taste, first use | Natural, safe | Mild cleaning only |
Frequently Asked Questions (FAQs)
How often should I clean my hydration bladder?
Rinse after every use and perform a thorough clean once a month, or after using energy drinks or flavored mixes.
Can I use a dishwasher for cleaning my reservoir?
Many top-fill, slide seal bladders are dishwasher safe (top rack only). Always check manufacturer guidelines beforehand.
What is the best way to dry my hydration bladder?
Prop bladder open with tongs or a specialized rack. Hang the tube vertically to allow water to drain.
How can I remove mold from the tube or bladder?
Soak in a diluted bleach solution (1 tsp per liter water), then rinse repeatedly and air dry.
Should I lubricate seals or attachments?
Yes, a small amount of food-grade lubricant on slider rails or O-rings keeps them functioning and prevents wear.
Summary of Key Tips
- Disassemble and rinse after every use.
- Scrub with warm, soapy water and specialized brushes.
- Dry thoroughly; do not store with residual moisture.
- Use natural solutions (lemon juice, baking soda) or cleaning tablets to remove odors and tastes.
- Inspect regularly for mold or damage—replace as needed.
By staying diligent and following these research-backed techniques, you will keep your hydration reservoir clean, hygienic, and tasting perfectly fresh, hike after hike.
References
- https://www.deuter.com/us-en/advice/streamer-care-tips
- https://www.youtube.com/watch?v=7wI5RGA5oyA
- https://tetongear.com/blogs/adventure-blog/how-to-clean-your-hydration-bladder
- https://www.youtube.com/watch?v=-sl2heApclY
- https://sourcetacticalgear.com/how-to-clean-hydration-pack/
- https://www.orangemud.com/blogs/orangemud/how-to-clean-a-water-backpack-hydration-sling
- https://www.camelbak.com/care-and-cleaning.html
- https://www.hydrapak.com/blogs/beyond-adventure/hydration-reservoir-cleaning-guide