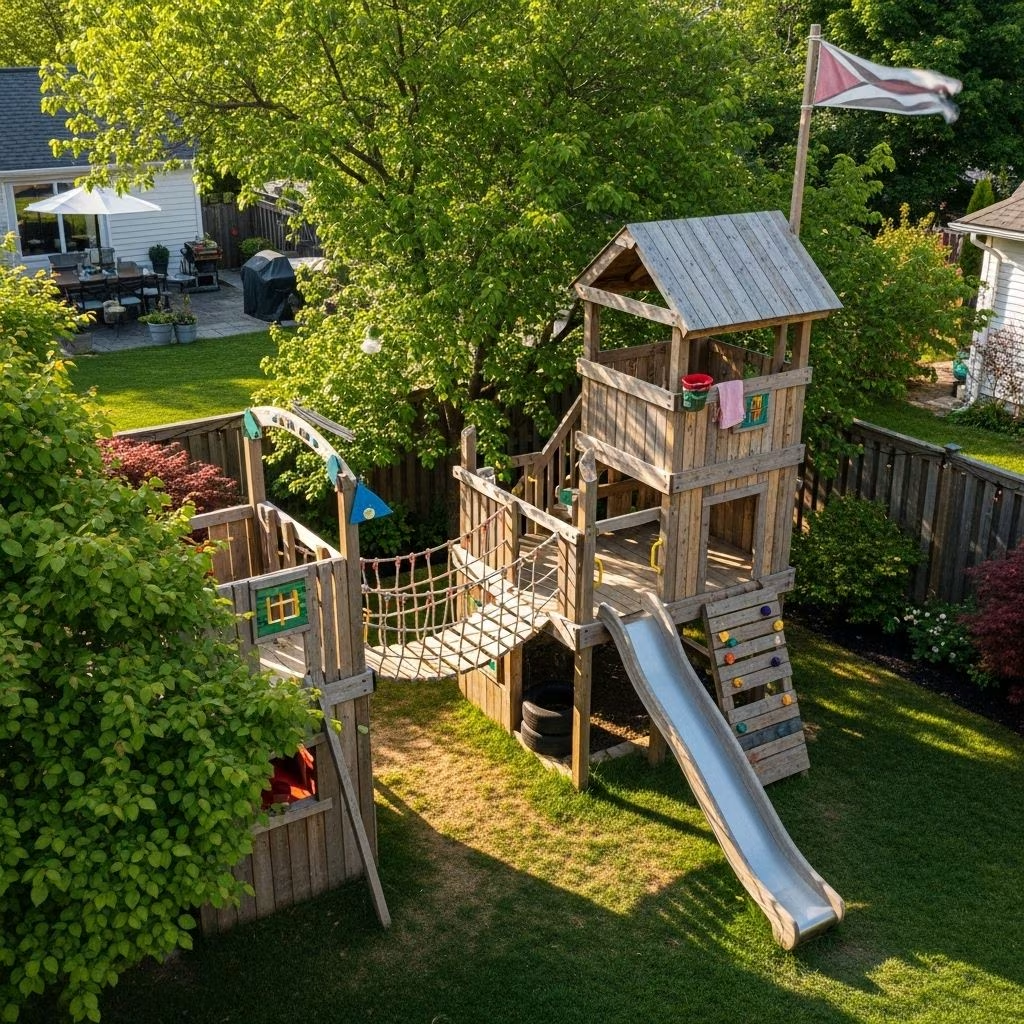
Whether you’re seeking backyard adventure, a creative play space for kids, or a strategic hideout in the woods, building an outdoor fort is a rewarding DIY project for families and outdoor enthusiasts alike. This comprehensive guide covers every step, from planning and selecting materials to construction techniques, safety considerations, and creative enhancements.
Overview: Why Build an Outdoor Fort?
Outdoor forts spark imagination and adventure, providing a unique retreat for play, social gatherings, quiet reading, or even survival skills practice. They teach basic construction concepts, foster teamwork, and help cultivate problem-solving abilities. Forts can be as simple or elaborate as you desire, adaptable for all ages and skill levels.
Essential Planning Considerations
Success starts with thoughtful planning. Consider the following essentials before breaking ground:
- Purpose: Is the fort for play, privacy, camping, or a garden hideaway?
- Location: Choose a level, well-drained, and safe area—common spots include under sturdy trees, beside fences, or open grassy spaces.
- Environment: Account for sunlight, shade, wind direction, and proximity to hazards (toolsheds, water, roads).
- Permanence: Decide between temporary moveable forts or more permanent structures.
- Users: Adjust dimensions and safety measures for the ages and activities of expected users.
- Permissions: For public land or woodlands, secure proper permissions before building or harvesting materials.
Choosing the Right Materials
The longevity and safety of your fort depend heavily on your material choices. Below is a comparison of commonly used options for frameworks, coverings, and fasteners:
| Element | DIY/Repurposed Options | Purchased Options |
|---|---|---|
| Frame | Branches, fallen logs, bamboo stakes, sturdy sticks, disassembled pallets | 2×4 lumber, pressure-treated wood, PVC pipe, metal pipes |
| Walls/Roof | Old sheets, canvas drop cloths, tarps, cardboard | Plywood, outdoor paneling, weatherproof canvas, pre-made fort kits |
| Fasteners | Rope, twine, zip ties, binder clips, duct tape, clothespins | Galvanized screws, nails, L-brackets, hinges |
For rustic forts, logs and branches can be lashed together; for a polished look, use lumber with brackets and screws for added durability. Consider environmentally friendly, non-toxic materials for children’s play spaces.
Popular Fort Types & Design Inspirations
Outdoor forts vary in complexity and style. Below are some classic and creative approaches:
- Lean-to Fort: A simple structure using a supporting beam between two trees with additional branches or tarp sloping to the ground.
- Teepee: Poles arranged in a conical shape, covered with fabric, leaves, or sheets—easy to assemble and disassemble.
- Box Fort: Interconnected large cardboard boxes form tunnels, rooms, or castles. Ideal for quick assembly and indoor/outdoor play.
- Table Fort: Utilize an outdoor picnic or folding table as a sturdy base, draped with blankets or tarps and enhanced with bamboo-pole extensions for added height.
- Elevated Platform Fort: A raised wooden deck or treehouse using plywood and support beams, offering better views and more security, but requires greater skill and caution.
- Pallet Board Fort: Upcycle construction pallets to form solid walls—attach together using rope or screws, and top with tarps or paneling for a roof.
Step-by-Step Building Instructions
Below is a general process adaptable to most fort designs.
1. Select the Fort Site
- Clear debris, rocks, sticks, and ensure ground is level and dry.
- If using trees for support, select healthy specimens with a diameter of at least 6 inches for strength.
2. Gather and Prepare Materials
- Decide frame size, layout, and gather appropriate branches, poles, lumber, or pallets.
- Have ropes, twine, fasteners, and covering materials on hand.
3. Build the Frame
- Between Trees: Lash a horizontal crosspiece (branch or 2×4) securely between two sturdy trees using rope or synthetic cordage.
- Freestanding: Hammer or dig in four posts, or assemble a rectangular frame using wooden boards and brackets.
- Use mitred (angled) corner joints for neatness and extra stability if using lumber frames.
4. Attach Walls and Roofing
- Lean and lash vertical wall supports (logs, bamboo, or poles) against the main support, securing each with knots or screws.
- For canvas or tarp options, stretch fabric over the frame and fasten tightly using rope, clothespins, or duct tape.
- Add a sloped roof for rain run-off, and overlap wall coverings to prevent water leaks.
- Install a hatch or door using simple hinges, or create a flap-style entrance for play forts.
5. Secure the Structure
- Add internal and external bracing supports to corners and wall joints using L-brackets, extra wood, or rope crossings.
- Check for any loose fasteners, wobbly panels, or sharp edges—fix as needed for safety.
Fort Walls and Roof Options
The durability, weather resistance, and comfort of your fort largely depend on the wall and roof design:
- Wooden Planks/Paneling: Use treated plywood or cedar for lasting performance. Overlap joints and seal gaps with waterproofing tape or caulk.
- Tarps or Canvas: Easy to install, inexpensive, and portable. For better results, use grommeted tarps for lashing and add a secondary liner to increase insulation.
- Natural Branches: Weave branches together for rustic camouflage or lay them closely for dense weather protection.
- Cardboard Sheets: Suitable for temporary play; reinforce with tape and keep dry.
- Corrugated Plastic Panels: Lightweight, waterproof, and easily attached to wood frames for effective roofing solutions.
Weatherproofing & Comfort Upgrades
Outdoor forts face sun, rain, and wind. Effective weatherproofing extends usability and livability:
- Angle the roof and overlap coverings to direct water away from interior spaces.
- Add ground tarps or rugs for a dry, comfortable floor.
- Seal any external seams or joints with exterior-grade tape or all-weather caulk.
- Install rollable window flaps for ventilation during warm days and to keep out bugs and rain.
- For winter or shade, insulate with cardboard, wool blankets, or reflectix panels.
Safety Tips & Best Practices
- Always wear safety glasses and gloves when using tools or handling wood.
- Inspect all materials for sharp edges, splinters, and rot before use.
- Ensure upright supports are well-secured—test for stability before children play.
- Keep the entrance easily accessible and clear in case of emergency.
- Install structural reinforcements as needed, especially for large or elevated forts.
- Supervise young children and enforce no-roughhousing rules in raised or enclosed forts.
Creative Enhancements & Activities
Personalize your fort with features that make it inviting and functional:
- Paint or decorate walls with outdoor-safe paints or markers.
- Create a flagpole from PVC pipe or bamboo and fly homemade flags for identity.
- Install periscopes or peepholes for observation and playful defense.
- Add lanterns, fairy lights, or battery-powered lamps inside for nighttime use.
- Build shelves, secret compartments, or benches from scrap lumber.
- Bring in soft blankets, pillows, and sleeping bags for cozy play or backyard camping.
Caring For & Maintaining Your Fort
- Check for loose fastenings, water damage, or mold regularly—especially after storms.
- Replace worn-out coverings or deteriorated ropes as soon as possible.
- Store removable fabrics or tarps indoors during extended rainy periods or off-season.
- Keep the surrounding area free of debris and tall grass to minimize insect and rodent visitors.
Frequently Asked Questions (FAQ)
Q: What’s the quickest type of outdoor fort to build?
A: The fastest options are table forts (using a picnic table draped with blankets or tarps) or cardboard box forts, which can be assembled in under an hour with minimal tools.
Q: How do I make my fort last longer outdoors?
A: Use weather-resistant materials such as treated lumber, tarps, and synthetic rope. Regularly inspect your fort, repair any weak spots, and protect fabrics from prolonged moisture by storing them indoors when not in use.
Q: Are backyard forts safe for small children?
A: Yes, so long as frames are sturdy, all sharp edges are covered, and adults supervise play, especially in raised forts. Avoid using small parts or hazardous tools when kids are present.
Q: What are the best natural materials for a woodland fort?
A: Straight, sturdy branches, long logs (for frames), and leaf-covered boughs (for roof/walls) work well. Use synthetic rope or paracord for lashing, which lasts longer than natural cordage.
Q: How can I weatherproof a simple fabric fort?
A: Overlap tarps, secure edges off the ground, and use waterproof spray or a secondary liner. Make sure rain can’t pool on the roof and allow for ventilation to prevent mildew.
References
- https://www.fortinthewoods.com/post/how-to-build-a-epic-fort
- https://www.thisoldhouse.com/yards/21016470/how-to-build-a-fort
- https://www.makeafort.ca/make-a-fort-ideas-for-backyard-fort
- https://www.grandtrunk.com/blogs/news/the-grand-trunk-guide-to-building-backyard-forts
- https://www.theruthlessmaker.com/post/playfortfoundation