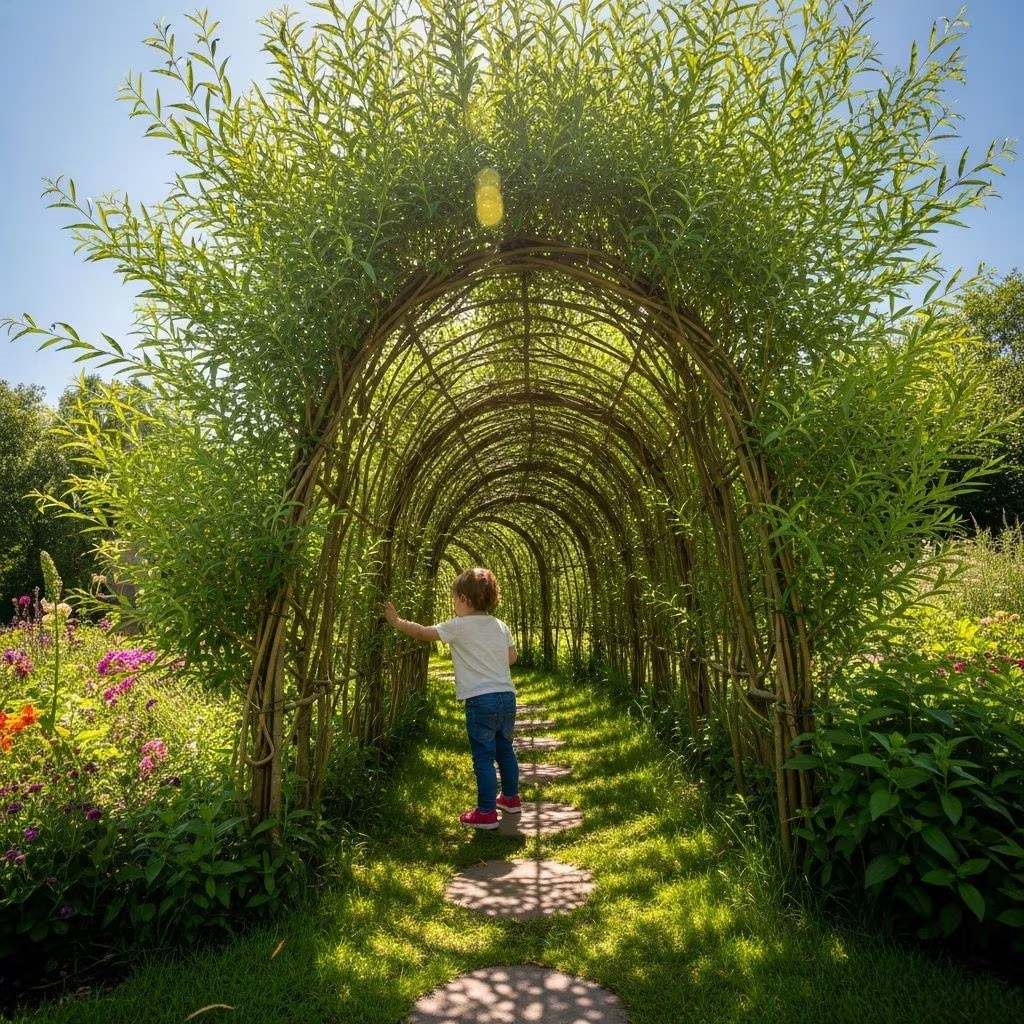
Building a Natural Willow Tunnel for Kids: Step-by-Step Guide and Benefits
Creating a natural willow tunnel for children transforms your outdoor space into a haven of play, imagination, and connection with nature. Willow tunnels, woven from living branches, offer both practical features—like shade and shelter—and fuel creativity and healthy outdoor activity. This guide provides extensive, actionable advice on planning, constructing, and maintaining a willow tunnel, ensuring a safe and beautiful play area that grows alongside your children.
Introduction: Why Build a Willow Tunnel?
A living willow tunnel is a sustainable outdoor structure, crafted from flexible willow rods that root, grow, and form a natural canopy. Willow is ideal due to its rapid growth and pliability, allowing intricate weaves and lush coverage. For children, willow tunnels provide:
- Shade and Shelter: Protection from sun and wind.
- Nature Connection: Immersive green space for play and learning.
- Active Play: Promotes physical activity and imaginative games.
- Seasonal Interest: Changes in appearance through budding, leafing, and flowering.
- Environmental Benefits: Biodiversity, oxygen, and soil health.
Planning Your Willow Tunnel
Effective planning ensures the longevity, safety, and fun of your willow tunnel. Considerations include:
- Location: Choose a sunny to partially shaded area with well-drained soil, away from buried utilities or large tree roots.
- Size and Shape: Typical tunnels are 1–1.5 meters wide, allowing children to move freely. Length can vary, but a common size is 3–6 meters. You can create gentle curves or straight lines.
- Access Points: Mark entrances and exits, considering multiple openings for safe movement and easy supervision.
- Ground Preparation: Ensure the space is clear of stones and weeds for rod planting. Level ground aids in stability and safety.
- Season: Plant dormant willow rods in late winter or early spring (January–April in temperate climates).
Materials and Equipment
Gather quality materials and tools before starting. Willow rod kits are available from specialist suppliers during the planting season. Essential items include:
- Main rods: 10–15 feet long, thick, for structure.
- Banding rods: Thinner rods for weaving stability.
- Lattice rods: Medium thickness, for decorative and structural weaving.
- Ties: Flexi-ties, zip ties, or willow ties to secure intersections.
- Weed suppressant matting: To reduce weed growth and aid water retention.
- Pegs or staples: To fasten matting/fabric to the ground.
- Mulch: Wood chips, compost, or biodegradable carpet for moisture management.
- Drip hose and timer: For automated watering in early growth.
- Tools: Spade, tape measure, scissors, secateurs, knife, string.
- Protective tubing: To guard rods against small animals or mowing accidents (optional).
Rod quantity depends on tunnel length; place main rods every 30 centimeters on both sides. Always buy a few extra rods to allow for damage or loss.
Preparing the Site
Prior to planting:
- Clear Ground: Remove turf, weeds, and debris along the intended tunnel path (ideally 60 cm wide).
- Install Matting: Lay out weed suppressant matting or heavy landscape fabric slightly wider than the tunnel. Secure it with pegs or staples, then cover with wood chips to prevent slipping.
- Mark Layout: Using string and tape measure, outline the tunnel perimeter and note entrance/exit placement.
- Create Pilot Holes: Use a stick or pole to make planting holes if soil is compact; this prevents rod damage during planting.
Step-by-Step Construction Process
1. Planting Main Rods
- Push the main rods through the matting, inserting them 15–30 cm deep (depending on soil and rod length).
- Space rods 30 cm apart on each side of the tunnel, ensuring they are upright and parallel.
- At the tunnel ends, use the stoutest rods; double these up for extra strength.
- If possible, thread protective tubing onto the base before planting to guard against rabbits and mowing accidents.
2. Shaping the Tunnel
- Select opposite pairs of rods from either side.
- Bend each pair gently until they meet overhead in the center, forming an arch.
- Secure the intersection with ties; be sure the rods overlap well to prevent springing apart. An extra pair of hands is helpful at this stage.
3. Adding Banding Rods
- Weave thinner banding rods horizontally or diagonally across the main rods, crossing over at each intersection to add strength and rigidity.
- Begin at the base and continue higher up, using ties as needed.
- The weave keeps the tunnel stable during the first season; afterwards, banding rods may be left to decompose or removed.
4. Inserting and Weaving Lattice Rods
- Make a sloping (45-degree) cut on the end of each lattice rod for easier planting.
- Insert lattice rods midway between main rods, at a slant, at least 15 cm deep.
- Weave diagonally to create a lattice or crisscross effect, securing intersections with ties.
- Take care not to kink or snap any rods—damaged rods may not root or grow.
5. Final Steps
- Replace removed turf if desired, or top with additional mulch for weed suppression.
- Water thoroughly after planting and continue regular watering, especially during the first growing season.
- If you want extra height, wait until the rods grow new shoots. Bend and weave these at the desired height in subsequent seasons.
| Step | Action | Purpose |
|---|---|---|
| 1. Plant Main Rods | Insert rods deep at regular intervals | Create structural skeleton |
| 2. Shape Tunnel | Bend paired rods, tie at top | Form arched tunnel shape |
| 3. Add Banding Rods | Weave horizontally/diagonally | Increase strength and stability |
| 4. Insert Lattice Rods | Plant at angles, weave for lattice | Decorate and reinforce |
| 5. Finalize & Water | Mulch, turf, irrigate | Promote growth, control weeds |
Safety Considerations
For children’s use, prioritize safety:
- Check for Hazards: Ensure rods are securely fastened and ends are tucked in, avoiding sharp projections.
- Rod Placement: Space rods so no gaps or snags can trap fingers or clothing.
- Protect Base: Use tubing or guards to prevent tripping or accidental uprooting.
- Supervision: Especially for younger children, monitor active play and discourage climbing the structure.
- Allergy Awareness: Willow is generally safe, but check for known allergies among users.
Maintenance & Care
Watering
- First Spring/Summer: Daily watering is crucial, especially in dry spells; use a drip hose and timer for consistency.
- Subsequent Years: Once established, willow tolerates moderate drought but thrives with regular moisture.
Weeding and Mulching
- Mulching: Maintain a thick wood chip or compost layer to suppress weeds and retain moisture.
- Weeding: Periodically pull out weeds and check for invasive grass, especially at rod bases.
Pruning and Shaping
- First Year: Avoid heavy pruning; allow rods to take root and establish.
- Every Spring: Prune vigorous shoots to maintain shape and density; use secateurs to trim, and encourage weaving of new growth into the lattice.
- Inspect for Damage: Repair broken or dead rods promptly; re weave loose ends.
Educational and Environmental Benefits
Willow tunnels are more than play features—they foster environmental stewardship and hands-on learning:
- STEM Learning: Offers a platform for natural observation, growth cycles, and plant biology.
- Biophilic Design: Promotes psychological wellbeing, focus, and relaxation via connection with living plants.
- Wildlife Habitat: Tunnels attract insects, birds, and beneficial organisms, enhancing garden biodiversity.
- Ecosystem Services: Willow improves soil quality, stabilizes erosion, and supports pollinators.
Seasonal Care and Growth
- Spring: New leaves and shoots will sprout; monitor daily watering and begin light training of growth.
- Summer: Growth accelerates; inspect for pests (like aphids), replenish mulch, and encourage weaving of new stems.
- Autumn: Leaves shed, revealing tunnel form; remove dead wood and debris.
- Winter: Dormancy allows structural assessment and replacement of broken rods; planting new rods is ideal in this season.
Troubleshooting and Common Mistakes
- Poor Rooting: Ensure rods are planted deep enough (minimum 15 cm) and soil is moist at planting time.
- Rod Damage: Avoid bending too harshly; always make clean, angled cuts before planting for optimal rooting.
- Weed Competition: Mulch effectively; failure to do so can stunt growth.
- Insufficient Water: Willow needs consistent watering the first season.
- Incorrect Materials: Use only dormant, healthy rods from trusted sources.
Frequently Asked Questions (FAQs)
Q: What is the best time to plant a willow tunnel?
A: The ideal period is late winter to early spring (January–April), when willow rods are dormant and primed to root.
Q: How long does it take for a willow tunnel to become usable?
A: Children can enjoy the tunnel structure immediately after building, but lush coverage develops in 1–2 growing seasons as the willow roots and leafs out.
Q: Are willow tunnels safe for all ages?
A: Yes—with proper supervision and careful construction. Avoid sharp ends, regularly inspect stability, and discourage climbing.
Q: Can I build a willow tunnel if my soil is heavy clay?
A: Willow is adaptable but may struggle in waterlogged or compacted soil. Improve drainage and consider incorporating compost.
Q: Are willow tunnels permanent?
A: Willow tunnels, if maintained, can last many years. Regular care, pruning, and replacement of dead rods ensure longevity.
Q: Is willow invasive?
A: Willow roots seek water but generally remain controlled in a garden setting. Avoid planting near foundations or drains.
Q: Do I need a kit?
A: Kits simplify sourcing materials and ensure correct rod types and quantities, but experienced gardeners may source and cut their own willow during dormancy.
Q: Can animals damage the tunnel?
A: Rabbits and rodents sometimes chew young willow. Install protective tubing at the base and inspect regularly.
Final Tips for Success
- Plan for growth—design your tunnel with future size and coverage in mind.
- Involve children in planting and maintenance for a sense of ownership and learning.
- Monitor moisture consistently; willow is forgiving but thrives with care.
- Refresh mulch annually and re secure ties as the structure ages.
With the right approach, a natural willow tunnel becomes a living centerpiece for play and discovery in your outdoor space—nurturing both plants and young minds for seasons to come.
References
- https://www.musgrovewillows.co.uk/help-and-advice/how-to-make-a-living-willow-tunnel/
- https://www.lakeshorewillows.com/site/blog/2020/11/30/building-living-willow-play-hut-tunnel
- https://www.lowimpact.org/categories/land/living-willow-structures
- https://woodworkersinstitute.com/living-willow-arch/
- https://www.youtube.com/watch?v=DnV252L-B2A
- https://www.musgrovewillows.co.uk/blog/everything-you-need-to-know-about-building-living-willow-structures/
- https://pithandvigor.com/2024/01/living-willow-arbor-structure-fence/
- https://www.youtube.com/watch?v=nxRw_Tt7vCo
- https://www.gardensillustrated.com/garden-design/how-to-make-arbours-and-tunnels-using-natural-materials