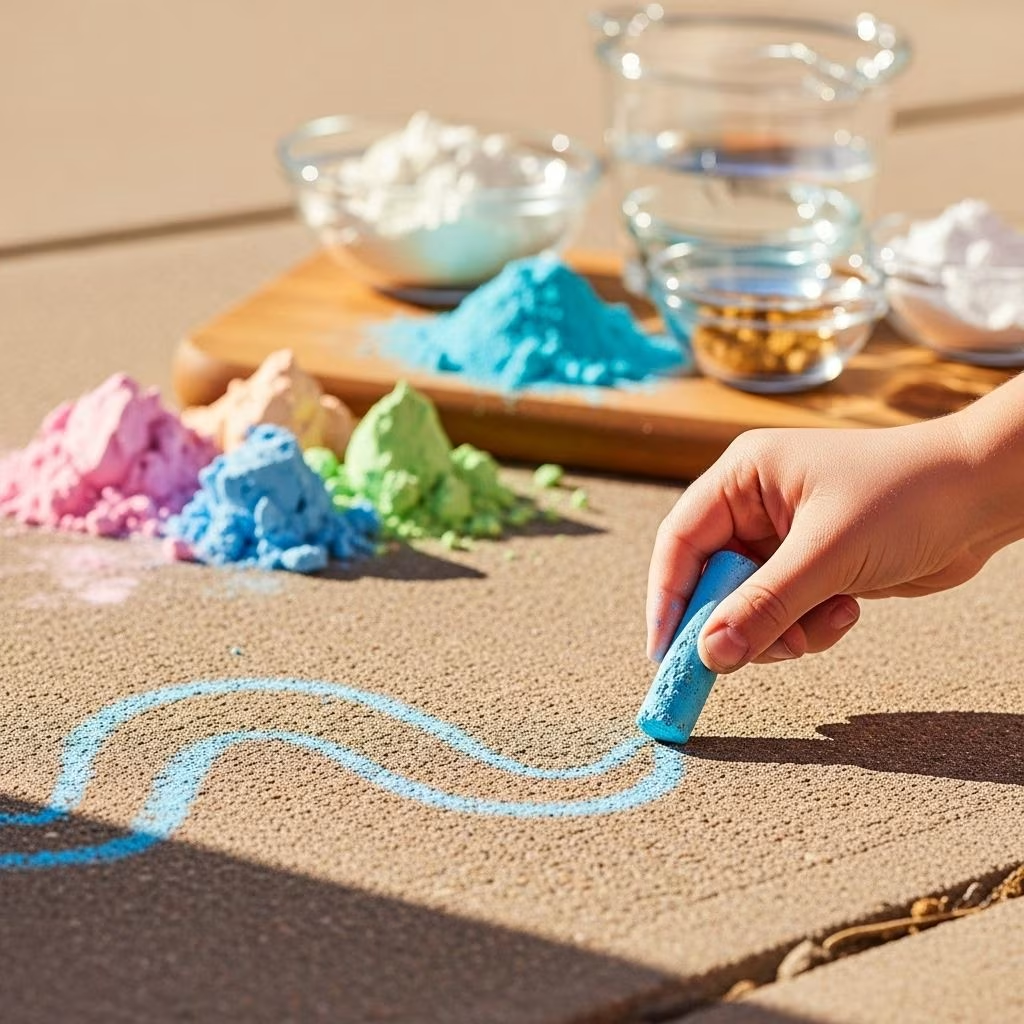
Creating your own pavement chalk at home is a rewarding and safe activity that combines creativity with practicality. When you make homemade non-toxic chalk, you have complete control over the ingredients, ensuring that your children can enjoy outdoor art without exposure to harmful chemicals. This comprehensive guide will walk you through multiple methods of making sidewalk chalk, from traditional plaster-based recipes to innovative cornstarch variations, providing you with everything you need to create colorful, safe, and washable chalk for hours of outdoor entertainment.
The beauty of homemade chalk lies in its simplicity and safety. Unlike commercial chalk products that may contain unknown additives or questionable ingredients, DIY chalk recipes use common household items that are non-toxic and environmentally friendly. Whether you’re a parent looking for a fun weekend project, an educator seeking safe classroom materials, or simply someone who enjoys crafting, making your own pavement chalk offers numerous benefits including cost savings, customization options, and the satisfaction of creating something useful from scratch.
Why Make Homemade Non-Toxic Chalk
The decision to create your own pavement chalk goes beyond simple cost savings. When you craft chalk at home, you ensure complete transparency in ingredient selection, which is particularly important for families with young children who may put objects in their mouths. Commercial chalk products often contain binders, fillers, and synthetic dyes that, while generally considered safe, may cause concern for health-conscious parents.
Health and Safety Benefits stand at the forefront of homemade chalk advantages. By using food-grade ingredients like cornstarch, baking soda, and natural food coloring, you create a product that poses minimal risk even if accidentally ingested. This peace of mind allows children to play freely without constant supervision regarding what they touch or taste during outdoor activities.
Environmental considerations also play a significant role in the appeal of DIY chalk. Homemade versions wash away easily with rain or water, leaving no harmful residues in soil or waterways. The ingredients break down naturally, making them garden-friendly and safe for areas where pets play. Additionally, by avoiding plastic packaging and mass-produced items, you reduce your environmental footprint while teaching children valuable lessons about sustainability.
Cost-effectiveness becomes apparent when comparing homemade chalk to store-bought alternatives. A single batch of DIY chalk costs pennies to produce and can yield multiple pieces, whereas commercial chalk packs can be surprisingly expensive, especially when children go through them quickly during active play sessions. The ingredients needed for homemade chalk are pantry staples that serve multiple purposes, making the investment even more worthwhile.
Customization opportunities allow you to create chalk that perfectly suits your needs. You can adjust colors to match preferences, create unique shapes using different molds, add pleasant scents with essential oils, and even control the chalk’s hardness or softness by modifying ingredient ratios. This level of personalization is impossible with commercial products and adds an extra layer of creativity to the crafting experience.
Essential Ingredients and Materials
Before diving into specific recipes, understanding the core ingredients and their roles helps ensure successful chalk-making. Each component serves a specific purpose, and knowing these functions allows you to troubleshoot issues and make informed substitutions when necessary.
Primary Binding Agents form the structural foundation of your chalk. Plaster of Paris remains the traditional choice for creating firm, long-lasting chalk sticks. This calcium-based powder sets hard when mixed with water, producing chalk with excellent drawing capabilities and durability. Alternatively, cornstarch offers a gentler, more forgiving option that creates softer chalk perfect for younger children. Cornstarch-based chalk crumbles more easily but washes away effortlessly and poses absolutely no toxicity concerns.
Liquid Components activate the binding agents and determine the chalk’s consistency. Cold water works best with plaster-based recipes, as it slows the setting process and allows adequate time for mixing and molding. The water-to-powder ratio critically affects the final product’s texture, with too much water creating weak, crumbly chalk and too little resulting in a mixture too thick to pour into molds.
Coloring Options bring vibrancy and visual appeal to your chalk creations. Acrylic craft paint provides intense, long-lasting color and mixes readily with both plaster and cornstarch bases. Gel food coloring offers another safe option, producing bright hues without adding excessive liquid to the mixture. For those seeking completely natural alternatives, vegetable-based dyes derived from beets, turmeric, spinach, or berries create beautiful earth-tone colors, though they may be less vibrant than synthetic options.
Optional Enhancement Ingredients can elevate your chalk from basic to extraordinary. Essential oils, particularly kid-safe varieties, add pleasant aromas that enhance the sensory experience. Baking soda, when combined with cornstarch in paint recipes, creates a chemical reaction with vinegar that makes artwork bubble and fizz, adding an element of magic to outdoor play. These additions transform simple chalk into an engaging, multi-sensory activity.
Equipment and Tools required for chalk-making are minimal and likely already in your home. Disposable plastic cups and spoons are essential for plaster recipes to avoid clogging your plumbing system. Silicone molds in various shapes make removing finished chalk effortless, though alternatives like muffin tins, toilet paper rolls lined with parchment paper, or small paper cups work equally well. A whisk or fork helps ensure thorough mixing, while squeeze bottles are perfect for storing chalk paint variations.
Classic Plaster of Paris Chalk Recipe
The traditional plaster of Paris method produces professional-quality chalk with excellent durability and vibrant color payoff. This recipe creates firm chalk sticks that write smoothly on various surfaces and withstand enthusiastic use by active children.
Ingredients for One Color:
- 1/2 cup Plaster of Paris
- 6 tablespoons cold water
- 3-4 tablespoons acrylic paint or gel food coloring
- 1 drop kid-safe essential oil (optional)
Step-by-Step Instructions:
Begin by preparing your workspace with disposable materials, as plaster of Paris should never go down your drain. Pour the cold water into a disposable plastic cup first, which helps prevent lumps from forming during mixing. Add your chosen coloring agent to the water and stir thoroughly until the color is evenly distributed. For deeply saturated chalk, use the full 4 tablespoons of paint or enough food coloring to achieve your desired intensity. Matte-finish acrylic paint integrates more smoothly than glossy varieties, creating a more uniform mixture.
Add the Plaster of Paris to the colored water along with any optional essential oil. Mix immediately and continuously for about one minute, ensuring all powder dissolves completely and no lumps remain. The mixture should resemble thick cream or pancake batter. Work quickly during this stage, as plaster begins setting within minutes of mixing with water.
Pour the mixture into your prepared molds, filling them about three-quarters full to allow for slight expansion. Tap the molds gently against your work surface several times to release trapped air bubbles, which can create weak spots in the finished chalk. As the chalk sets, you may notice water rising to the surface. This is completely normal and will evaporate as drying progresses.
Allow the chalk to set in a warm, dry location. While chalk placed in direct sunlight may feel solid after 6-12 hours, it will still be somewhat damp and crumbly inside. For best results, let the chalk cure for a full 24 hours before removing it from molds. Once demolded, store chalk in a dry place if still slightly damp, or in an airtight container once completely dried to prevent moisture absorption.
Easy Cornstarch Chalk Recipe
The cornstarch method offers the gentlest, most forgiving approach to chalk-making, making it ideal for families with very young children or those seeking the simplest possible recipe. This version creates softer chalk that washes away effortlessly and poses zero toxicity concerns.
Basic Cornstarch Chalk Ingredients:
- Equal parts cornstarch and water (start with 1/4 cup each per color)
- Food coloring or natural dye
- Optional: 1 drop kid-safe essential oil per batch
Preparation Method:
Combine equal amounts of cornstarch and water in a small container, mixing thoroughly until the cornstarch dissolves completely and no clumps remain. The consistency should resemble thick paste or play dough. Add food coloring drop by drop, stirring after each addition until you achieve your desired shade. Natural dyes may require larger quantities to produce visible color, and since they add liquid to the mixture, you may need to adjust the cornstarch ratio accordingly.
If creating traditional chalk sticks, transfer the mixture into molds lined with parchment paper. Toilet paper rolls cut to size and sealed at one end make excellent molds for jumbo-sized chalk. Alternatively, you can knead the mixture by hand until it reaches a pliable consistency, then shape it into cylinders or other forms manually.
Drying time for cornstarch chalk typically ranges from 12 to 24 hours, depending on humidity levels and chalk thickness. The chalk is ready when it feels completely dry to the touch and no longer cool or damp. Once dry, remove from molds by gently peeling away the parchment paper. Cornstarch chalk has a softer texture than plaster varieties, making it perfect for young children and easy cleanup.
Sidewalk Chalk Paint Variations
Chalk paint offers an exciting alternative to traditional chalk sticks, allowing children to create large-scale artwork using brushes, sponges, or even spray bottles. These liquid formulations provide a different creative experience while maintaining the same non-toxic, washable properties.
Simple Cornstarch Paint Recipe:
The most basic chalk paint requires just cornstarch, water, and food coloring in equal proportions. Mix 1/4 cup cornstarch with 1/4 cup water in small containers or muffin tin cups, stirring until smooth. Add food coloring to create your desired colors, remembering that colors intensify as the paint dries. This paint has a thin consistency perfect for brush application and creates vibrant, washable artwork on any outdoor surface.
During painting sessions, the cornstarch naturally settles to the bottom of containers. Encourage children to stir their paint periodically to maintain an even consistency and vibrant color. The paint dries to a slightly chalky finish that showcases colors beautifully and washes away completely with water or rain.
Magic Fizzing Chalk Paint:
For an extra element of excitement, create fizzing chalk paint that reacts when sprayed with vinegar. This recipe combines 1/2 cup cornstarch with 1/2 cup baking soda, then slowly adds approximately 1/4 cup water while stirring to achieve a paint-like consistency. Mix in washable craft paint for color, then pour into squeeze bottles for easy application.
After children finish creating their artwork, provide them with spray bottles filled with white vinegar. When they spray the vinegar onto their chalk paint creations, a delightful fizzing reaction occurs as the baking soda and vinegar interact chemically. This combination of art and science captivates children and adds an educational component to outdoor play.
Thick Paste Paint:
For children who prefer finger painting or working with thicker textures, adjust the water ratio to create a paste-like consistency. Use 3 cups cornstarch with only 2 cups water initially, adding more water gradually until achieving the desired thickness. This variation works wonderfully for stamping projects, textured artwork, and sensory play experiences.
Natural and Safe Coloring Options
While commercial food coloring provides vibrant, predictable results, natural alternatives offer completely plant-based options for families committed to using only ingredients found in nature. Understanding the strengths and limitations of natural dyes helps set realistic expectations.
Vegetable-Based Dyes create beautiful earth tones and soft pastels. Beet juice produces lovely pinks and reds, turmeric yields warm yellows and golds, spinach or kale juice creates gentle greens, and blueberries or blackberries offer purples and blues. To extract these colors, blend or juice the vegetables, then strain through cheesecloth to remove pulp. Use the resulting liquid in place of water in your chalk recipes, though you may need to reduce other liquids accordingly.
Powdered Natural Colorants provide more concentrated color without adding extra moisture. Spices like paprika, cinnamon, and cocoa powder create warm browns and oranges. Spirulina powder produces vibrant blue-green hues, while activated charcoal creates dramatic blacks and grays. Mix these powders directly with dry ingredients before adding water for the most even color distribution.
Commercial Food Coloring remains the most practical choice for those wanting bright, true colors. Gel food coloring provides intense pigmentation with minimal liquid addition, making it ideal for both plaster and cornstarch recipes. Liquid food coloring works well but may require larger quantities to achieve saturated colors. Both options are food-safe and widely considered non-toxic, offering peace of mind with superior color results.
Molding Techniques and Tips
The mold you choose significantly impacts your chalk’s final appearance, ease of removal, and usability. Understanding different molding options allows you to create chalk perfectly suited to your needs and available materials.
Silicone Molds represent the gold standard for chalk-making due to their flexibility and non-stick properties. Ice cube trays, candy molds, and baking molds in various shapes create fun, themed chalk pieces that children adore. The flexibility of silicone allows for easy demolding without breakage, and these molds can be reused indefinitely. After pouring chalk mixture into silicone molds, simply let it set completely, then flex the mold to pop out finished pieces.
Toilet Paper Roll Molds offer an economical solution for creating jumbo-sized chalk perfect for young children’s hands. Cut rolls to your desired chalk length, then line the interior and seal one end with parchment paper secured with tape. Stand the molds upright in a cup or box to prevent tipping, then pour in your chalk mixture. Once dry, simply peel away the cardboard and parchment to reveal oversized chalk sticks.
Muffin Tins work well for creating thick, round chalk pieces, though removal can be challenging with plaster-based recipes. Line cups with paper liners or coat with cooking spray to facilitate easier removal. These molds are particularly suitable for cornstarch chalk, which has a softer consistency and releases more readily.
Small Paper Cups provide disposable molds for individual chalk pieces. Simply tear away the paper cup once the chalk has set completely. This method works for any recipe type and eliminates concerns about plaster residue in reusable containers.
Drying Time and Storage Solutions
Proper drying and storage ensure your homemade chalk maintains quality and usability over time. Environmental factors like humidity and temperature significantly affect drying times and finished chalk texture.
Optimal Drying Conditions include warm temperatures, low humidity, and good air circulation. Placing molds in direct sunlight accelerates drying but may cause uneven curing, with the exterior becoming hard while the interior remains damp. For more consistent results, dry chalk indoors in a warm room with moderate air flow. Plaster-based chalk typically requires 24 hours for complete curing, while cornstarch versions may dry in 12-24 hours depending on thickness.
Testing for Dryness involves checking both temperature and texture. Fully dried chalk should feel room temperature or slightly cool to the touch, not cold or damp. Gently press the surface; it should feel completely firm without any give. If using plaster molds, listen for a hollow sound when tapping, indicating the interior has solidified.
Storage Solutions depend on your chalk’s moisture content and composition. Slightly damp chalk should be stored in a dry, well-ventilated area to complete the drying process. Once completely dry, transfer chalk to airtight containers to prevent moisture absorption from the air, which can make chalk soft and crumbly. Plastic bins, glass jars, or resealable bags work well. Store different colors separately to prevent color transfer, and consider adding labels indicating the chalk type and creation date.
Long-Term Storage in cool, dry conditions allows homemade chalk to remain usable for months. Plaster-based chalk has a longer shelf life than cornstarch varieties, which may harden over time. If cornstarch chalk becomes too hard, briefly dampen the surface to restore its drawing properties.
Creative Uses for Homemade Chalk
Beyond traditional sidewalk drawing, homemade chalk opens doors to countless creative activities that combine art, learning, and outdoor fun. These ideas maximize your chalk’s potential while keeping children engaged and entertained.
Educational Activities transform learning into play. Use chalk to create outdoor math problems where children hop through addition or multiplication tables. Draw letter grids for alphabet games, create maps for geography lessons, or illustrate science concepts like the solar system or water cycle directly on pavement. The temporary nature of chalk makes it perfect for practicing skills without fear of permanent mistakes.
Active Play Games encourage physical movement while fostering creativity. Classic games like hopscotch, four square, and tic-tac-toe take on new life with colorful homemade chalk. Create obstacle courses with chalk-drawn paths, design racetracks for bicycles or scooters, or draw targets for beanbag toss games. These activities combine artistic expression with physical activity, promoting healthy outdoor play.
Sensory and Art Projects engage multiple senses simultaneously. Create textured chalk rubbings by placing paper over rough surfaces and coloring with chalk. Mix chalk dust with water to create paint, or use wet chalk for more intense colors. Combine chalk drawing with photography, documenting artwork before rain washes it away. These multi-sensory experiences support child development while providing entertainment.
Community and Social Activities bring people together through shared creativity. Organize neighborhood chalk art competitions, create collaborative murals with friends, or design welcoming messages for visitors. Chalk art becomes a conversation starter and community builder, fostering connections through shared creative expression.
Troubleshooting Common Issues
Even with careful preparation, chalk-making sometimes presents challenges. Understanding common problems and their solutions helps ensure success with every batch.
Crumbly or Weak Chalk typically results from too much water in the mixture or insufficient drying time. If your chalk crumbles excessively during use, reduce the water slightly in your next batch. For plaster chalk, ensure you’re using cold water and mixing quickly to prevent premature setting. Allow extra drying time in humid conditions, as moisture in the air significantly extends curing periods.
Chalk Won’t Release from Molds indicates either insufficient drying or inappropriate mold material. Plaster chalk must be completely dry before demolding, which may take longer than expected. If using rigid plastic molds, try placing them in the freezer for 30 minutes, then immediately flexing to pop out the chalk. For future batches, line molds with parchment paper or use silicone alternatives for easier release.
Pale or Uneven Colors suggest inadequate coloring agent or incomplete mixing. Increase the amount of paint or food coloring in your next batch, particularly if using natural dyes, which tend to be less concentrated. Mix thoroughly for at least one minute, ensuring color distributes evenly throughout the mixture. For plaster chalk, add color to water before incorporating powder to prevent streaking.
Chalk Writes Too Lightly may indicate over-diluted mixture or low-quality plaster. Check your plaster of Paris expiration date, as old plaster loses binding strength. Reduce water slightly to create a thicker mixture that produces more pigmented marks. When using cornstarch chalk, press more firmly or slightly dampen the drawing surface for better color transfer.
Air Bubbles or Holes in finished chalk result from trapped air during pouring. After filling molds, tap them firmly against your work surface multiple times to encourage bubbles to rise and escape. Pour slowly and steadily rather than quickly dumping the mixture. For persistent bubble problems, try mixing more gently to avoid incorporating excess air initially.
Frequently Asked Questions
Q: Is homemade chalk safe if children accidentally ingest it?
A: Yes, when made with food-grade ingredients like cornstarch, baking soda, and food coloring, homemade chalk is non-toxic and safe if small amounts are accidentally ingested. Plaster of Paris is also non-toxic but can cause mild stomach upset if consumed in large quantities. Always supervise young children during chalk play and discourage intentional eating of chalk.
Q: How long does homemade chalk last compared to store-bought?
A: Properly stored homemade plaster chalk can last several months to a year when kept in airtight containers away from moisture. Cornstarch chalk has a shorter shelf life of a few months and may harden over time. Store-bought chalk often contains preservatives that extend shelf life, but homemade versions remain usable for typical seasonal needs when stored correctly.
Q: Can I make chalk without Plaster of Paris?
A: Absolutely! Cornstarch-based recipes provide excellent alternatives that require only cornstarch, water, and food coloring. These versions create softer chalk perfect for young children and wash away more easily than plaster varieties. While not as durable as plaster chalk, cornstarch options offer simplicity and complete peace of mind regarding ingredient safety.
Q: Will homemade chalk stain concrete or damage surfaces?
A: No, both plaster and cornstarch-based homemade chalk wash away completely with water and will not permanently stain concrete, asphalt, or other outdoor surfaces. Rain naturally removes chalk artwork, or you can hose it away. The natural ingredients are garden-safe and environmentally friendly, breaking down harmlessly in soil.
Q: What’s the best mold for making chalk with young children?
A: Silicone ice cube trays or candy molds work wonderfully for child-friendly chalk-making. They create small pieces perfect for little hands, release easily without frustration, and come in fun shapes that engage children’s interest. Alternatively, toilet paper roll molds lined with parchment paper produce jumbo-sized chalk that’s easy for toddlers to grip and harder to break.
Q: Can I add glitter or other decorative elements to homemade chalk?
A: Yes, you can incorporate biodegradable glitter, dried flower petals, or other decorative elements into your chalk mixture before molding. However, these additions may affect chalk’s drawing ability and cleanup. Use biodegradable glitter specifically to maintain environmental friendliness, and avoid adding too many extras that could compromise the chalk’s structural integrity.
Q: Why does my plaster chalk crack or break easily?
A: Cracking typically occurs when chalk dries too quickly or unevenly. Avoid placing molds in direct hot sunlight, which causes the exterior to harden rapidly while the interior remains wet. Ensure you’re using proper water-to-plaster ratios and mixing thoroughly. Some cracking is normal in very thick pieces; creating thinner chalk sticks helps prevent this issue.
Q: What’s the difference between chalk paint and chalk sticks?
A: Chalk paint is a liquid mixture with a thinner consistency designed for brush or sponge application, while chalk sticks are solid pieces for traditional drawing and writing. Paint allows for large-scale artwork and different textures but requires brushes or applicators. Sticks offer more control for detailed drawing and writing, and children can use them immediately without additional tools.
Creating homemade non-toxic pavement chalk represents more than a simple craft project; it embodies a commitment to safe, creative play that nurtures children’s artistic expression while providing parents with peace of mind. Whether you choose the classic plaster method for durable, vibrant chalk or opt for the gentler cornstarch approach perfect for younger children, you’re investing in quality time and meaningful experiences that extend far beyond the finished product. The process of making chalk together teaches valuable lessons about patience, following instructions, and the satisfaction of creating something useful from basic ingredients.
As you embark on your chalk-making journey, remember that perfection isn’t the goal. Each batch teaches you something new about ratios, timing, and techniques. Your children will treasure the memories of creating colorful chalk together, and the hours of outdoor play that follow will provide far more value than any store-bought product. The sidewalk becomes a canvas, the chalk becomes a tool for imagination, and your family creates lasting memories filled with color, creativity, and joy. So gather your simple ingredients, embrace the process, and watch as your homemade chalk transforms ordinary pavement into extraordinary opportunities for learning, playing, and growing together.
References
- https://www.youngliving.com/blog/how-make-diy-sidewalk-chalk-paint/
- https://www.argofoodservice.com/recipe/DIY-Homemade-Sidewalk-Chalk-Paint
- https://buildit.sdsu.edu/diy-jumbo-chalk/
- https://www.youtube.com/watch?v=bdx3Qj4zbJQ
- https://woodlarkblog.com/diy-natural-chalk/
- https://ourbestbites.com/easy-diy-sidewalk-chalk-paint/