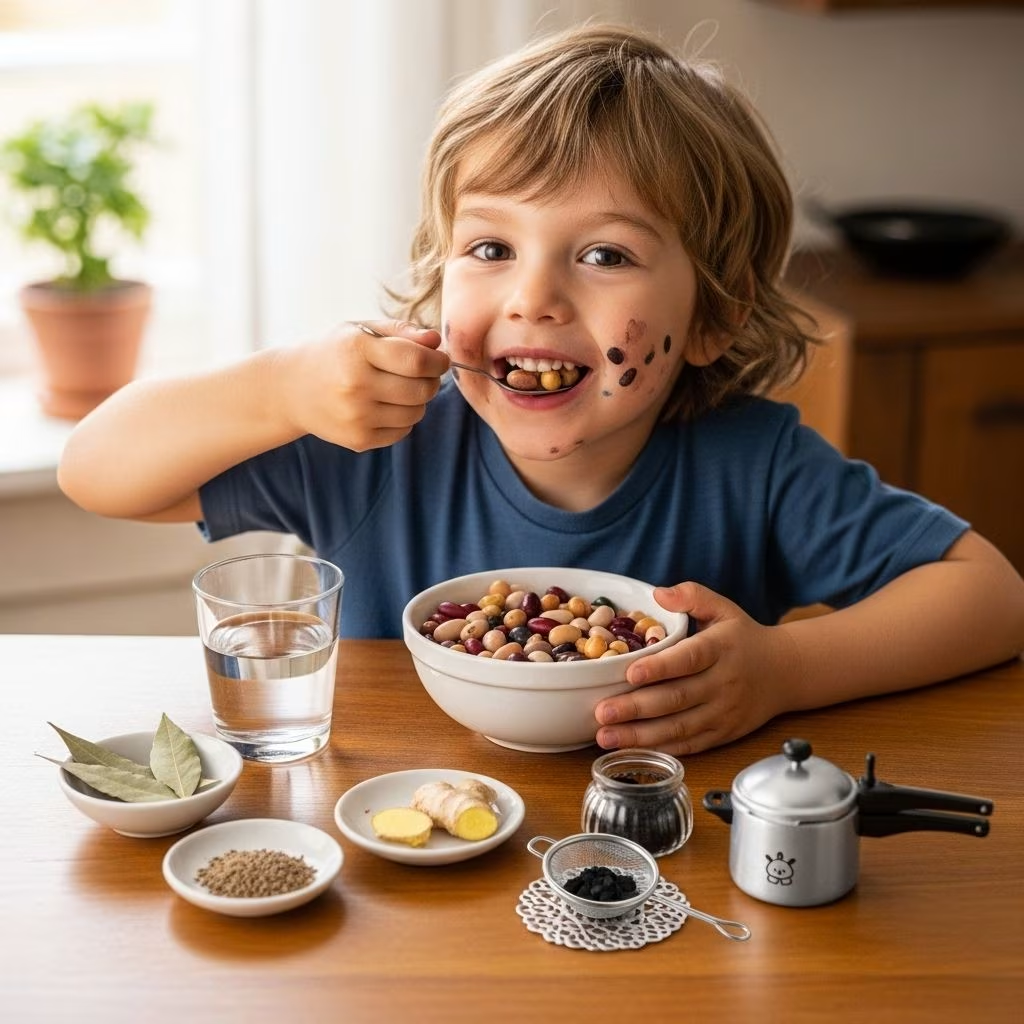
Beans are nutritional powerhouses packed with protein, fiber, vitamins, and minerals that growing children need. However, many parents hesitate to serve beans regularly because of the digestive discomfort they can cause. The good news is that with proper preparation techniques, you can significantly reduce or eliminate the gas-causing compounds in beans, making them perfectly suitable for kids. This comprehensive guide will walk you through multiple proven methods to de-gas beans effectively while keeping them delicious and nutritious for your family.
Understanding Why Beans Cause Gas
Before diving into de-gassing techniques, it’s important to understand what makes beans cause digestive issues. Beans contain complex sugars called oligosaccharides, particularly raffinose, which the human digestive system cannot break down completely. When these sugars reach the large intestine, bacteria ferment them, producing gas as a byproduct. Additionally, beans have a coating on their surface that contributes to digestive challenges. For children with developing digestive systems, these compounds can be especially troublesome, leading to bloating, discomfort, and flatulence.
The concentration of these gas-causing compounds varies among different types of beans. Some varieties are naturally easier to digest than others, but nearly all beans benefit from proper preparation methods. The techniques outlined in this guide work by either removing these compounds before cooking or breaking them down during the cooking process, making beans much more digestible for sensitive stomachs.
The Traditional Overnight Soaking Method
The most fundamental technique for de-gassing beans involves soaking them in water for an extended period. This time-tested method works by allowing water to penetrate the beans and dissolve some of the oligosaccharides, which then leach into the soaking water. When you discard this water and rinse the beans thoroughly, you’re removing a significant portion of the gas-causing compounds.
To use this method effectively, place your dried beans in a large bowl and cover them with cold filtered water. The water level should be at least two to three inches above the beans, as they will expand significantly during soaking. Let the beans soak for a minimum of 8 hours, though 12 to 24 hours is even better for maximum gas reduction. Some experienced cooks recommend soaking for up to 36 hours, changing the water every 12 hours to remove more oligosaccharides.
After soaking, drain the beans completely and rinse them under cold running water. During rinsing, use your hands to rub or knead the beans vigorously. This physical action helps break down the surface coating that contributes to gas production. The beans should feel slightly slippery at first, but this coating will wash away with thorough rinsing. This step is particularly important when preparing beans for children, as their digestive systems are more sensitive to these compounds.
The Baking Soda Method for Quick De-Gassing
Baking soda is a powerful ally in the fight against bean gas, though it requires careful application to avoid turning your beans into mush. This alkaline compound works by changing the pH of the cooking water, which helps break down the raffinose and other complex sugars that cause digestive distress. Many parents find this method especially effective when cooking beans for children.
After completing the overnight soak and rinse, add approximately 2 teaspoons of baking soda to your pot of beans. Cover the beans with fresh water, ensuring you use a deep pot because the baking soda will cause significant foaming when the beans come to a boil. Never leave the pot unattended during this initial boiling phase, as the foam can quickly overflow and create a considerable mess on your stovetop.
Bring the beans to a rolling boil and maintain this for about 2 to 3 minutes. You’ll notice a substantial amount of foam and scum forming on the surface. This foam contains the gas-causing compounds being released from the beans. After boiling, drain the beans completely in a colander and rinse them thoroughly under cold running water. This rinsing step is crucial because it removes both the baking soda and the released compounds. The beans are now ready for your regular cooking method, whether that’s simmering on the stovetop, using a slow cooker, or pressure cooking.
An alternative approach involves adding just 1/4 teaspoon of baking soda per pound of dried beans directly to the cooking water. However, this method carries a higher risk of creating mushy beans, especially if you’re using a pressure cooker or Instant Pot. While mushy beans work perfectly for refried beans, bean dips, or hummus, they’re less ideal for dishes like chili, soups, or bean salads where you want the beans to maintain their shape and texture.
The Boil and Discard Method
This straightforward technique is perfect for busy parents who need a reliable de-gassing method without overnight soaking. The boil and discard method works by using heat to extract the gas-causing compounds from the beans into the cooking water, which you then discard before proceeding with your recipe.
Start by placing your rinsed dried beans in a large pot and covering them with water by at least two inches. Bring the water to a vigorous boil and let the beans cook uncovered for 10 to 15 minutes. During this time, you’ll notice foam and scum accumulating on the surface of the water. This material contains the oligosaccharides and other compounds responsible for causing gas. The longer you boil during this initial phase, the more of these compounds will be released into the water.
After boiling, carefully drain the beans in a colander and rinse them thoroughly under cold running water. The beans will still be quite firm at this point, but they’ve already released much of their gas-causing content. Now you can proceed with your regular cooking method, whether that means simmering them on the stovetop with fresh water and seasonings, or cooking them in a pressure cooker for faster results. This method effectively serves double duty by both de-gassing the beans and eliminating the need for overnight soaking, making it an excellent choice for last-minute meal preparation.
Using Spices and Herbs for Natural De-Gassing
Many traditional cultures have used specific spices and herbs for centuries to make beans more digestible. These natural ingredients contain enzymes and compounds that help break down the complex sugars in beans, reducing gas production. Adding these to your bean dishes not only helps with digestion but also enhances flavor, making beans more appealing to children.
Ginger is one of the most effective natural de-gassing agents. Fresh ginger root contains enzymes that help break down oligosaccharides, and it also aids overall digestion. Add a 1-inch piece of fresh ginger (peeled and sliced) or 1 teaspoon of ground ginger to your cooking water. Children often enjoy the subtle warmth ginger adds to bean dishes.
Cumin is another powerful digestive aid that works exceptionally well with beans. This aromatic spice contains compounds that stimulate digestive enzymes and help break down complex carbohydrates. Add 1 to 2 teaspoons of cumin seeds or ground cumin to your beans during cooking. Cumin’s warm, earthy flavor complements most bean varieties and is generally well-accepted by children.
Fennel seeds have carminative properties, meaning they help prevent gas formation and relieve bloating. These seeds have a mild, slightly sweet flavor that children typically find pleasant. Add 1 teaspoon of fennel seeds to your cooking water, or use ground fennel if you prefer a smoother texture in your finished dish.
Epazote is a traditional Mexican herb specifically known for reducing bean gas. Use approximately 1 tablespoon of fresh or dried epazote per cup of dried beans. While epazote has a distinctive flavor that some describe as medicinal, it becomes milder during cooking and blends well with other seasonings.
Ajwain (also called carom seeds) is commonly used in Indian cuisine for its powerful digestive properties. These small seeds have a strong, thyme-like flavor and are particularly effective at reducing gas. Use about 1/2 teaspoon for every 2 cups of cooked beans. Because ajwain has a potent flavor, start with less when cooking for children and adjust according to their taste preferences.
Kombu, a type of seaweed used in Japanese cooking, contains enzymes that help break down the complex sugars in beans. Add a 2-inch piece of dried kombu to your cooking pot. The seaweed will soften during cooking and can be removed before serving, or it can be chopped and mixed into the beans for added nutrients. Kombu has a mild, slightly salty flavor that most children don’t notice in bean dishes.
Pressure Cooking for Maximum Gas Reduction
Modern pressure cookers and Instant Pots offer an excellent method for cooking beans with reduced gas-causing compounds. The high-pressure environment breaks down oligosaccharides more effectively than traditional cooking methods, resulting in more digestible beans. This method is particularly convenient for busy families because it dramatically reduces cooking time while improving digestibility.
After soaking and rinsing your beans thoroughly, place them in your pressure cooker with fresh water, covering the beans by about one inch. Add 1 tablespoon of salt and 3 to 4 bay leaves, both of which contribute to digestibility and flavor. Bay leaves contain compounds that help reduce gas production, making them an excellent addition when cooking beans for children.
Secure the lid and ensure the pressure valve is closed. Select the bean or chili setting if your pressure cooker has one, or manually set the cooking time to 30 minutes for firm beans or 35 minutes for softer beans. Keep in mind that older beans that have been in storage for extended periods may require longer cooking times. After the cooking cycle completes, allow the pressure to release slowly and naturally rather than using quick release, as this gentler method helps maintain the beans’ texture while ensuring they’re fully cooked.
One important consideration when pressure cooking beans with baking soda is that this combination can result in very mushy beans. If you want to use both methods together, reduce the amount of baking soda to just a pinch and monitor the cooking time carefully. For most applications when cooking for children, you’ll achieve better results by relying on proper soaking, rinsing, and the addition of digestive spices rather than combining pressure cooking with baking soda.
The Speed Soak Method for Busy Parents
When you don’t have time for overnight soaking, the speed soak method provides a practical alternative that still reduces gas-causing compounds effectively. This technique uses your pressure cooker to achieve in minutes what traditional soaking accomplishes in hours, making it perfect for spontaneous meal planning.
Place your dried beans in the pressure cooker and cover them with filtered water, ensuring the water level is at least two inches above the beans. Secure the lid and cook on high pressure for exactly 2 minutes. This brief cooking period is enough to start breaking down the bean’s structure and release some of the oligosaccharides into the water. After the cooking cycle completes, release the pressure and drain the beans immediately.
Rinse the speed-soaked beans thoroughly under cold running water, using your hands to rub them vigorously. This removes both the soaking water containing dissolved oligosaccharides and the surface coating on the beans. The beans are now ready to be cooked using your preferred method. While speed soaking doesn’t remove quite as much gas-causing content as overnight soaking, it provides a reasonable compromise when time is limited.
Gradual Introduction and Portion Control for Children
Even with perfect de-gassing techniques, introducing beans to children’s diets should be done gradually. Young digestive systems need time to build up the gut bacteria necessary to process beans comfortably. Start with very small portions, perhaps just a tablespoon or two mixed into familiar foods that your child already enjoys.
Monitor your child’s response to beans and increase portions slowly over several weeks. Some children may tolerate certain types of beans better than others. Generally, lentils, split peas, and black-eyed peas are easier to digest and make good starting points for children new to legumes. As your child’s digestive system adapts, you can gradually introduce other varieties like black beans, pinto beans, and kidney beans.
Encourage your child to drink plenty of water when eating beans. Adequate hydration helps the digestive system process the fiber in beans more effectively, reducing the likelihood of discomfort. Making beans a regular part of your family’s diet, rather than an occasional food, also helps children’s digestive systems adapt and become more efficient at processing them.
Choosing the Right Beans for Children
Not all beans are created equal when it comes to digestibility. Some varieties naturally contain fewer oligosaccharides or have thinner skins that are easier for young digestive systems to handle. When cooking beans for children, especially those trying beans for the first time, consider starting with these more digestible options.
Lentils, both red and green varieties, are among the easiest legumes for children to digest. They cook quickly, don’t require soaking, and have a mild flavor that works well in many dishes. Red lentils break down into a creamy texture that children often find appealing in soups and dal.
Split peas, like lentils, are highly digestible and don’t require overnight soaking. They cook into a soft, creamy consistency that’s perfect for soups and purees. Their mild, slightly sweet flavor makes them acceptable to most children.
Black-eyed peas have thinner skins than many other bean varieties, making them easier to digest. They also require less cooking time and have a delicate, slightly nutty flavor that children typically enjoy.
Navy beans and cannellini beans are also relatively easy to digest when properly prepared. Their mild flavor and creamy texture make them versatile additions to soups, stews, and pasta dishes that children love.
Combining Multiple De-Gassing Techniques
For maximum gas reduction, especially when cooking beans for children with particularly sensitive digestive systems, combine multiple de-gassing techniques. This comprehensive approach addresses gas-causing compounds at every stage of preparation and cooking.
Start with a thorough overnight soak lasting at least 12 hours, changing the water once or twice during this period. Drain and rinse the beans vigorously, kneading them with your hands to remove the surface coating. Next, use the boil and discard method by bringing the beans to a boil for 10 minutes in fresh water, then draining and rinsing again. Finally, cook the beans with digestive spices like ginger, cumin, and bay leaves, using either pressure cooking or traditional stovetop methods.
This multi-step approach may seem time-consuming, but it virtually guarantees gas-free beans that even the most sensitive children can enjoy comfortably. Once you establish a routine, these steps become second nature and require minimal active attention.
Storage and Meal Planning Tips
Cooking beans in large batches and storing them properly can save time while ensuring you always have digestible, kid-friendly beans ready for meals. After cooking beans using your preferred de-gassing method, allow them to cool completely before storing. Divide the cooled beans into portion-sized containers, including some of the cooking liquid to keep them moist.
Properly de-gassed and cooked beans can be refrigerated for up to 5 days or frozen for up to 3 months. When freezing, use freezer-safe containers or bags, removing as much air as possible to prevent freezer burn. Label containers with the type of bean and the date cooked. Frozen beans can be thawed in the refrigerator overnight or added directly to soups and stews during cooking.
Having pre-cooked, de-gassed beans on hand makes it easy to add this nutritious ingredient to your children’s meals regularly. Mix them into pasta dishes, add them to quesadillas, blend them into smoothies (yes, really!), or mash them for sandwich spreads. The more regularly children eat beans, the better their digestive systems become at processing them comfortably.
Troubleshooting Common Issues
Even with proper de-gassing techniques, you may occasionally encounter problems. If your beans turn out too mushy, you likely used too much baking soda or cooked them too long under pressure. For future batches, reduce the baking soda amount or cooking time. If beans remain hard after cooking, they may be old. Dried beans lose moisture over time and require longer cooking. Store dried beans in airtight containers in a cool, dry place and try to use them within a year of purchase.
If your child still experiences gas despite proper bean preparation, consider reducing portion sizes further or trying different bean varieties. Some children simply digest certain types of beans better than others. Keep a food diary to identify which beans work best for your child’s digestive system.
Remember that some gas is normal and even healthy, indicating that beneficial gut bacteria are at work. The goal isn’t to eliminate all gas but to reduce it to comfortable levels that don’t cause distress or discourage children from enjoying nutritious bean-based meals.
Frequently Asked Questions
Q: How long should I soak beans to remove the most gas?
A: For maximum gas reduction, soak beans for 12 to 24 hours, changing the water every 12 hours. Some cooks extend soaking to 36 hours for particularly sensitive digestive systems. Always drain and rinse thoroughly after soaking.
Q: Can I use canned beans instead of dried beans for children?
A: Yes, canned beans can be a convenient option. Rinse them thoroughly under cold water for at least 30 seconds to remove the canning liquid, which contains some gas-causing compounds. However, dried beans that you prepare yourself using proper de-gassing techniques are generally more digestible.
Q: Will baking soda make my beans taste different?
A: When used correctly and thoroughly rinsed away, baking soda doesn’t leave any noticeable taste in beans. The key is to use it during an initial boiling phase and then drain and rinse the beans completely before final cooking.
Q: At what age can I start giving my child beans?
A: Well-cooked, pureed beans can be introduced to babies around 6 months of age when they start solid foods. Begin with very small amounts of easily digestible varieties like lentils or split peas, and always consult your pediatrician about introducing new foods.
Q: Do I need to use all the de-gassing methods together?
A: No, each method provides benefits on its own. Start with basic soaking and rinsing, then add other techniques as needed based on your child’s tolerance. Combining methods provides maximum gas reduction but isn’t always necessary.
Q: Which spice is best for de-gassing beans for kids?
A: Ginger and cumin are excellent choices for children because they’re effective at reducing gas while having mild, generally acceptable flavors. Start with small amounts and adjust based on your child’s taste preferences.
Q: How can I tell if beans are too old to cook?
A: Very old beans may have faded colors, take extremely long to cook (several hours), or never fully soften. If beans remain hard after double the normal cooking time, they’re likely too old and should be discarded.
Q: Is it safe to eat beans that caused foam during cooking?
A: Yes, foaming is normal and actually indicates that gas-causing compounds are being released. Simply skim off the foam and continue cooking. The beans are perfectly safe to eat after proper cooking and rinsing.
By implementing these comprehensive de-gassing techniques, you can confidently include beans in your children’s diet, providing them with essential nutrients while minimizing digestive discomfort. Remember that patience and consistency are key—as you regularly serve properly prepared beans and your children’s digestive systems adapt, beans will become an easy, nutritious staple in your family’s meal rotation.